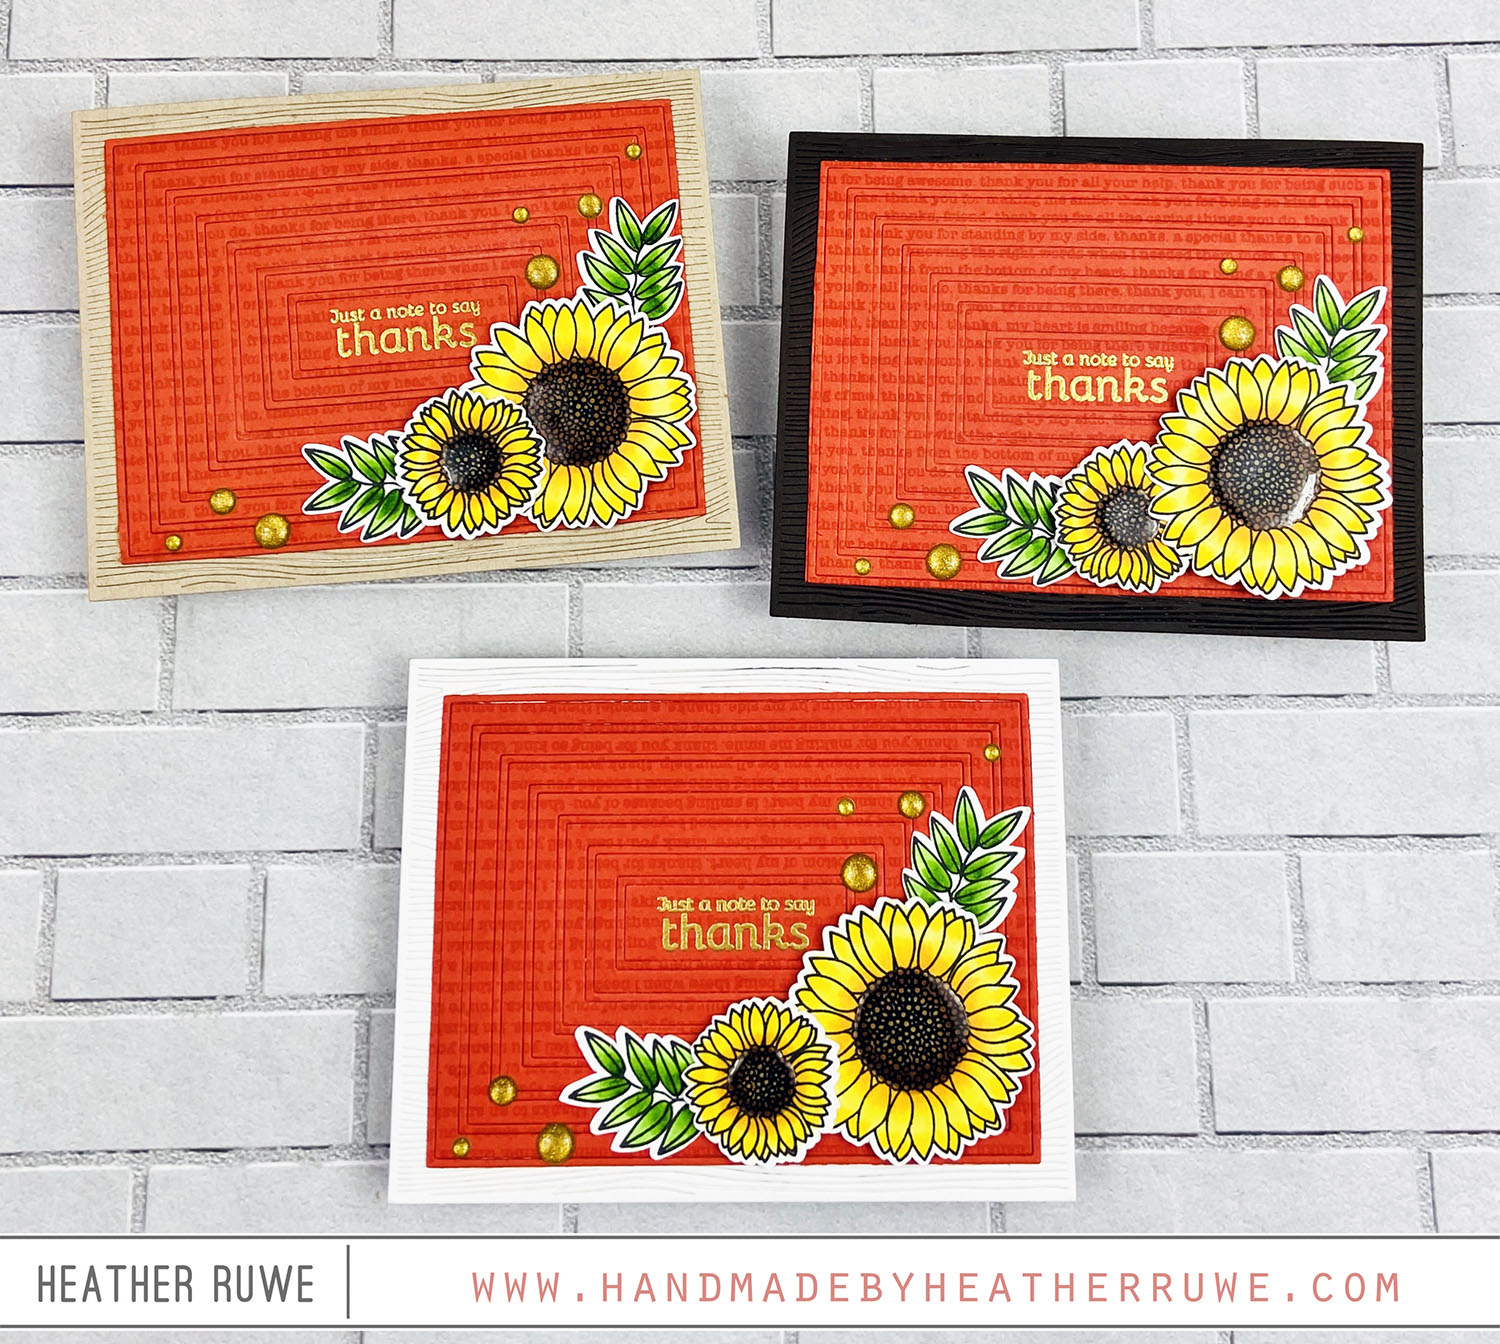
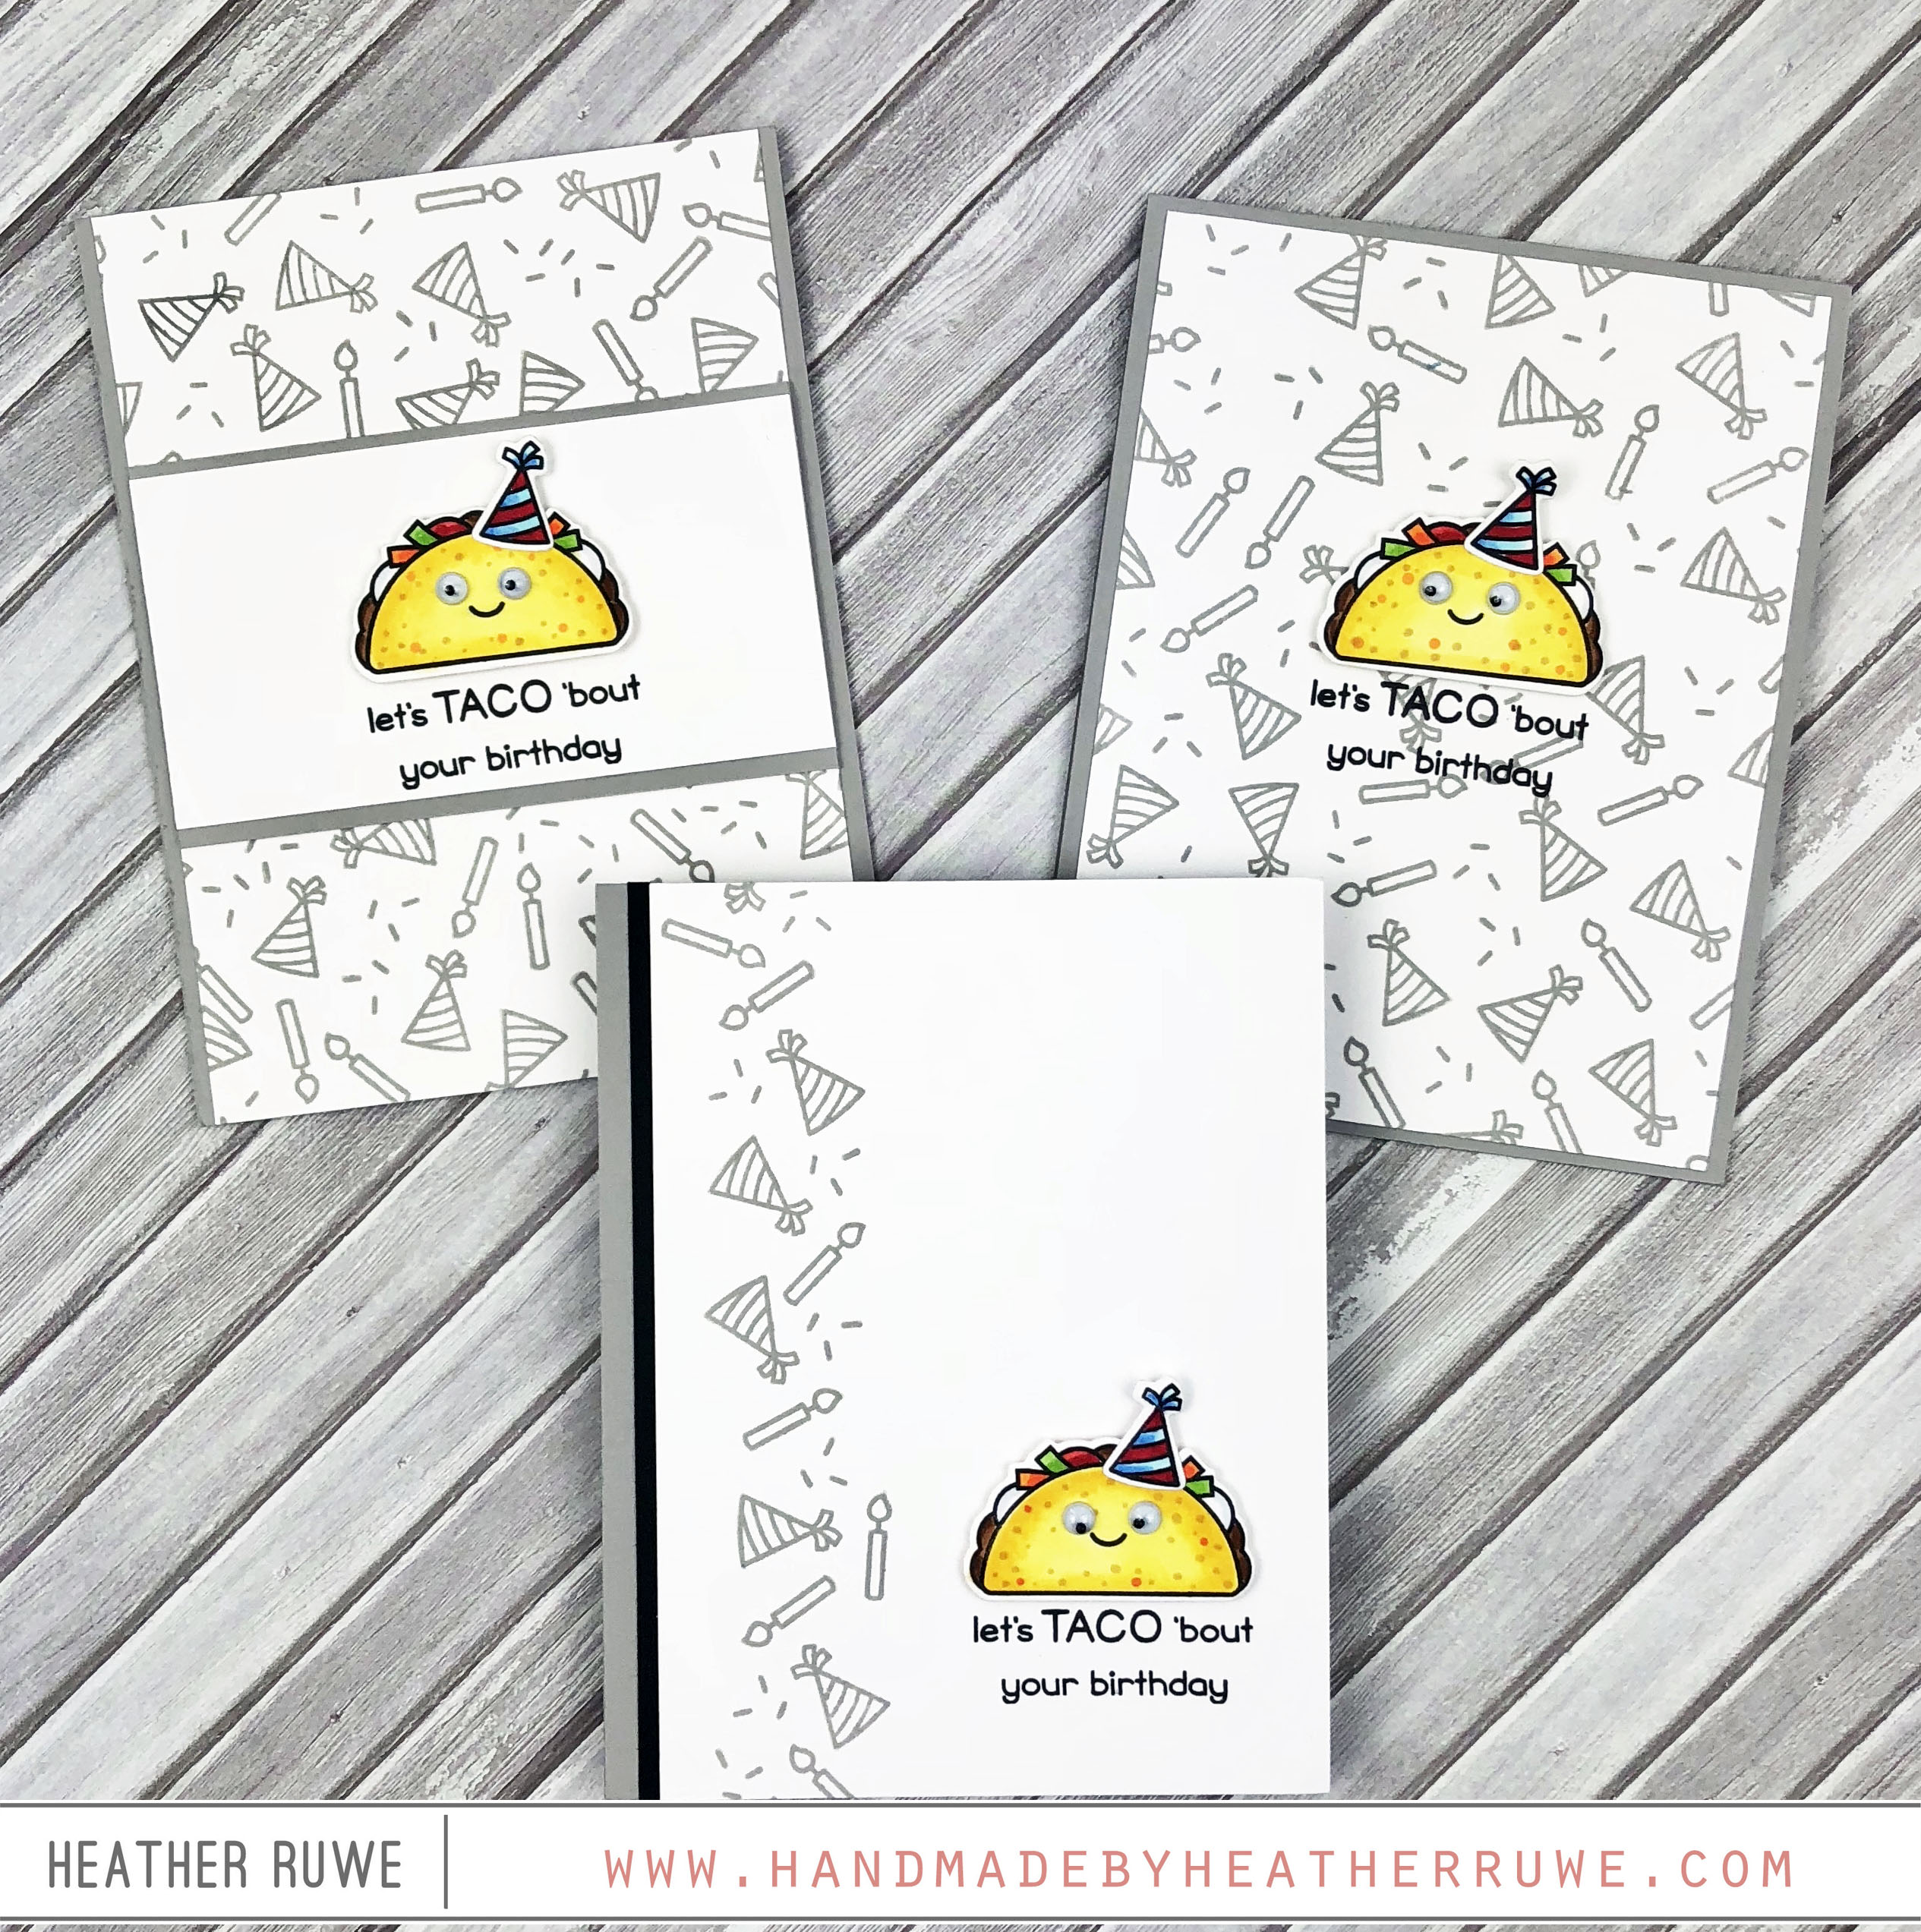
Howdy, crafty friends. Recently, I shared a post HERE using THIS new card kit. I cut several frames to make that shaker card using THESE dies. I had lots of the inside of the rectangle frame left, so I used those pieces to create today’s cards… I started by stamping on those rectangle pieces with THIS background stamp using THIS ink for a tone-on-tone look. I heat embossed a sentiment in the center rectangle...
Pinkfresh Studio STAMPtember 2020 Collaboration
Hi there, crafty friends. THIS stamp set is the next STAMPtember collaboration stamp set and it’s from Pinkfresh Studios. Usually, I’m not a big fan of layering sets. I find them difficult, but these backgrounds came together in very little time and the layering portion is super simple. I chose to stamp the layers from THIS stamp set with Distress Oxide inks. The reason I chose these inks is because of their pigment properties....
Let’s Connect Release Blog Hop
ETA: This is my second post of the day. If you’re looking for the MISTI/Pinkfresh Blog Hop, click HERE. Hi there, crafty friends. I’m honored to be part of this blog hop celebrating THIS new release… I started by stamping THIS background stamp on card panels created from THIS card stock using THIS ink. Next, I cut 4×4 squares of colored card stock and stamped the same background with coordinating ink for a tone...
Sunny Days Ahead Release
Hi there, crafty friends. Simon Says Stamp just released THESE products and I have a trio of cards to share showcasing some of the new goodies… I started by die-cutting THIS tulip six times from THIS card stock. I cut two pieces for each card. For the bottom piece, I left all the die-cut pieces in their spot by adding a bit of scotch tape to the back. I removed all of the inner...
You Are Loved Cards
Hi, crafty friends. I have a few cheery cards today with a message that I think it’s important to hear. So, just in case you need a reminder, you are loved. I started by making three card bases from THIS card stock. I love that color of card stock because it’s a great neutral base. I stamped all of them with THIS background stamp using the same color ink for a tone-on-tone look. I...
Simon Says Wednesday Challenge: Tim Holtz
Hi there, crafty friends. I’m thrilled to be a December guest over HERE on the Simon Says Stamp Wednesday Challenge Blog. This week’s challenge is traditional Christmas showcasing Tim Holtz products… I started by applying ink through THIS stencil. I rotated the stencil to get different looks and die-cut the panels using THIS die. I stamped and colored THIS, THIS, and THIS bird. I used THESE coordinating dies to cut them out and cut...
Happy STAMPtember!
It’s finally here! Happy STAMPtember, crafty friends! If you’re unfamiliar with STAMPtember, it’s a month long stamping celebration hosted by Simon Says Stamp. This year is the 10th anniversary of STAMPtember and Heidi (the owner of Simon Says Stamp) and her team have lots of fun surprises in store. Speaking of Heidi, let’s kick off this party with some cards I created for her as a thank you for all she does for this...
Stamping Friends Trifecta Blog Hop
Hey, crafty friends. I’m excited to be a part of a special blog hop today. Picket Fence Studios has teamed up with Gina K. Designs and My Sweet Petunia to bring you lots of inspiration. I love this industry and how people work together. It makes my heart happy. It was a pleasure working with Gina K. and My Sweet Petunia products. I used them to create these cards… I started by creating mini...
Blossoms and Butterflies Release
Hi there, crafty friends. Simon Says Stamp has a new release HERE and it is fabulous. I have a card set to share using some of the new products… I started by die-cutting a few of THESE 4 bar note cards that I covered with a piece of THIS card stock. I used THIS, THIS, and THIS new die and cut it from the card fronts, THIS Yupo paper, and colored card stock. I white...
Taco Birthday Cards
Hi there, crafty friends. Today’s card share is just for fun. I couldn’t help but make some birthday cards with THIS cute stamp set from Lawn Fawn… I started by stamping and coloring the taco images. I used THIS coordinating die to cut out the images. I created three backgrounds using the smaller images in the stamp set. Here’s a closer look at each card… I added a party hat to each taco as...