

Hey, crafty friends. I’m excited to be a part of a special blog hop today. Picket Fence Studios has teamed up with Gina K. Designs and My Sweet Petunia to bring you lots of inspiration. I love this industry and how people work together. It makes my heart happy. It was a pleasure working with Gina K. and My Sweet Petunia products. I used them to create these cards…
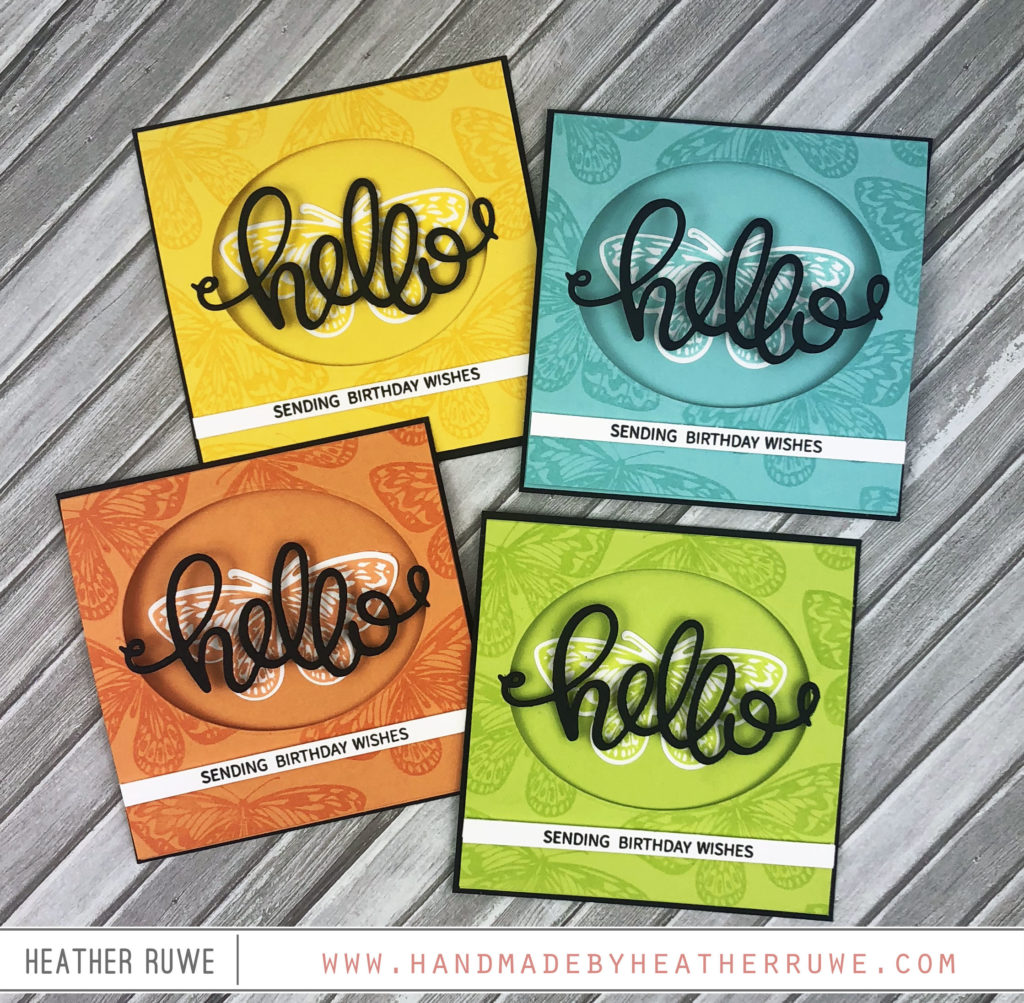
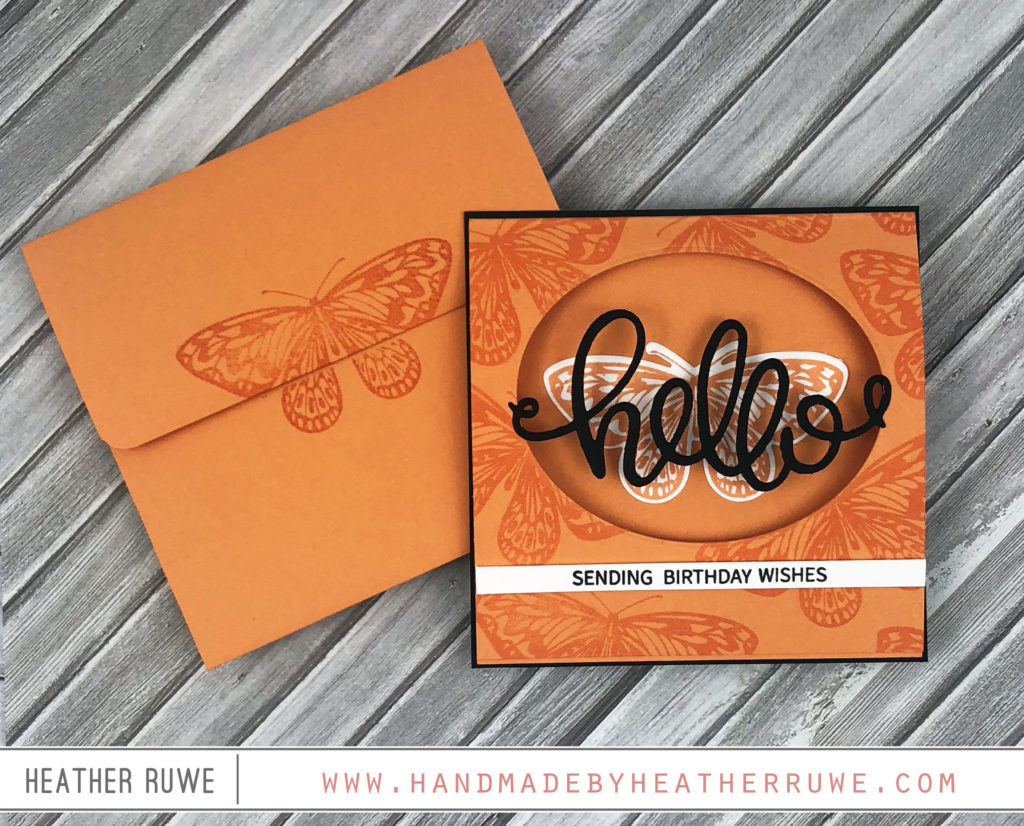
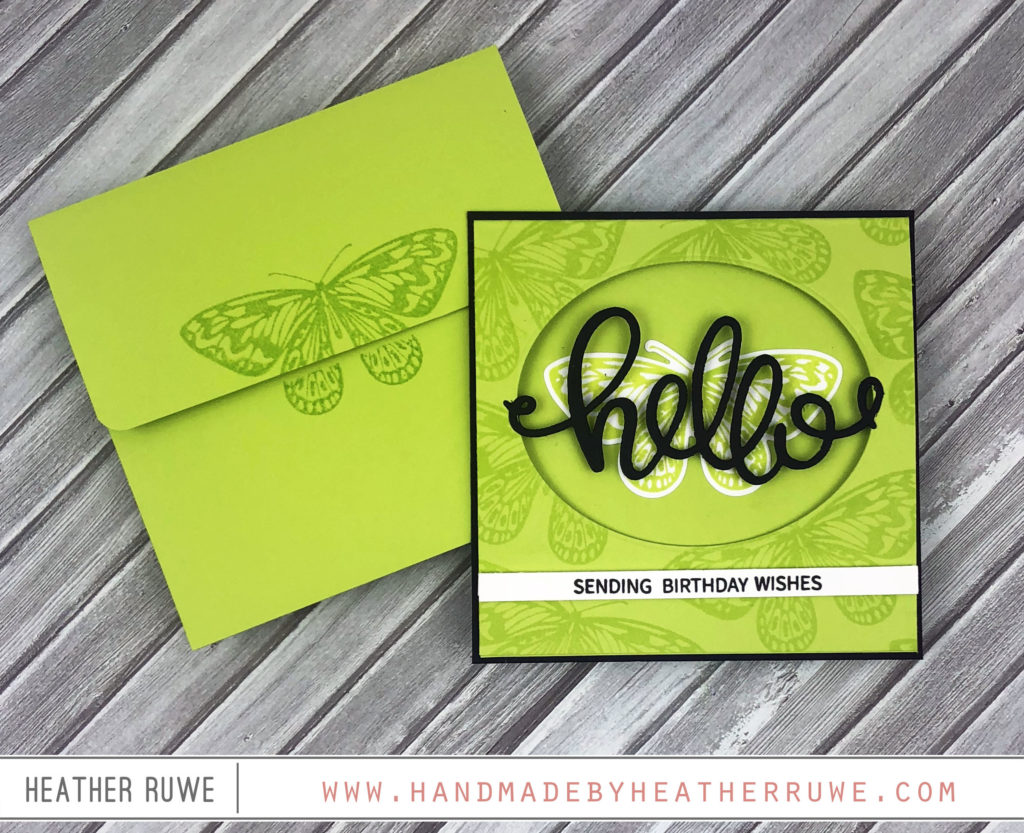
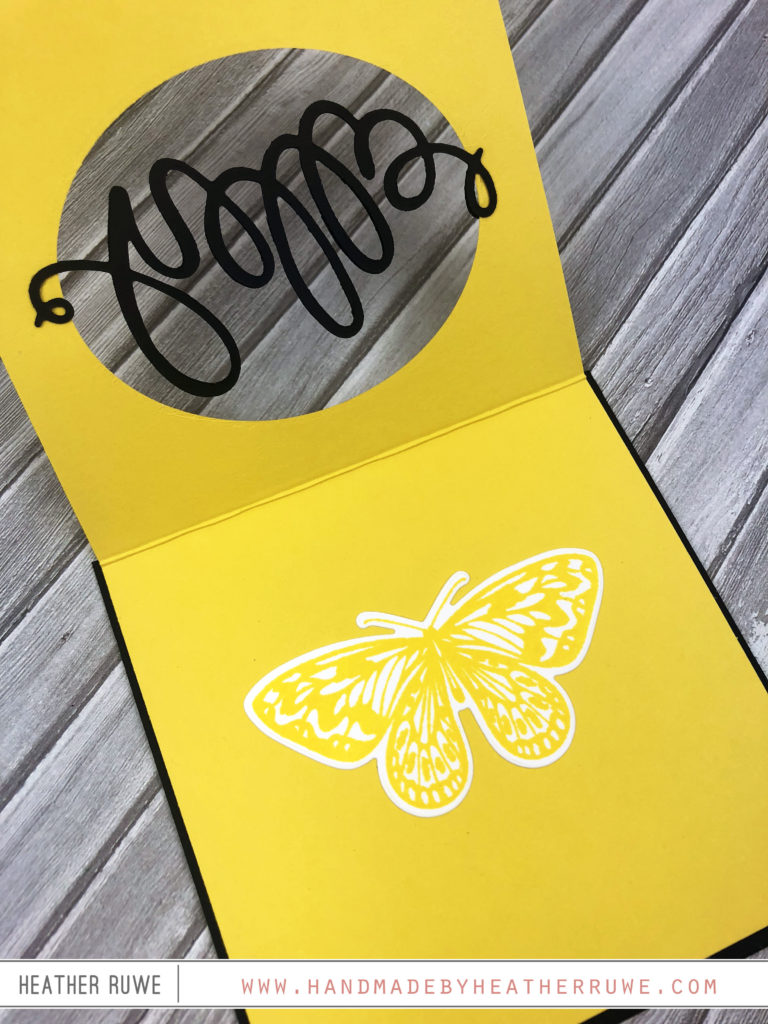
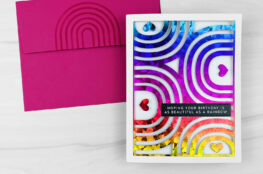
I started by creating mini card bases from Gina K. card stock. The colored cards measure 4 x 4 and I cut one of THESE ovals from the center, creating a window. I stamped the butterfly image from THIS stamp all over the front panel to create a background using coordinating Gina K. ink (her ink is AMAZING). I also stamped a butterfly for each card on white card stock and used THIS coordinating die to cut it out. I adhered that in the center of the oval window on the inside of the card. I die-cut THIS word in black two times for each card. I adhered one to the front of the opening, adding glue just to the ends that touch the card front. I adhered the second one behind that on the inside front flap directly behind to add stability.
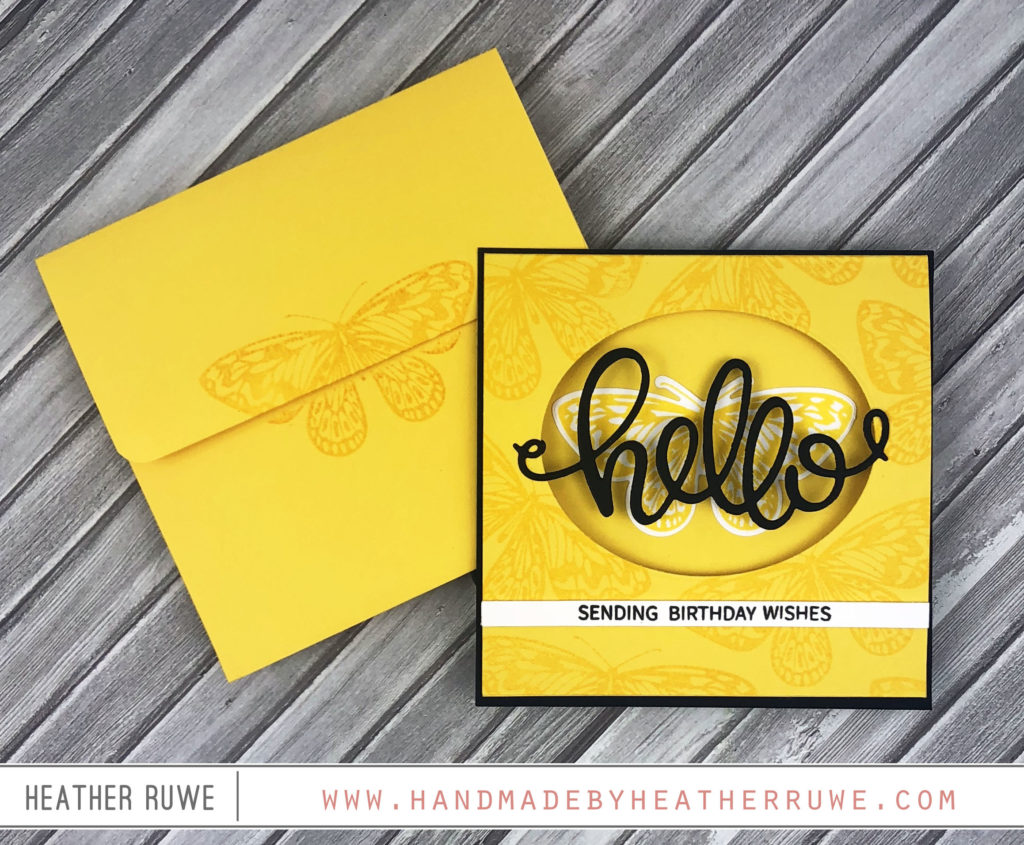
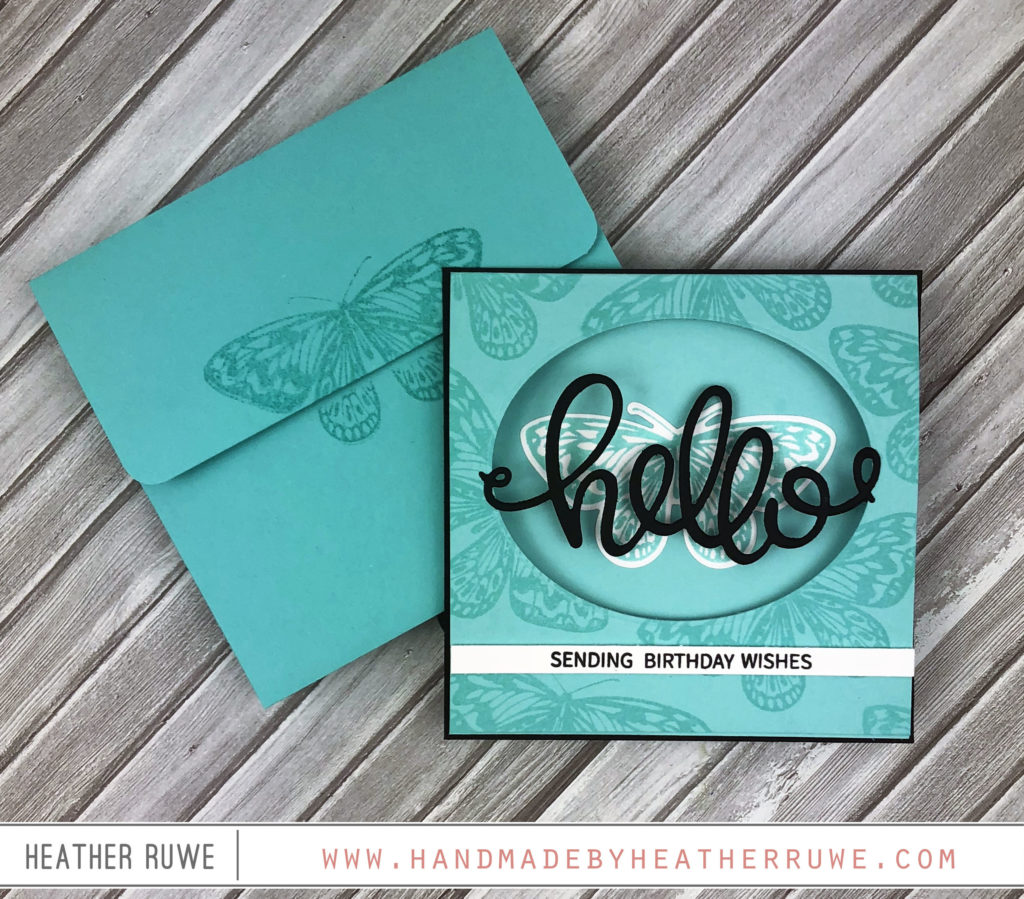
I also created square envelopes to match my cards made from standard A2 envelopes. I learned this tip from Gina K. and it’s so fun and easy! She has a great video explaining how to do this HERE (it’s towards the end of the video at the 17:00 mark).
I added a sentiment from THIS stamp set along the bottom and I used THIS tool from My Sweet Petunia to cut them all out. This tool is amazing for cutting out small sentiment strips. I used it for cutting several blank strips as well. I adhered those behind the sentiment strips for added dimension. I also wanted to share a simple tip about the MISTI. The MISTI by far is my most used tools in the craft room. I use it for stamping on every project. I also like to use it for adhering card fronts to card bases. I’m extremely challenged in this area and not sure why. LOL But if you’re like me and ruin a lot of card bases because the panels are just always a little “off”, try placing the card base in the corner of the MISTI before adhering your panel on. It gives a nice straight edge and makes adhering card panels so much easier.
BLOG HOP
There’s much more inspiration to see. Click HERE for the next stop on the hop. Click HERE to start at the beginning.
GIVEAWAY
All three companies participating will be giving away a $50 gift card to their stores, randomly drawn from the comments at each stop on the hop. Leave a comment below for your chance to win! Winners will be announced on the company blogs no later than June 7th.
Thanks for stopping by. I hope you have an amazing day.
LINKS TO SUPPLIES USED:

June 7, 2019
Really beautiful tone-on-tone cards!!
Thanks so much for sharing!
June 6, 2019
Wonderful card set! I love the tone on tone using Gina K card stock and inks. So pretty!
June 6, 2019
So bright! 😃
June 5, 2019
This window idea us too clever! Love it.
Thanks for sharing.
June 4, 2019
Wonderful, colorful set of cards.
June 4, 2019
Simply delightful!! So much inspiration on this hop!
June 4, 2019
Such a beautiful set of Birthday Cards! I love the tone on tone look.
June 3, 2019
Hi Heather 🙂 This would make a beautiful gift card set!!! Wonderfully bright and cheery cards! Thanks for inspiring me 🙂
June 3, 2019
Wonderful set of cards! Love all the colors!
June 3, 2019
Love each of the color versions! Pretty cards!
June 3, 2019
Love the simplicity of these cards, but great techniques for details.
June 3, 2019
Love the simplicity of these cards , but done with great techniques.