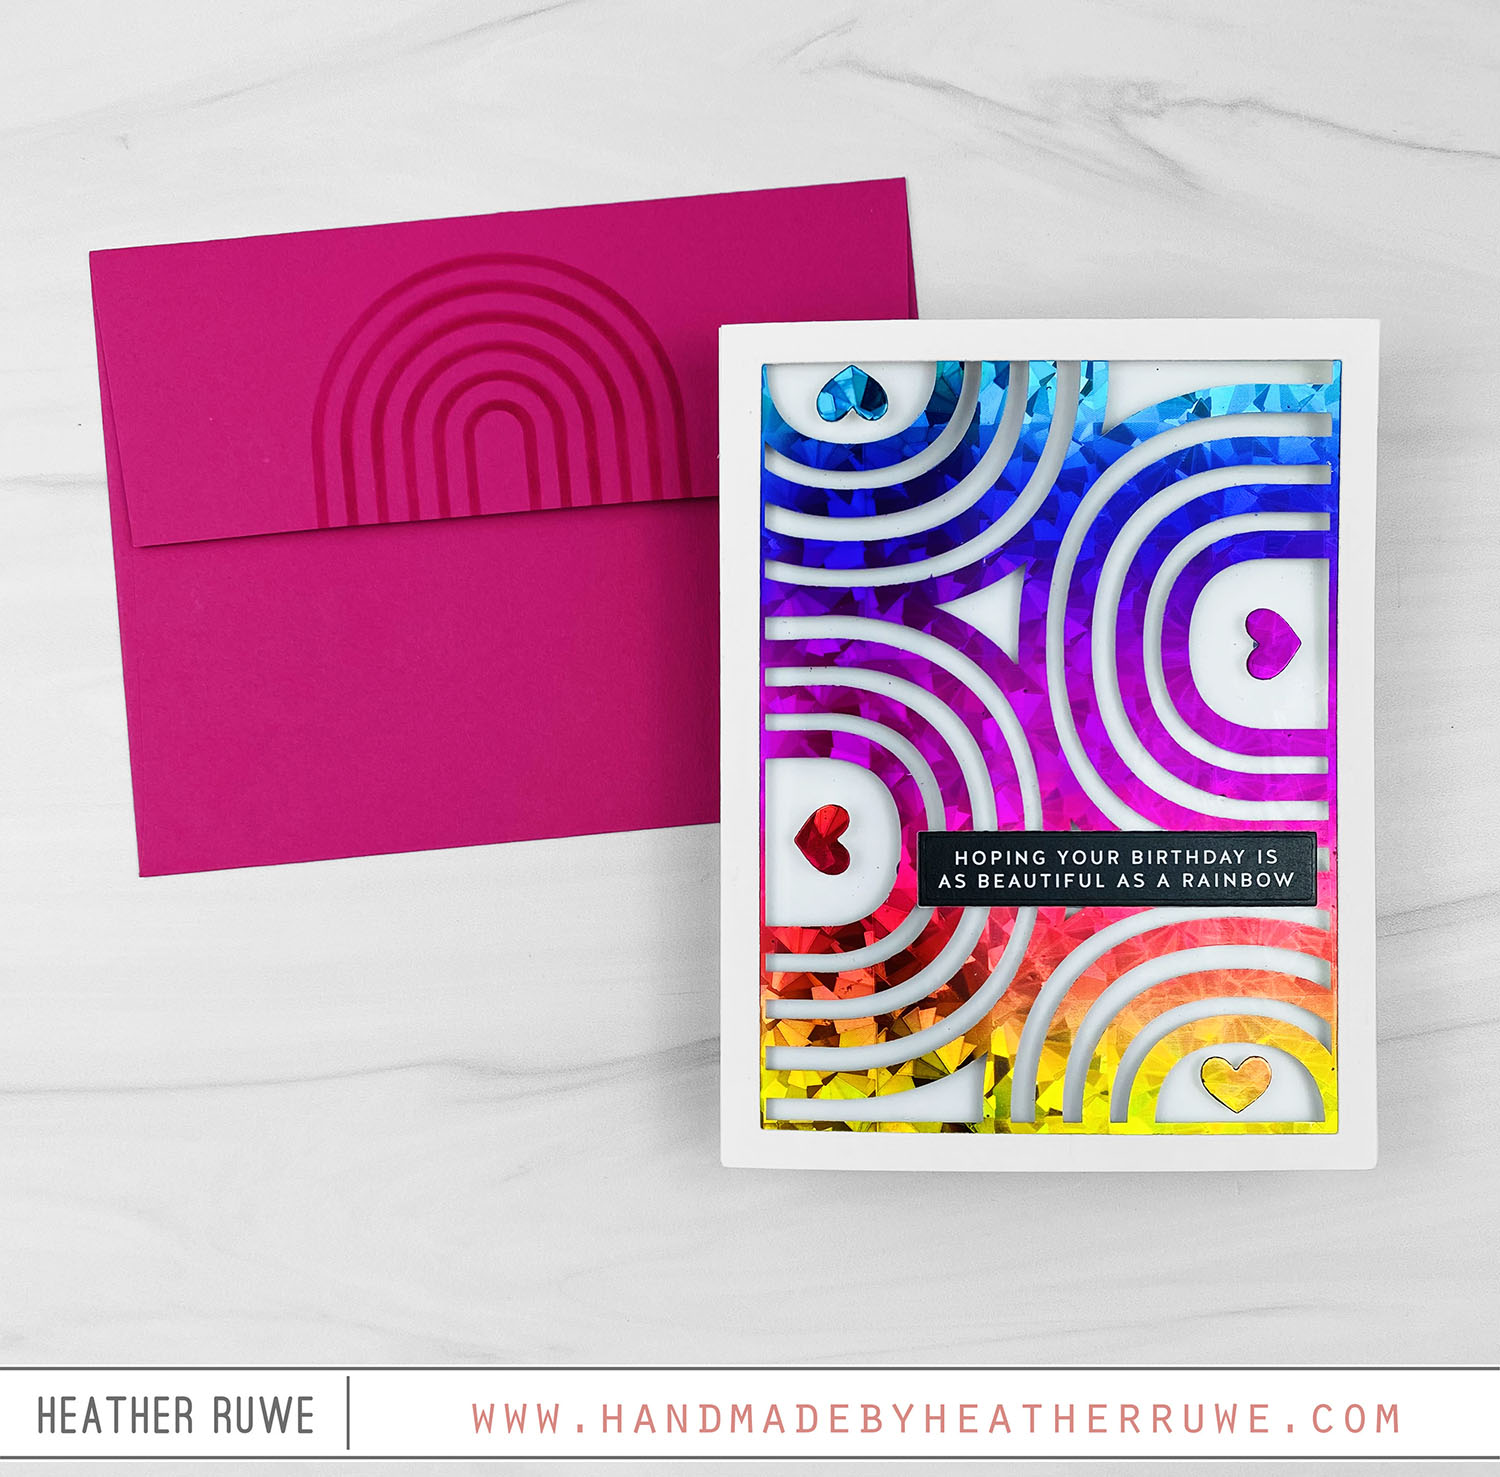
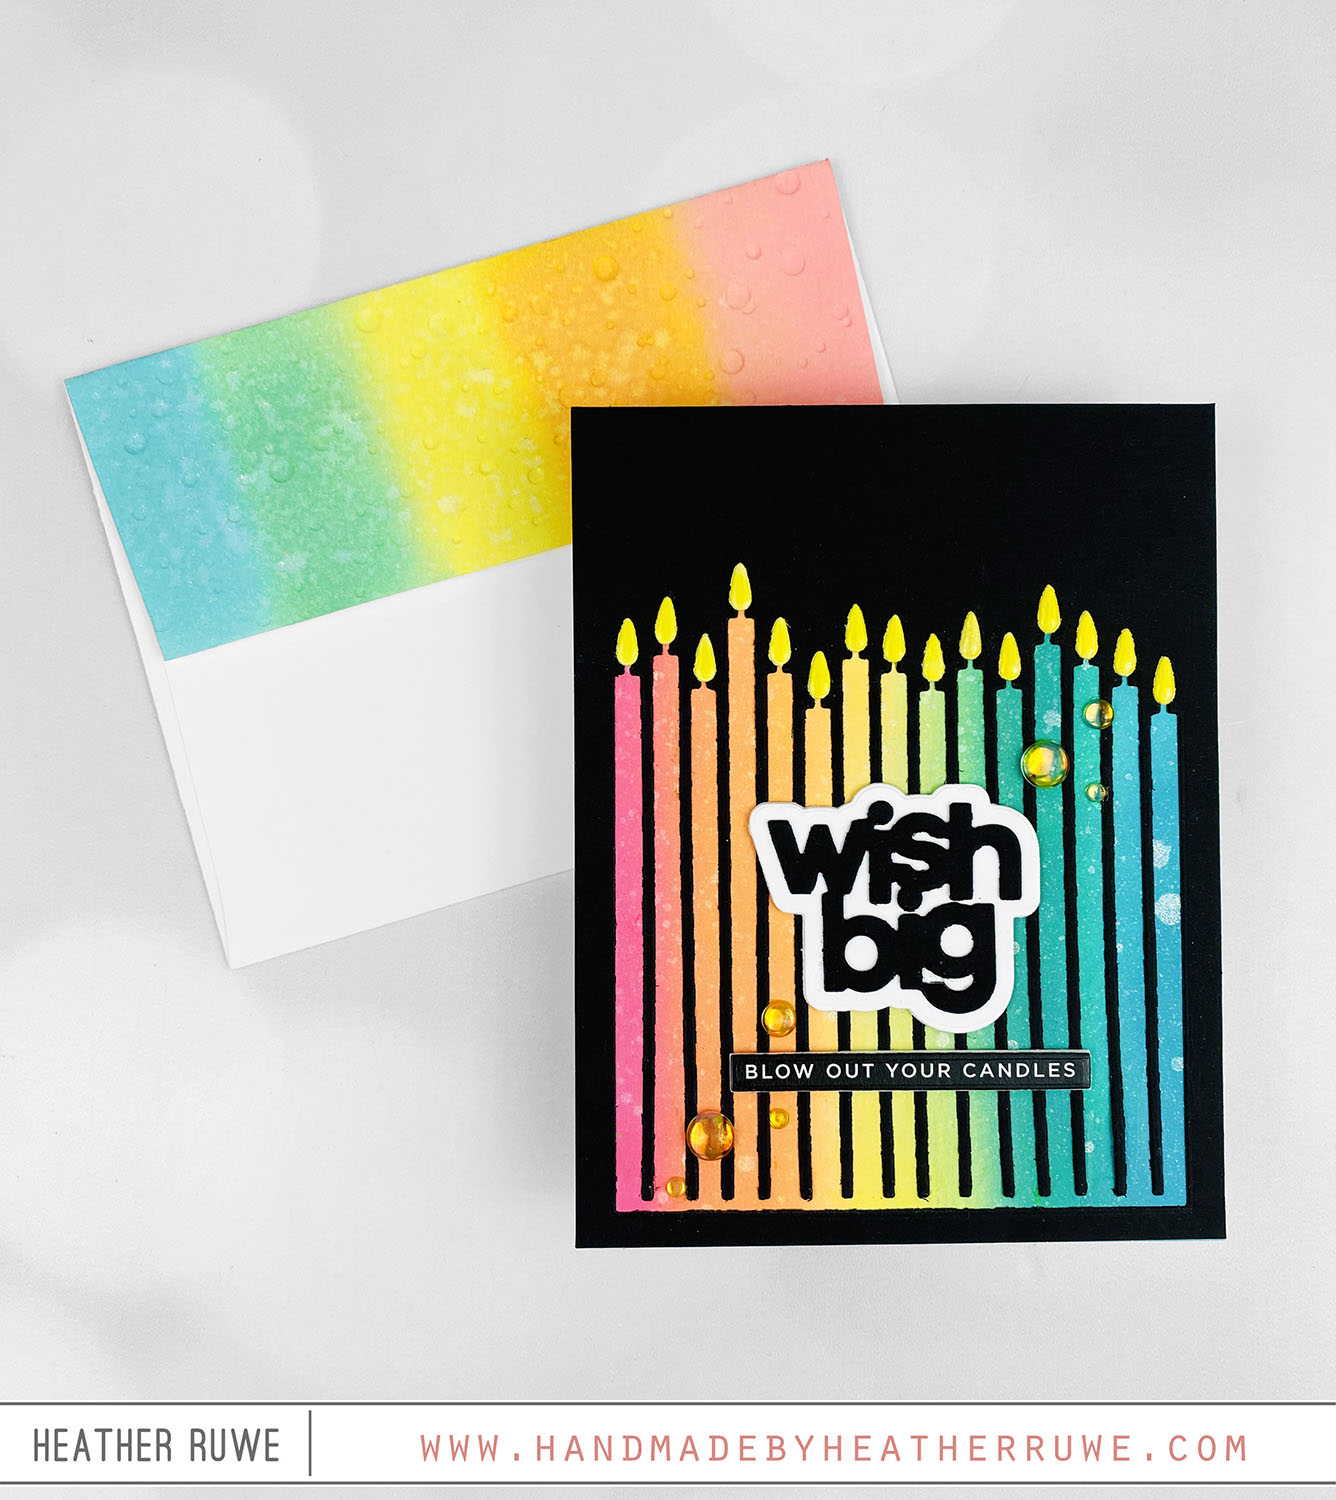
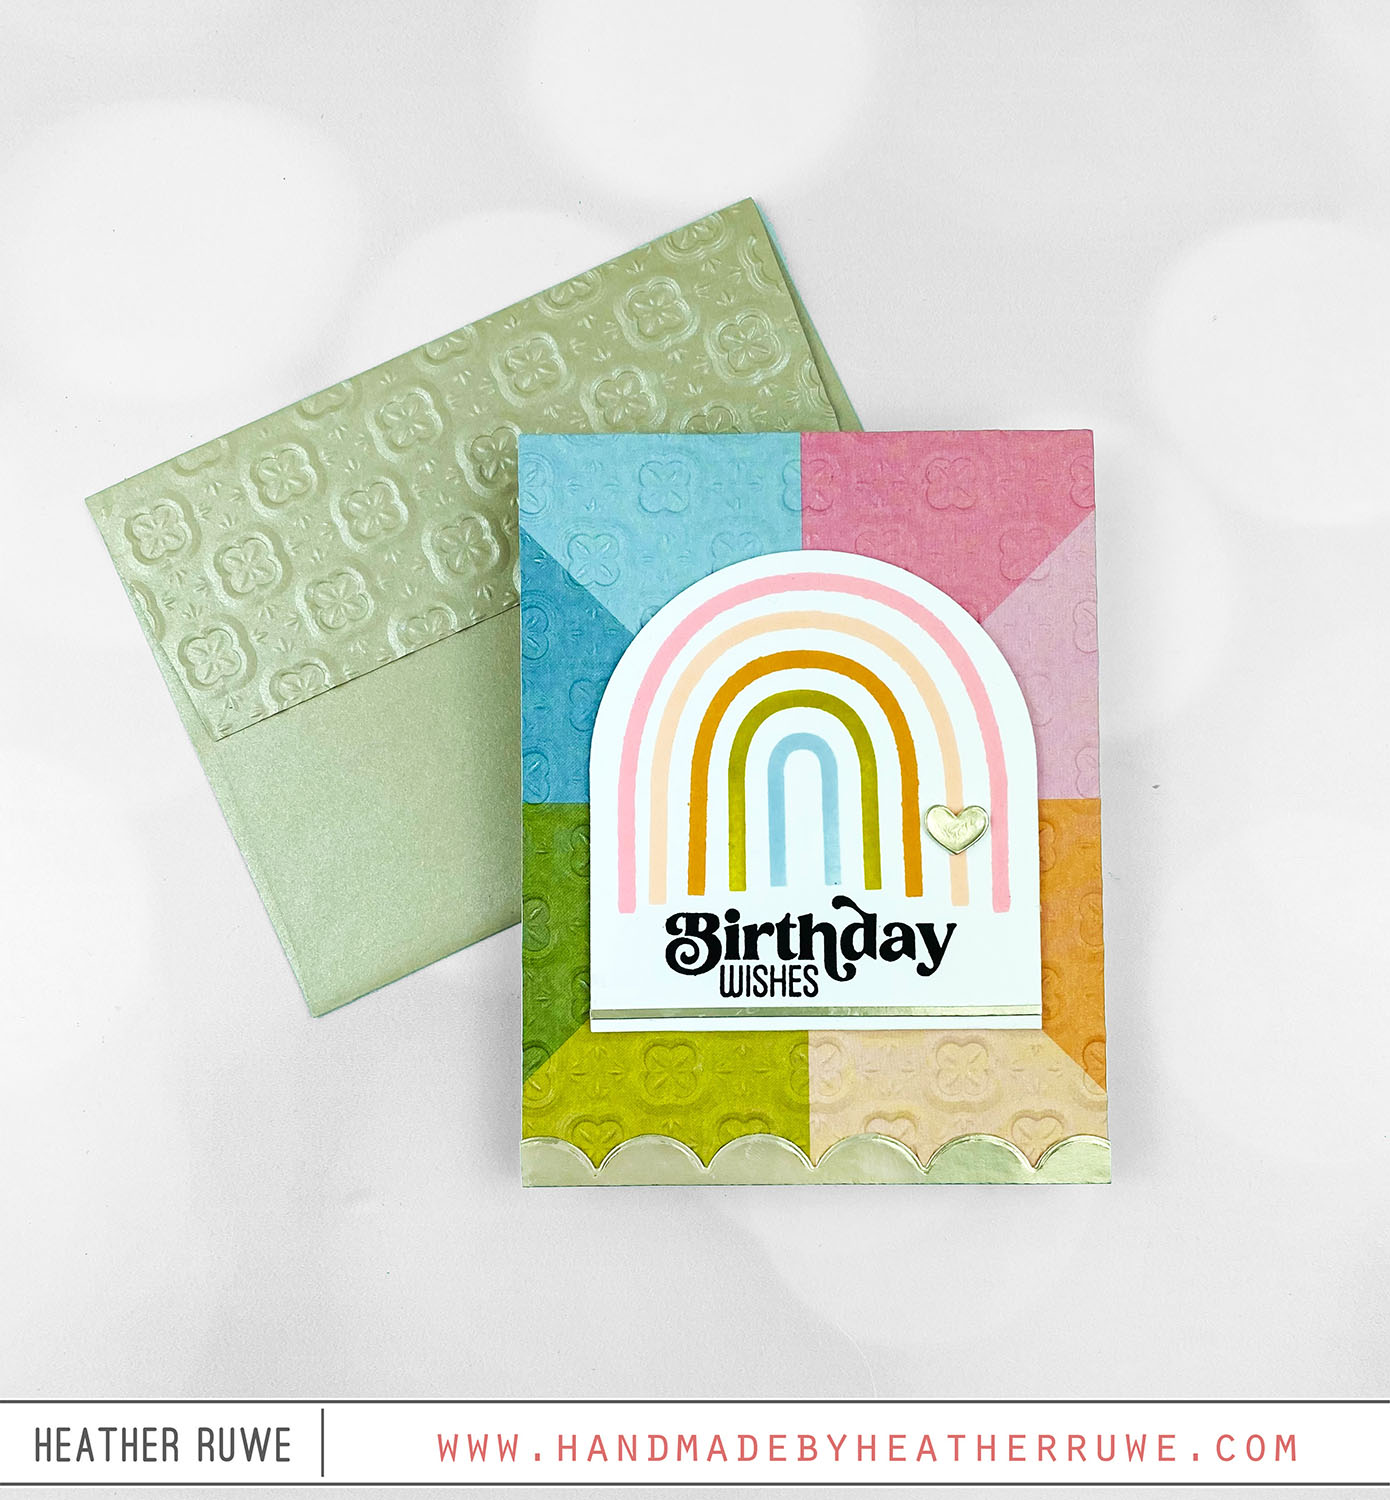
More DieCember 2023 Release Inspiration

Howdy, crafty friends. I’m back with more inspiration from THIS new release… To create this card, I started by die cutting THIS slimline die on a piece of white cardstock. I die cut THIS and THIS bird die from different colors of cardstock and adhered them to the white panel, trimming off any excess hanging off the edge. I added black enamel dots to the bird’s eyes and added a white heat embossed sentiment...

Happy DieCember! 2023

Hello there, crafty friends. Happy DieCember! If you’re unfamiliar with DieCember, it’s a month long party hosted by Simon Says Stamp celebrating dies and die-cutting. Today’s card shares features how to use the negative pieces when die cutting. To create today’s card, I die cut THIS candles die from and A2 piece of black cardstock. I removed the candles image to just leave the negative piece from the die cutting. On a piece of...

Party Monster Card

Hello again, crafty friends. I have a birthday card to share today… I started by stamping THIS monster image on an A2 white cardstock panel as well as some of THIS masking paper. I cut out the mask for the monster image and balloon and applied it over the stamped image to mask it from THIS balloon border stamp that I stamped on top as well as THIS floor image under the monster’s feet....

Put Your Party Hats On Card Kit

Hi, crafty friends. Today’s card features THIS new card kit… I started by trimming 1 inch off the right side of a side folding note card. I stamped the party hat images from the kit’s stamp set on the inside of the card in the portion that I cut from the side of the card. I colored the images in with Copic Markers and added some shimmer and shine with THIS and THIS. I...

Mini Slimline Birthday Card

Hello there, crafty friends. I have a mini slimline birthday card to share today… To create this card, I applied four different colors of Distress Oxide ink through THESE layering stencils to create the sentiment on a mini slimline card. I stamped the images from THIS stamp set and colored them in with Copic Markers. I used THESE dies to cut them out. Here’s a closer look… I also created THIS envelope from patterned...

More inspiration using the Retro Wishes Card Kit

Howdy, crafty friends. I have more inspiration to share today using THIS new card kit… To create his card, I stamped the rainbow layers of the kit’s stamp set and stamped a sentiment under it. I trimmed down the arch and adhered it to one of the kit’s patterned papers that I embossed with the embossing folder included. I added a strip along the bottom of the arch with the specialty paper included and cut...

Shaped and Shaker Cards

Hi, crafty friends. I have two cards to share today that were so fun to create. One is a shaped card and one is a shaker card… For both cards, I applied six different colors of ink through THESE stencils to create a rainbow pattern. I like to start off with a 6×6 piece of white cardstock (the same size as the stencil). That way, I can cut out the section I want and...

Best Year Yet Card Kit

Hi, crafty friends. I have a Birthday card to share today featuring THIS new card kit…  To create this card, I started with a 6×6 piece of white cardstock and stamped an image from THIS stamp set (included in the kit) towards the top center. I rotated the cardstock 180 degrees in my MISTI and stamped again. I did the same process for the image on the right and left. I continued in the corners...

Stenciled Backgrounds Part One

Hi there, crafty friends. I have two cards to share today featuring products from THIS new release. These cards are part one. Stay tuned for tomorrow’s post where I’ll share two more cards that came from these backgrounds. For both cards, I created stenciled backgrounds. For the first card… I applied three colors of ink through THIS stencil and then outlined the pattern with THIS gold pen. I die-cut THIS word die from black...

Product Spotlight: Picket Fence Studios Paper Pouncers

Hello again, crafty friends. Today’s post is all about the new Paper Pouncers from Picket Fence Studios. I’m really loving them and wanted to give you an introduction to them. I created a video all about these pouncers. You can watch it HERE or click on the video below…  So there is a bright rainbow pack is a pack of 9. There is also a Neutrals pack of paper pounces available in black, brown,...