Celebrate Release Blog Hop

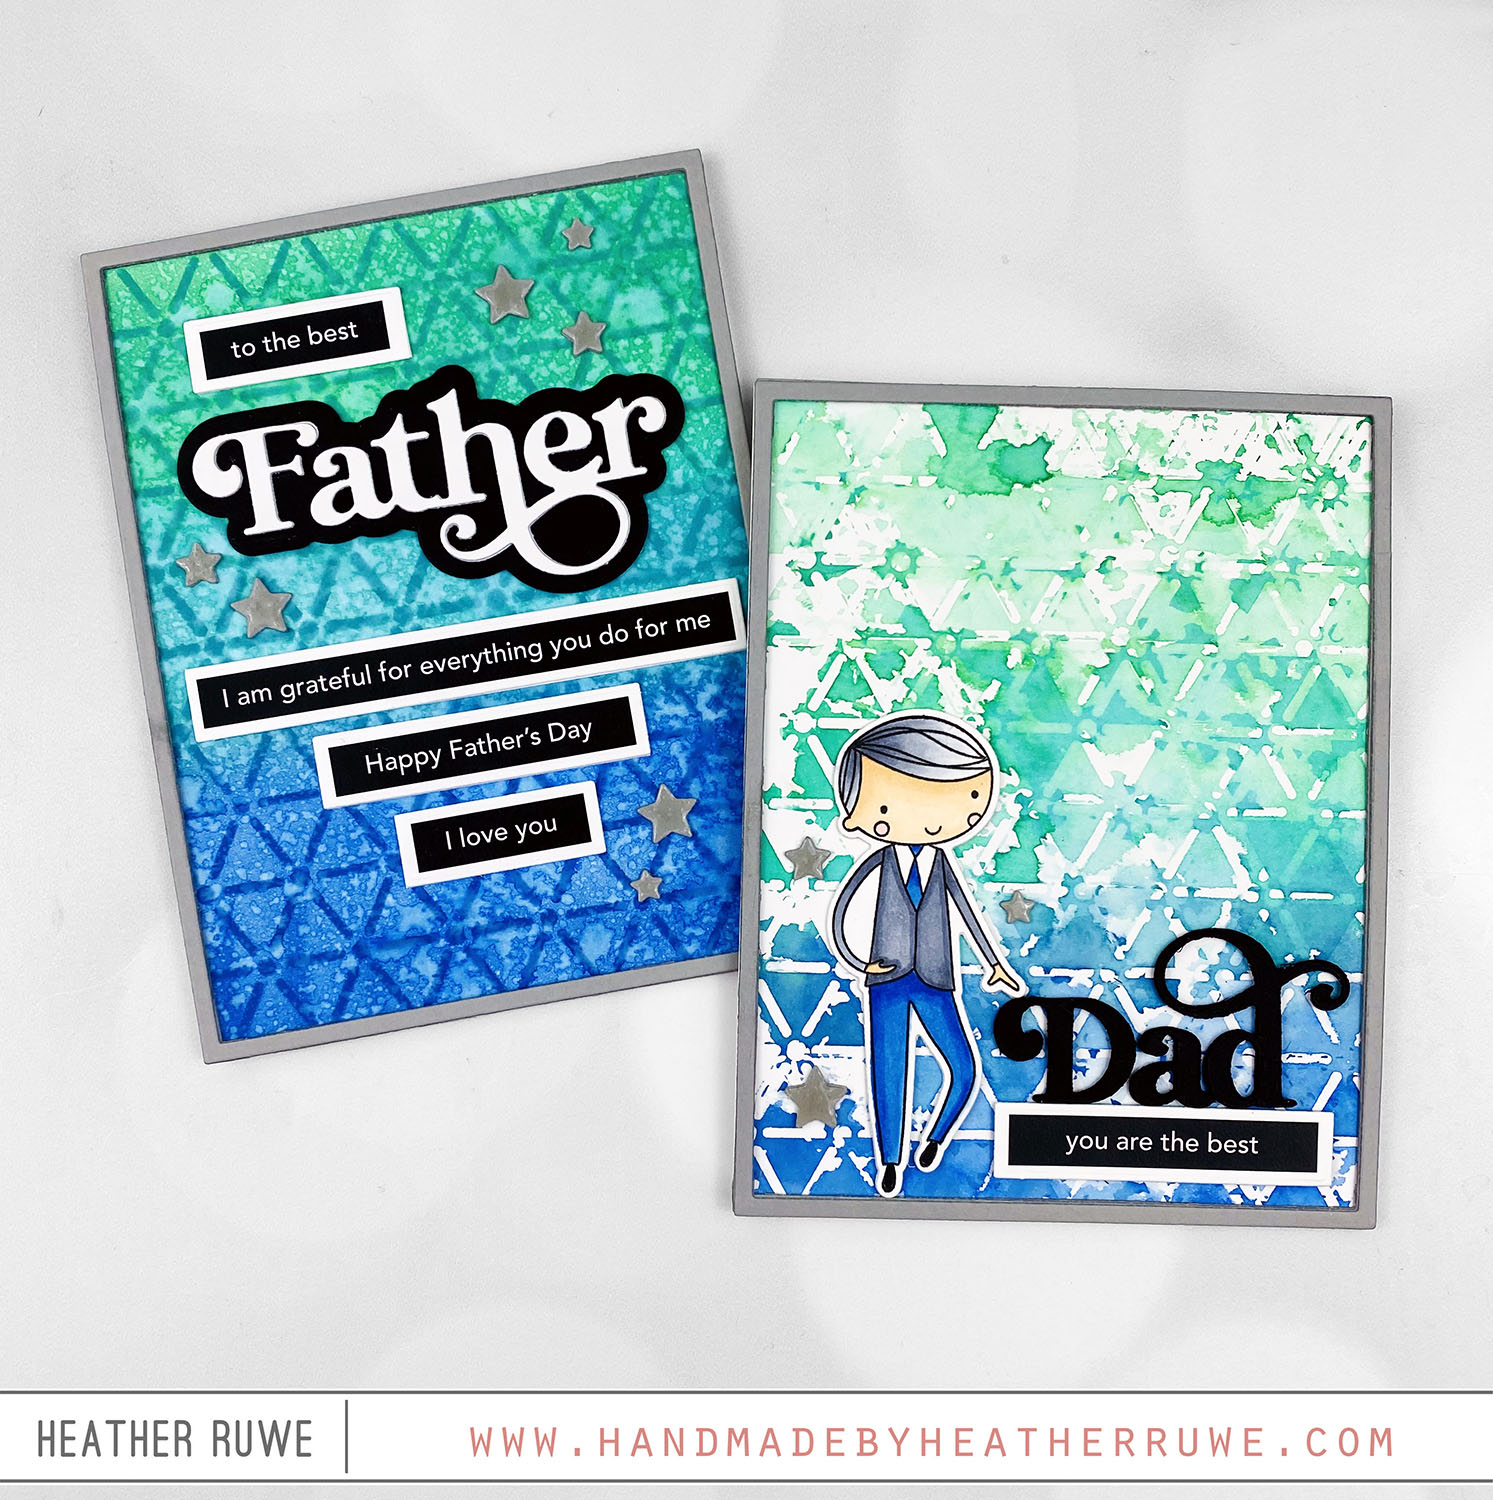
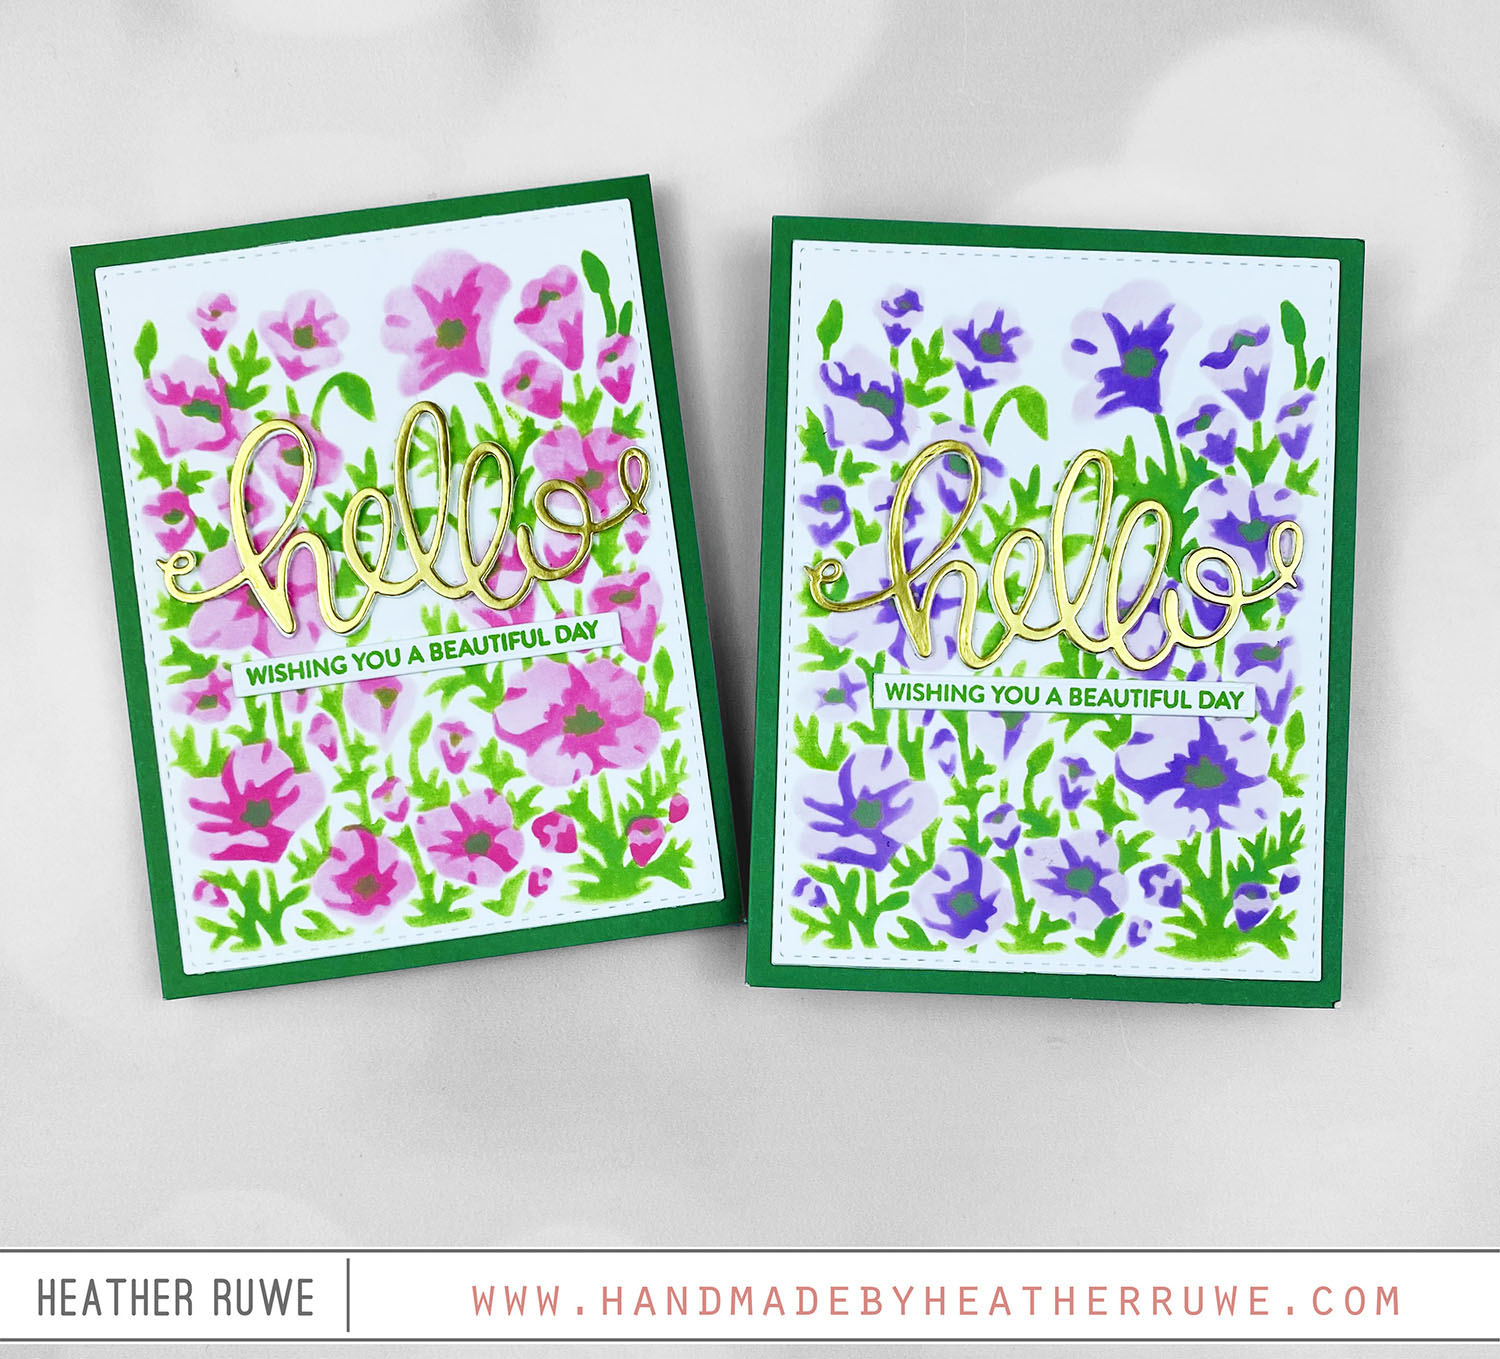
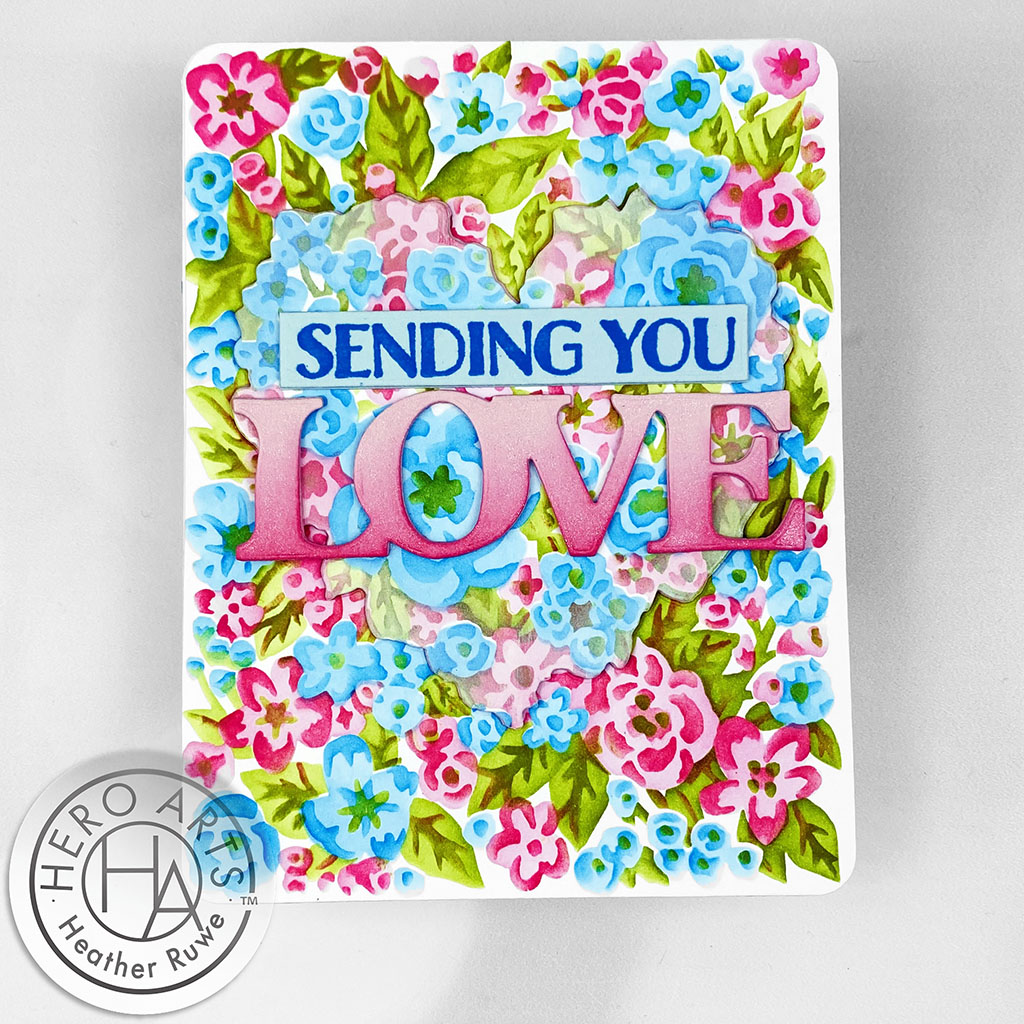
Hi there, crafty friends. Today’s cards are part of THIS Blog Hop celebrating THIS new release… For the first card…. …I started with the background. I applied three colors of Distress ink through THIS stencil on a piece of THIS watercolor paper. I went over the design with the same colors to add color to the entire background. I spritzed it with water to create some texture… I added THIS die cut sentiment along...

Happy Retirement Card

Hello, crafty friends. I have a retirement card to share today featuring THESE layering stencils, THIS embossing folder, and THIS sentiment set… To create this card, I applied ink through THESE layering stencils on a yellow A2 sized panel. On the last layer, I applied THIS gold paste for the flower centers to give some shine and dimension. Next, I embossed a piece of pink cardstock with THIS embossing folder. I cut it and...

Splendid Birthday Card

Hi again, crafty friends. Today’s card features more inspiration from THIS new release… To create this card, I started by applying four different shades of Distress Oxide ink through THESE layering stencils to create a background. I adhered it to a top folding white note card and rounded all four corners of the card. I white heat embossed sentiments from THIS stamp set and adhered them to the card along with THIS word die...

My Monthly Hero Countdown April 2024

Hi, crafty friends. Today’s card is part of the My Monthly Hero Countdown to the April 1st Kit release. My card features THIS Classic Kit… To create this card, I applied the kit’s inks through the kit’s layering stencils to create a quick background. Next, I used the kit’s die to “cut” out the image. I love that the die doesn’t cut the background out entirely. It just cuts certain parts of the images...

Be Bold Release Blog Hop

Hey there, crafty friends. Today’s card set is part of THIS Blog Hop celebrating THIS new release… To create the first card… I started by applying blue ink through THIS stencil on the front of a top folding note card. I added a strip of blue cardstock along the bottom and rounded the two bottom corners. Next, I stamped the images (and sentiment) from THIS stamp set, colored them with Copic Markers, and used...

Card Class Cards

Hello there, crafty friends. Recently, I taught a card class for some of the teachers at Aiden’s school… …we had so much fun and I wanted to share the cards that we created. We made a total of four cards. For the first card… I started by covering the front of a 4bar card base with THIS patterned paper. Next, I stamped the images from THIS waffle stamp set and colored them with Copic...

Layering Stencils and Stamps

Hello, crafty friends. Today’s card features THIS new release. It also features layering stencils and stamps, which I’m loving lately… To create this card, I stenciled THESE layering stencils on a white panel. I die cut it using an older stitched die and adhered it to a pink note card. Next, I stamped the layers of THIS bunny image on white cardstock and adhered it on the stenciled background. I added a strip of...

My Monthly Hero Countdown February 2024

Hello again, crafty friends. Today’s card is part of the My Monthly Hero Countdown to the February 5th Kit release. My card features THIS Premium Kit… To create this card, I started by ink blending an A2 white panel cut with THIS die using a rainbow of Hero Arts inks (all linked below). Next, I applied black ink through THIS stencil on top of the ink blending. I spritzed it with THIS shimmer spray....

Color Cube Color Combinations

Howdy, crafty friends. I recently shared THIS video talking about how I choose color combinations. Today’s card shares another example of that… To create this card, I cut THESE flower dies and THESE leaves dies from colors of cardstock that matched my Color Cube card. I cut THIS heart die from teal cardstock and ran it through my embossing folder with THIS stencil and THIS embossing mat. This makes an impression of the stencil...

My Monthly Hero Countdown

Hi, crafty friends. Today’s card is part of the My Monthly Hero Countdown to the January 8th Kit release. My card features THIS Classic Kit… To create this card, I applied ink through the layering stencils and cut it using THIS rectangle die. I cut the coordinating die from the center of the pattern and added white pigment ink around the edges to get it to stand out against the background. I cut a...