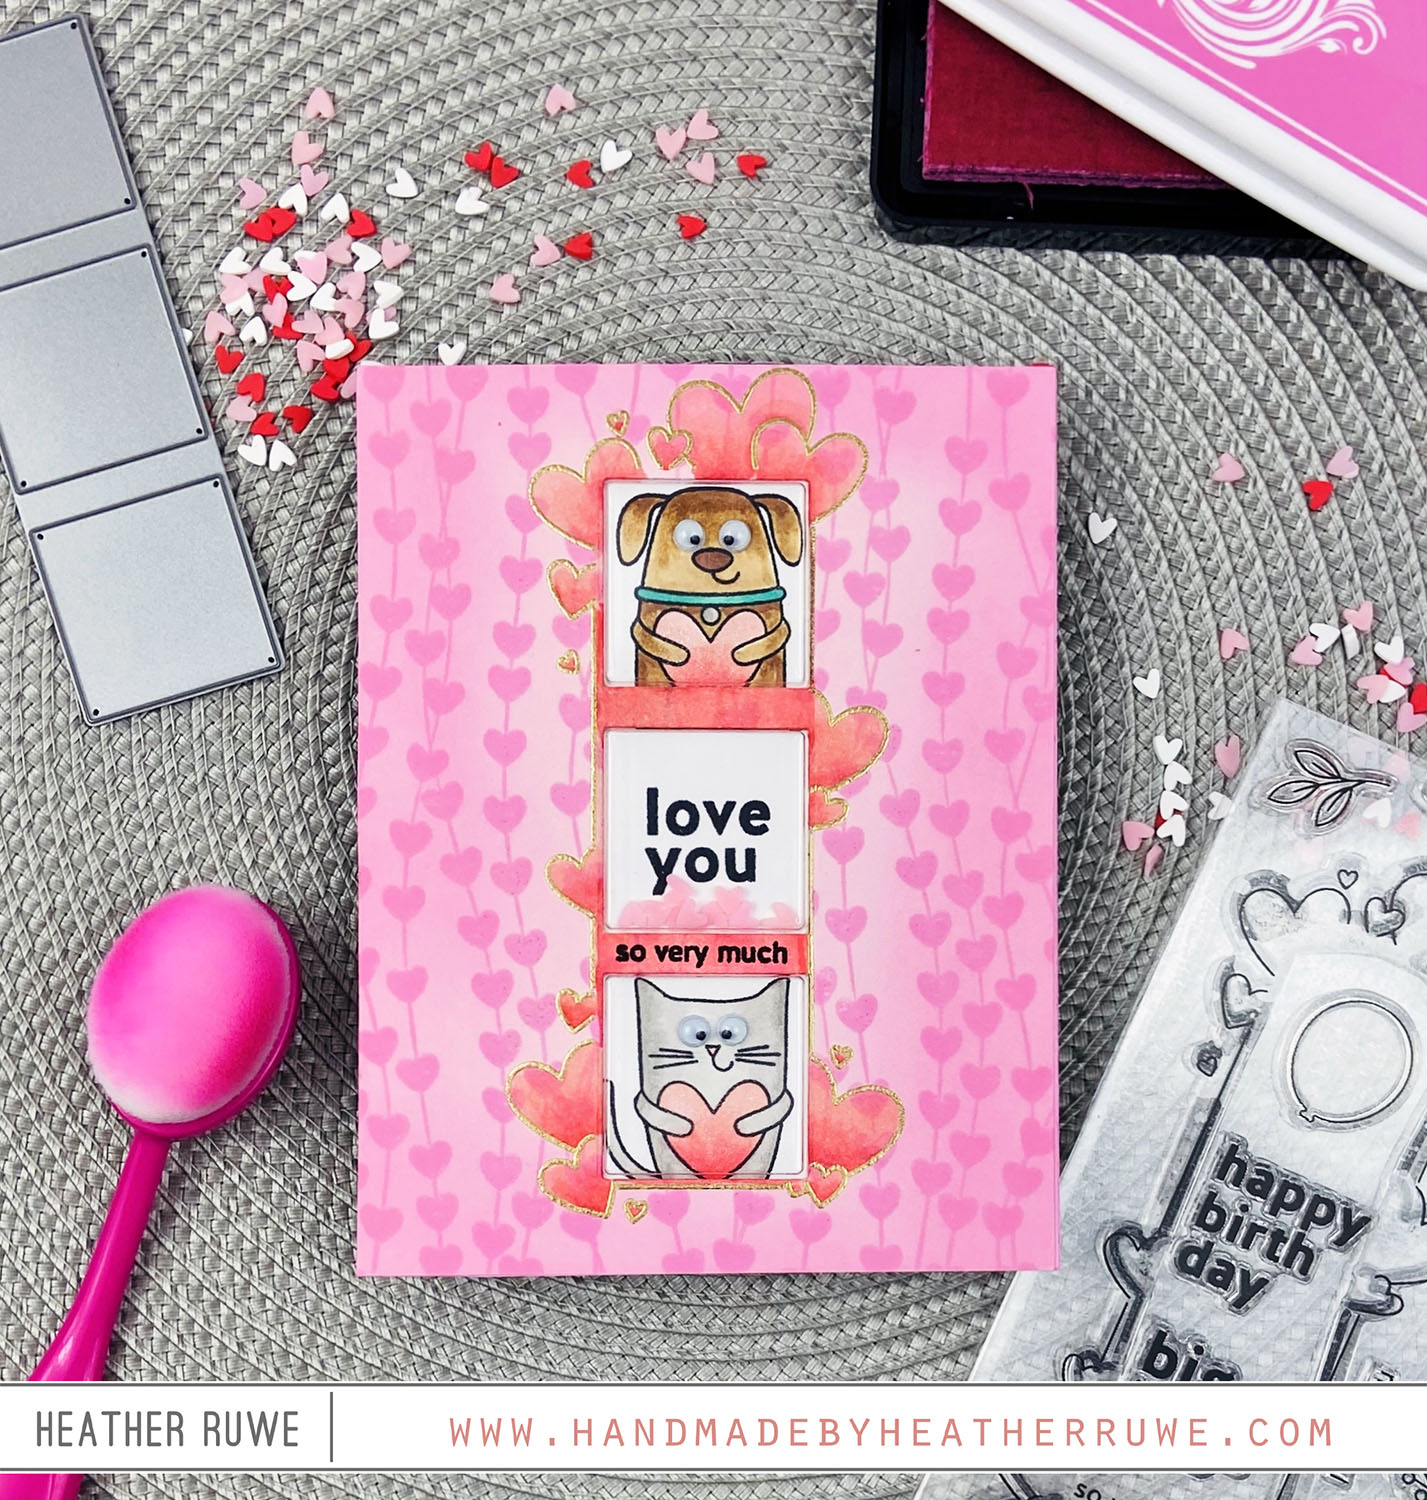
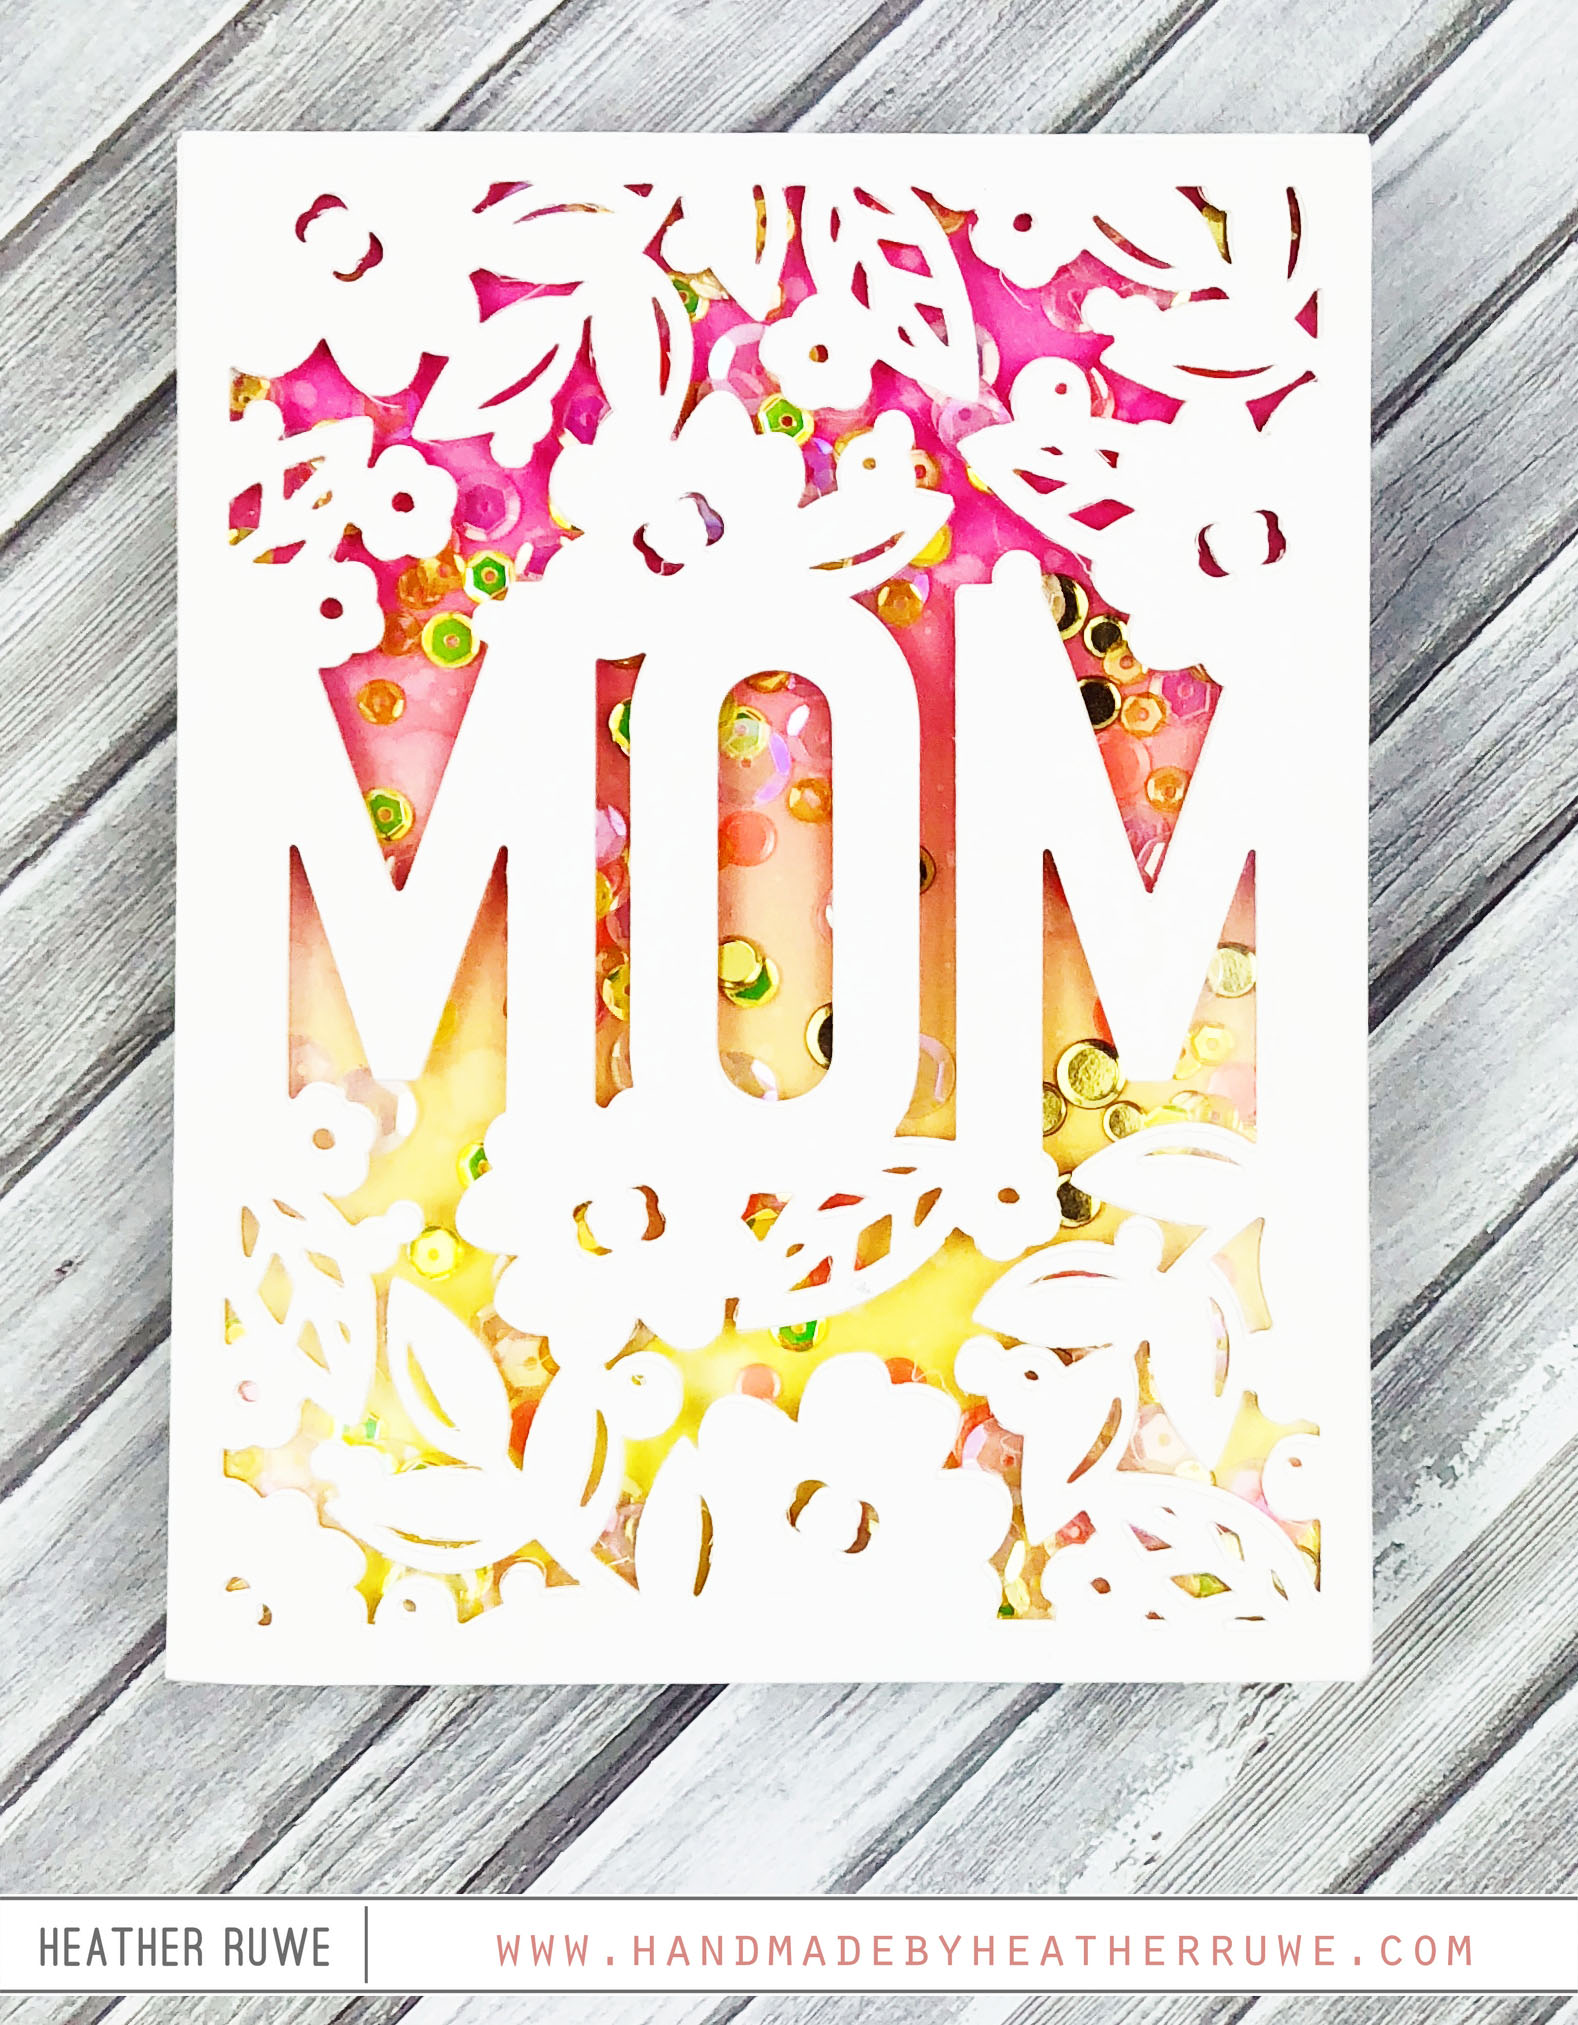
Hello, crafty friends. Simon Says Stamp just released their February Card Kit HERE and it is so clever! Check out the card I made using the kit… I started by stamping THIS background with THIS ink on to a pink card panel. I used a blending brush with the same ink and inked up the edges. I gold heat embossed the heart frame from the kit’s stamp set and used the kit’s trio window...
Snowflake Builder Card Kit
Hi there, crafty friends. Today’s card features THIS new card kit from Simon Says Stamp… I stamped one of the layering snowflakes from THIS 6×8 stamp set that’s included in the kit on to a piece of vellum. I die-cut a circle from one of the patterned papers using THIS die and adhered it on top of the vellum. I stamped the bottom of the snow globe image from THIS set, cut it out,...
Cheer and Joy Release Inspiration Week-Day Three
Hi, crafty friends. I’m sharing more inspiration using THIS new release… I stamped THIS adorable puppy image and colored it with THESE markers. I die-cut THIS coordinating die from another piece of card stock that was inked and applied acetate behind the opening, creating a window. I white heat embossed a sentiment from the same stamp set on a red card stock strip and adhered it under the window. I applied foam tape to...
Look for the Rainbows Card Kit
Howdy, crafty friends. THIS new card kit from Simon Says Stamp is now available and I created a shaker card with some of the contents… I started by embossing a piece of THIS card stock using the embossing folder included in the kit. I applied a rainbow of distress ink on to THIS work surface and sprayed water to create watercolor. I taped down the piece to a hard board using THIS tape. I painted...
Rest and Refresh Release
Hi, crafty friends. Simon Says Stamp has a new release called, Rest and Refresh, and it’s fabulous. You can find the entire release HERE. I created two shaker cards using some of the new product… For the first shaker card… I started by stamping THIS new background stamp on THIS card stock using THIS ink for a tone on tone look. I die-cut four circles from the front of the panel using one of...
Easy Shaker Card Element
Hello, crafty friends. Today’s card features and easy to create shaker card element… I started by die-cutting THIS circle die from THIS card stock. I die-cut THIS frog circle die from the center of the circle, creating a circle window. I adhered acetate to the back of the opening and adhered the eye die-cuts into place. I stamped a sentiment from THIS stamp set along the bottom of the circle by curving the sentiment before...
MOM Shaker Card
Hi there, crafty friends. I’m sharing a simple and sweet shaker card today… I started by applying THIS and THIS ink to a piece of white card stock. When the colors meet in the middle, it creates a beautiful orange color. I spritzed it with some water for some added texture. I die-cut THIS die three times from white card stock and adhered them together. I spritzed some of THIS on the top layer...
Fresh Bloom Release
Hello there, crafty friends. I’m back today with a couple of shaker cards featuring new product from THIS new release from Simon Says Stamp… First, I stamped two card fronts with THIS background stamp. I die-cut a tag and then die-cut THIS chick die and THIS bunny die from the center. I stamped coordinating sentiment from THIS stamp set on the tag and created shaker cards by adding acetate and foam tape to the...
Simon Says Stamp March Card Kit Week-Day 1
Hi, crafty friends. Today’s card features products from THIS card kit from Simon Says Stamp. It’s called “Lucky Rainbow” and it’s fabulous. I’ve been making lots of projects with it so I thought it would be fun to make it a whole week of inspiration. Today is day one and I have a shaker card to share… I started by die-cutting a piece of patterned paper from the kit with THIS die and THIS...
New Picket Fence Release (February 2019)
Hi there, crafty friends. Picket Fence Studios has a new release and I have a few cards to share using their new dies… I think their new alcohol beverage dies are so fun and their large solid area makes them perfect for shaker cards. I started by creating three alcohol ink backgrounds on THIS paper. While the alcohol ink was still wet, I laid THIS silver foil on top. I trimmed them down to...