
Hi there, crafty friends. I’m thrilled to be part of THIS Blog Hop Celebrating THIS new release. I have three cards to share featuring stencil sets…
VIDEO
I’m excited to bring more video content in 2022. You can watch the video on how I created these cards HERE or click on the video below…
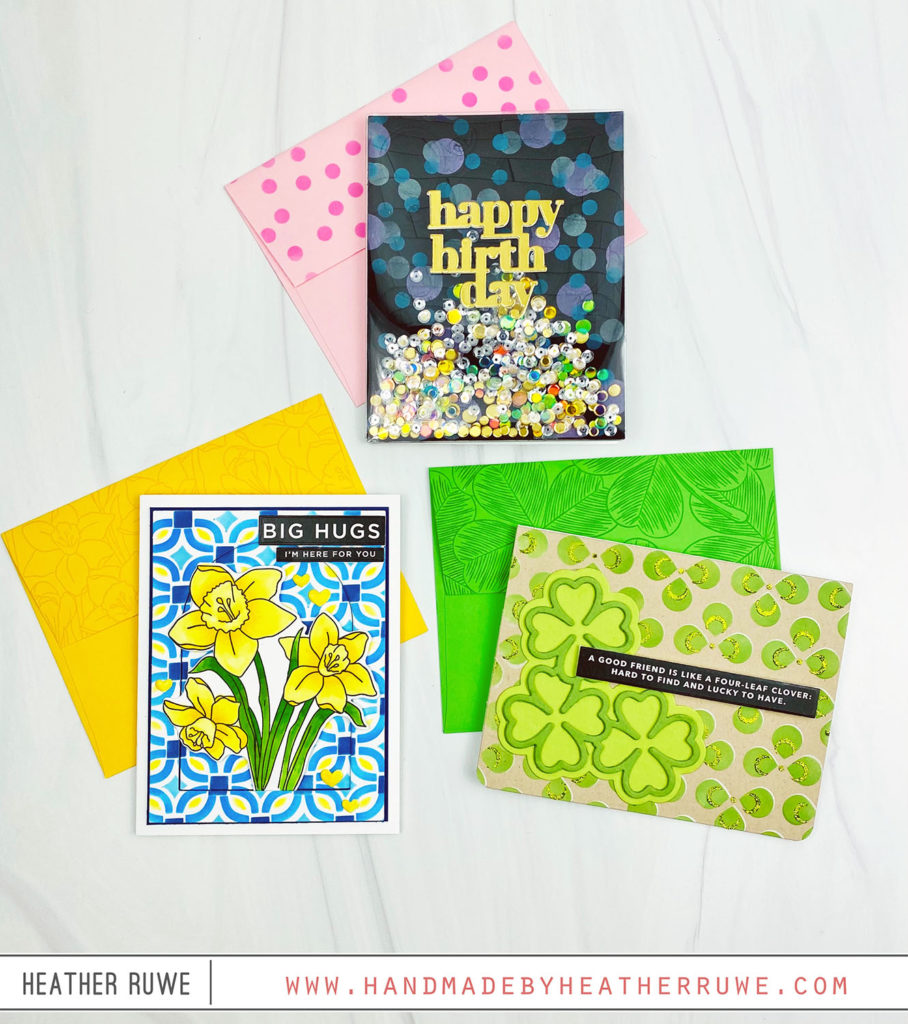
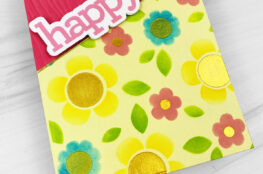
For the first card, I applied ink through the Interlocking Circles stencil set. I die-cut the arched dome die from the center of the panel, creating a window. I adhered the inner portion down to the blue mat and adhered the remaining ink portion with foam tape to add dimension. I stamped and colored the daffodil image from the Spring Stems stamp set and used the coordinating die to cut it out. I finished off the design with a few die-cut hearts from the Mini Hearts Party die. I colored them with Copic Markers to match the colored image and added crystal glaze on top for some shine. I also added sentiment strips from the sentiment strips. I stamped the Daffodil Background stamp on the flap of the envelope to tie everything together.
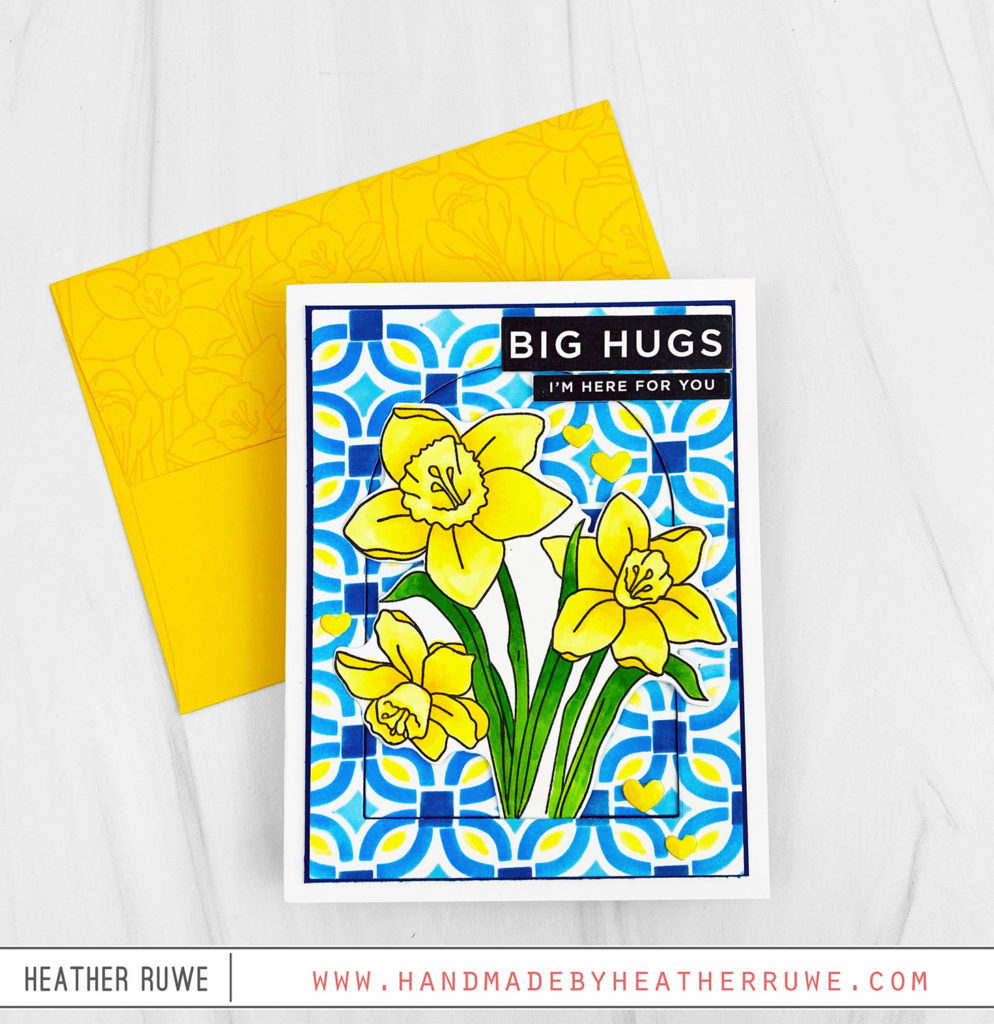
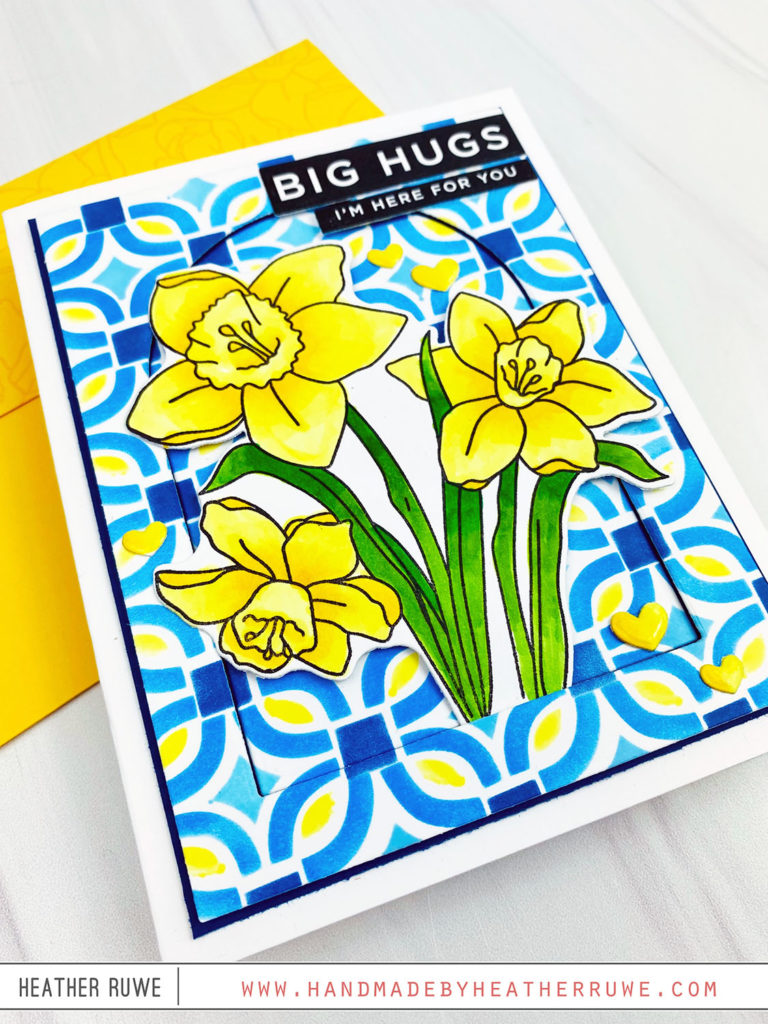
For the first card, I applied ink through the Interlocking Circles stencil set. I die-cut the arched dome die from the center of the panel, creating a window. I adhered the inner portion down to the blue mat and adhered the remaining ink portion with foam tape to add dimension. I stamped and colored the daffodil image from the Spring Stems stamp set and used the coordinating die to cut it out. I finished off the design with a few die-cut hearts from the Mini Hearts Party die. I colored them with Copic Markers to match the colored image and added crystal glaze on top for some shine. I also added sentiment strips from the Reverse Well Wishes sentiment strips. I stamped the Daffodil Background stamp on the flap of the envelope to tie everything together.
Here’s a closer look…
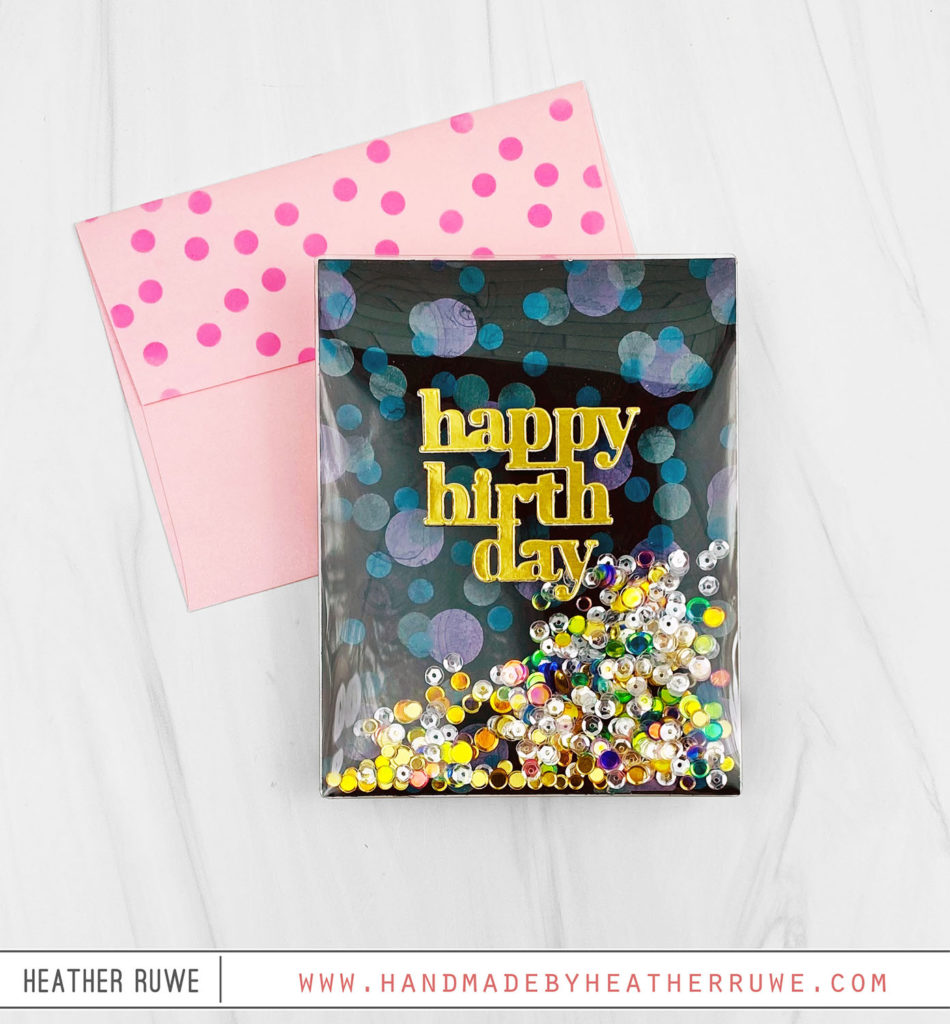
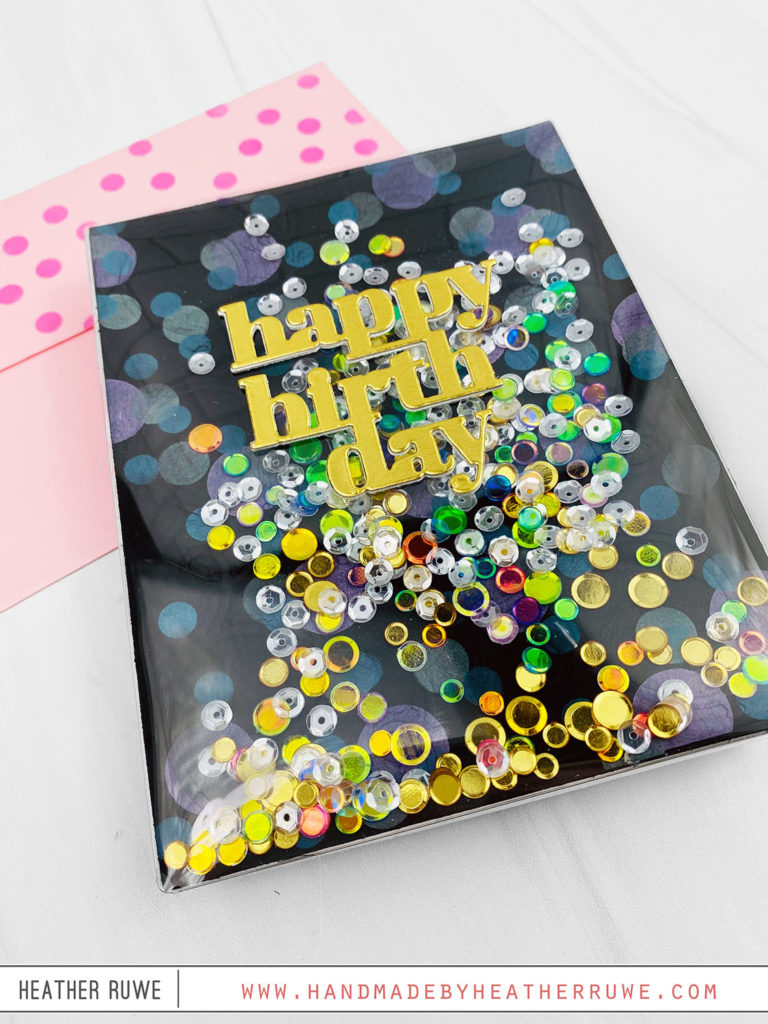
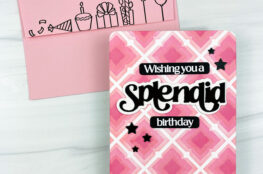
For the second card, I applied Distress Oxide inks through the Layered Confetti stencil set on to black cardstock. I embossed the Balloon Background die on top of the pattern using an embossing mat in my die-cut machine. I adhered an A2 shaker pouch to the background on three sides, leaving the top open. I added some End of Rainbow sequins and sealed up the top. I added the Basic Box Card Happy Birthday die to the front and adhered the shaker to the front of a side folding white note card using strong tape. I also applied ink through one of the stencils on the flap of the envelope.
 Here’s a closer look…
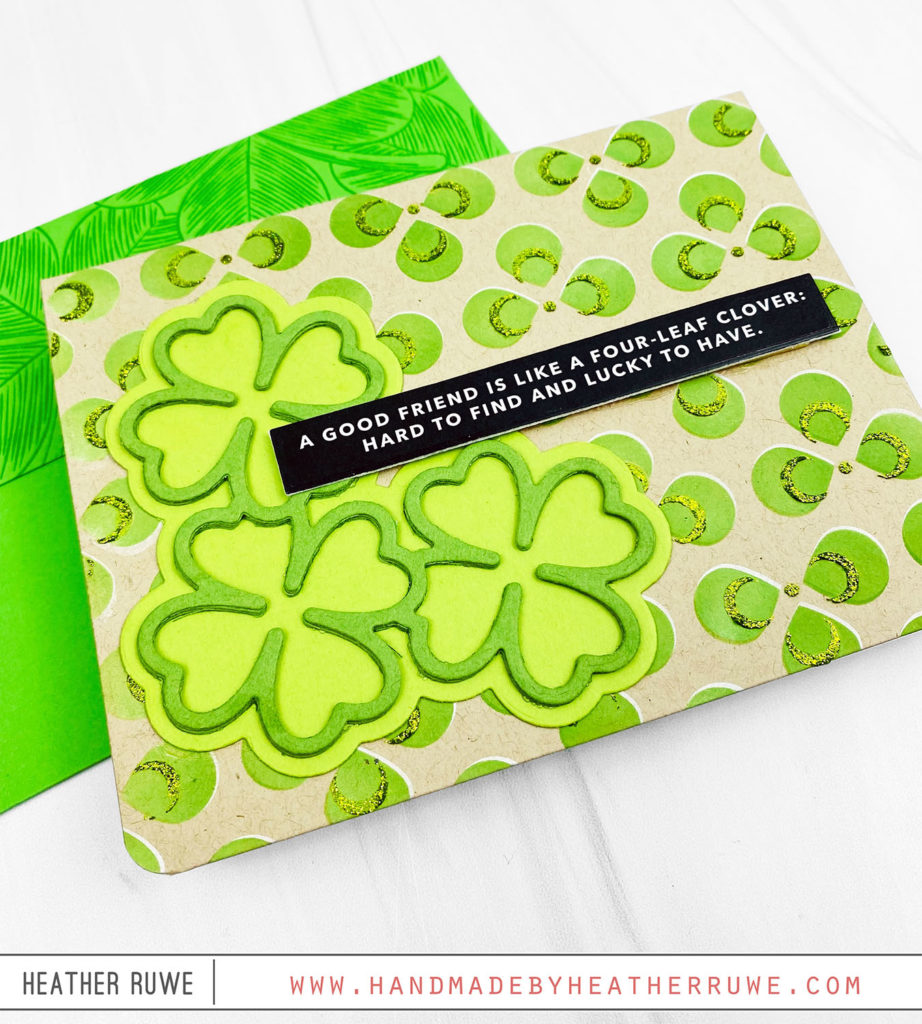
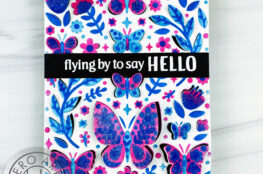
For the final card, I applied white pigment ink through one of the Layered Clover stencils on a Kraft cardstock. Once dry, I applied green ink on top. I did the white pigment ink first to make the green ink more vibrant since the colored cardstock would mute the color. I applied green glitter glitz gel through the other stencil in the set on top of the design to add some sparkle. I die-cut the Linking Lucky Clovers die from two shades of green and adhered it on top along with a printed sentiment strip from the Reverse Lucky sentiment strips. I rounded the bottom two corners an stamped a green envelope flap using the Shamrock Background stamp.
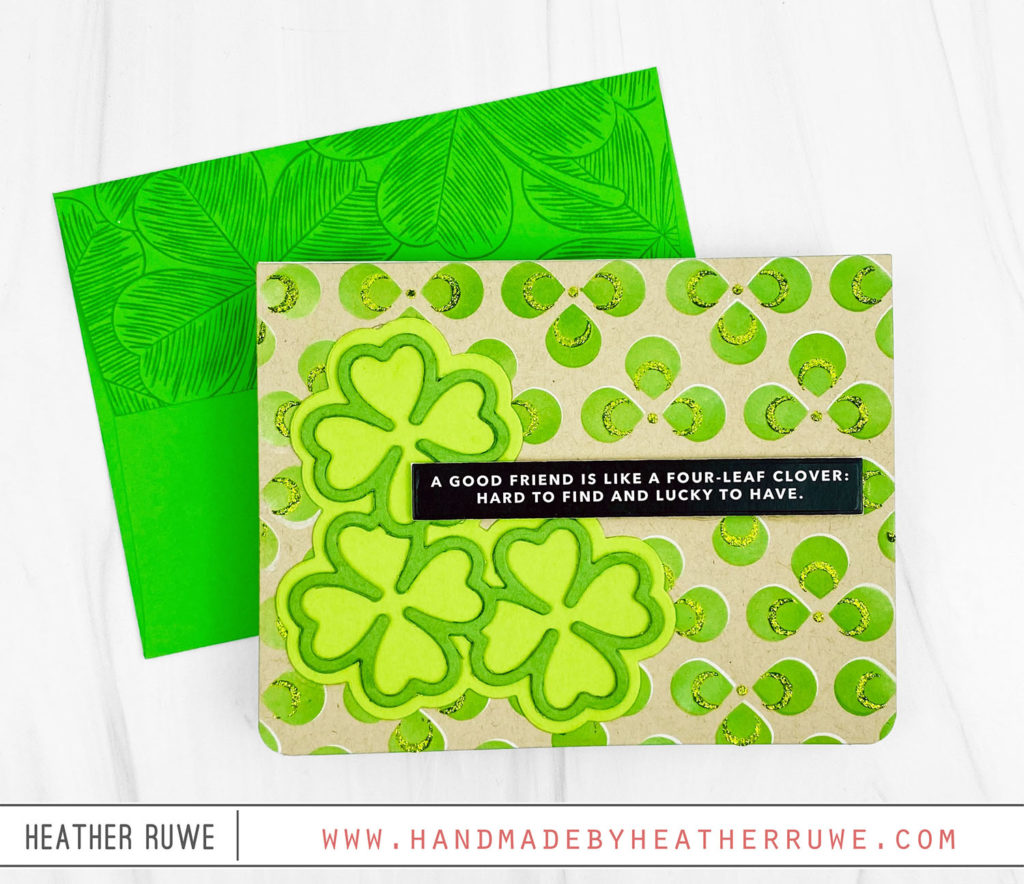 Here’s a closer look…
BLOG HOP
There is much more inspiration to see. Click HERE for the next stop on the hop. Click HERE to start at the beginning of the hop.
Here’s the complete Blog Hop list…
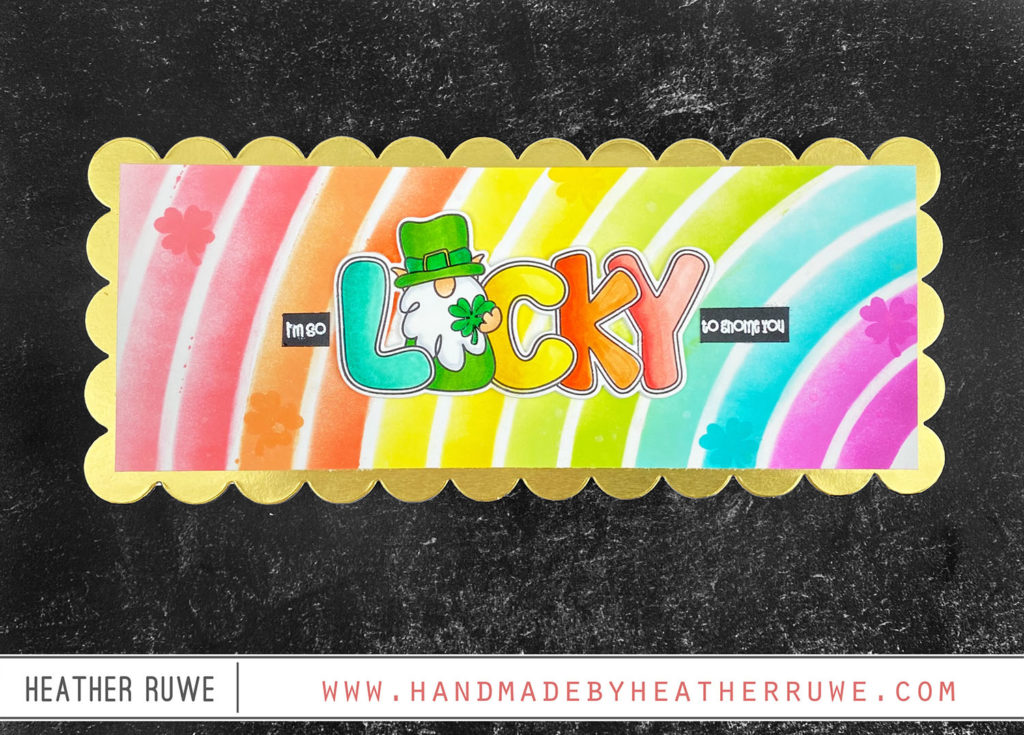
Looking for even more inspiration using THIS release? I shared another project HERE…
GIVEAWAY
Simon is so generous and giving away a $25 coupon to every stop on the hop so be sure to leave comments along the way for your chance to win. Simon Says Stamp will announce winners on their blog on Wednesday. Good luck!
Wait, there’s more…
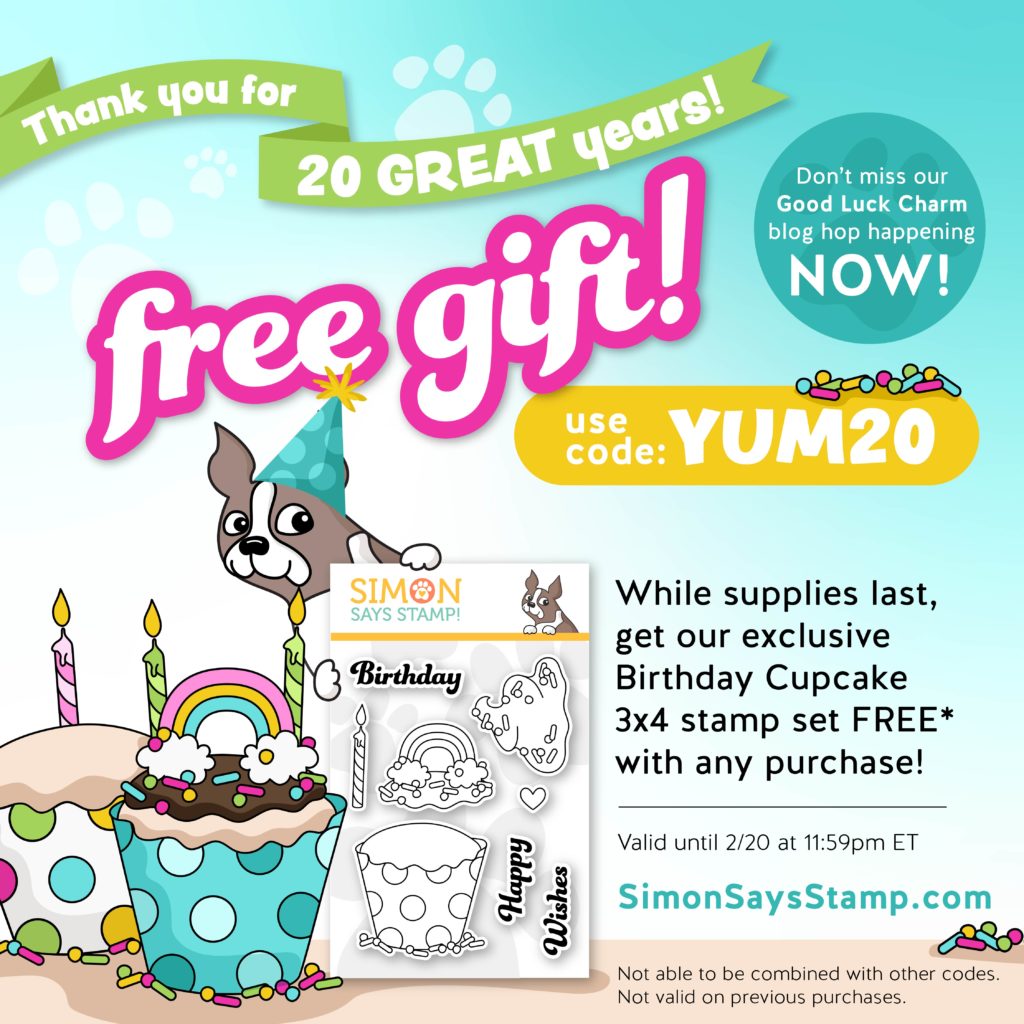
Use the code YUM20 to receive a free 3×4 Birthday Cupcake Stamp Set . Valid while supplies last or until 2/20 at 11:59 EST.
Thank you so much for stopping by. I’ve linked to the entire new release below as well as products used on today’s cards.
LINKS TO ENTIRE NEW RELEASE:
(Affiliate links used at no extra cost to you. Thank you for your support.)

LINKS TO SUPPLIES USED ON TODAY’S CARD:
(Affiliate links used at no extra cost to you. Thank you for your support.)

February 22, 2022
Magnificent use of the stencils.
February 22, 2022
Enjoyed watching your video showcasing SSS new release and your pretty cards, Heather.
February 22, 2022
Soooooooooo Creative! Thank you for sharing!
February 22, 2022
Love all of these cards, Heather! I am especially loving the daffodils! So ready for Spring!! Thanks for taking the time to create them all and share!
February 21, 2022
I love your cards. I especially love the shaker birthday card. All your cards are lovely.
February 21, 2022
Great cards Heather! I really love the shaker, nothing is more fun than a bunch of colorful sequins! I also like the look of the sentiment die.
February 20, 2022
I like these stenciled designs.
February 20, 2022
I love your cards, especially that shaker!
February 20, 2022
All your cards are so fun, but I love the glitter glitz gel on the clover stencil, really adds a lot of shimmer!
February 20, 2022
Love that shaker!
February 20, 2022
Great card designs! TFS!
February 20, 2022
Beautiful cards! Love all the new stencils!!
February 20, 2022
Your card designs are awesome and I love all the stencils in this release!!
February 20, 2022
Nice project shares and look at the stencils.