Hello there, crafty friends. Recently, I taught a card class for some of the teachers at Aiden’s school…
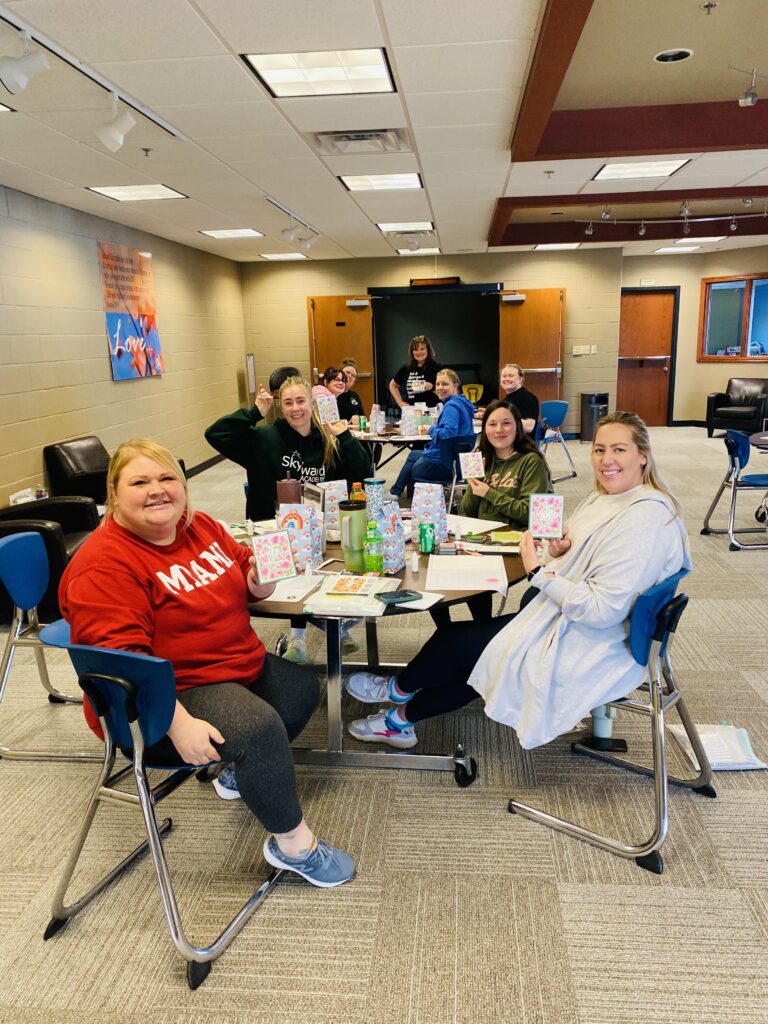
…we had so much fun and I wanted to share the cards that we created. We made a total of four cards.
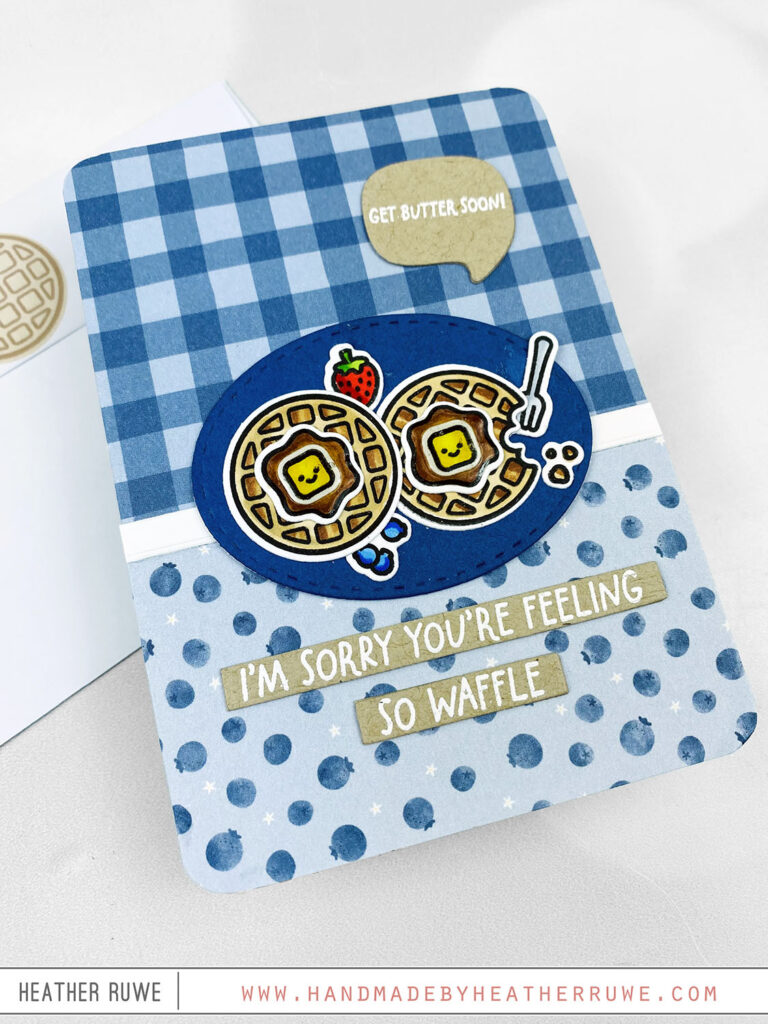
For the first card…
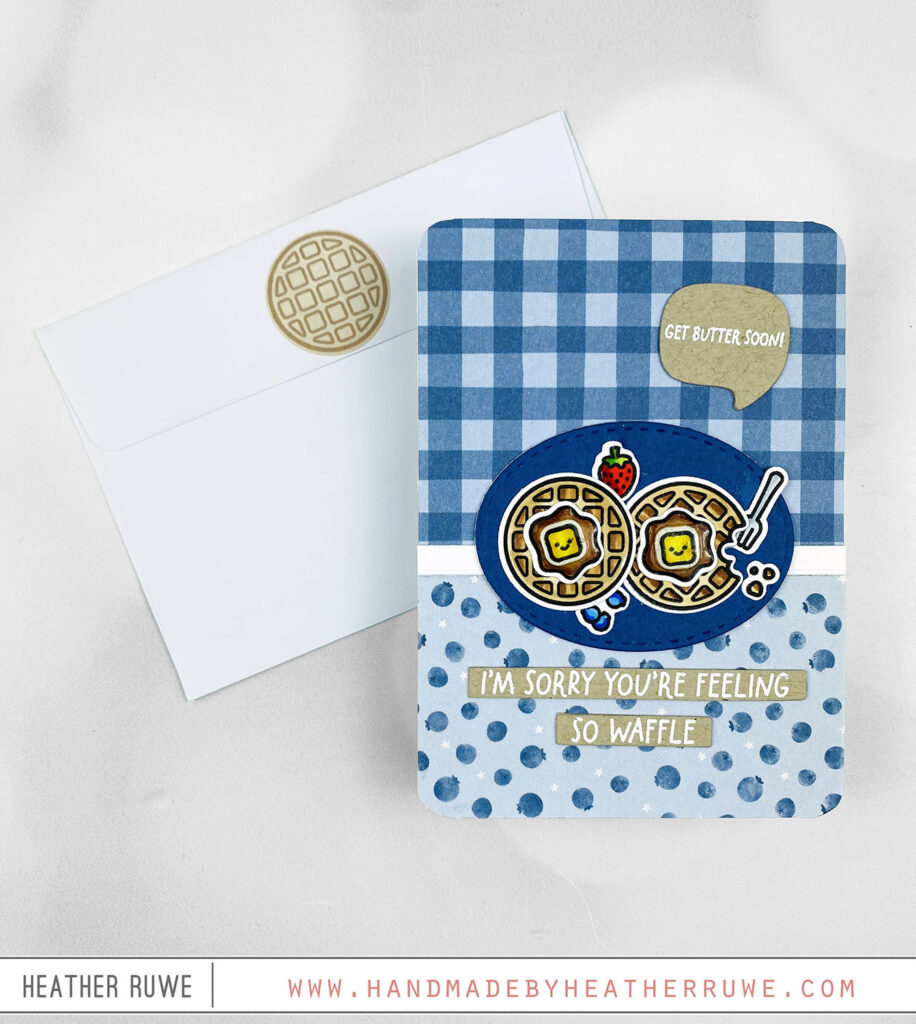
I started by covering the front of a 4bar card base with THIS patterned paper. Next, I stamped the images from THIS waffle stamp set and colored them with Copic Markers. I used THESE coordinating dies to cut them out. I added the images to THIS stitched oval and applied glossy accents on the syrup for some shine. From that same stamp set, I white heat embossed the sentiments on kraft cardstock. I also stamped a waffle image on the flap of the envelope to tie everything together.
Here’s a closer look…
For the second card…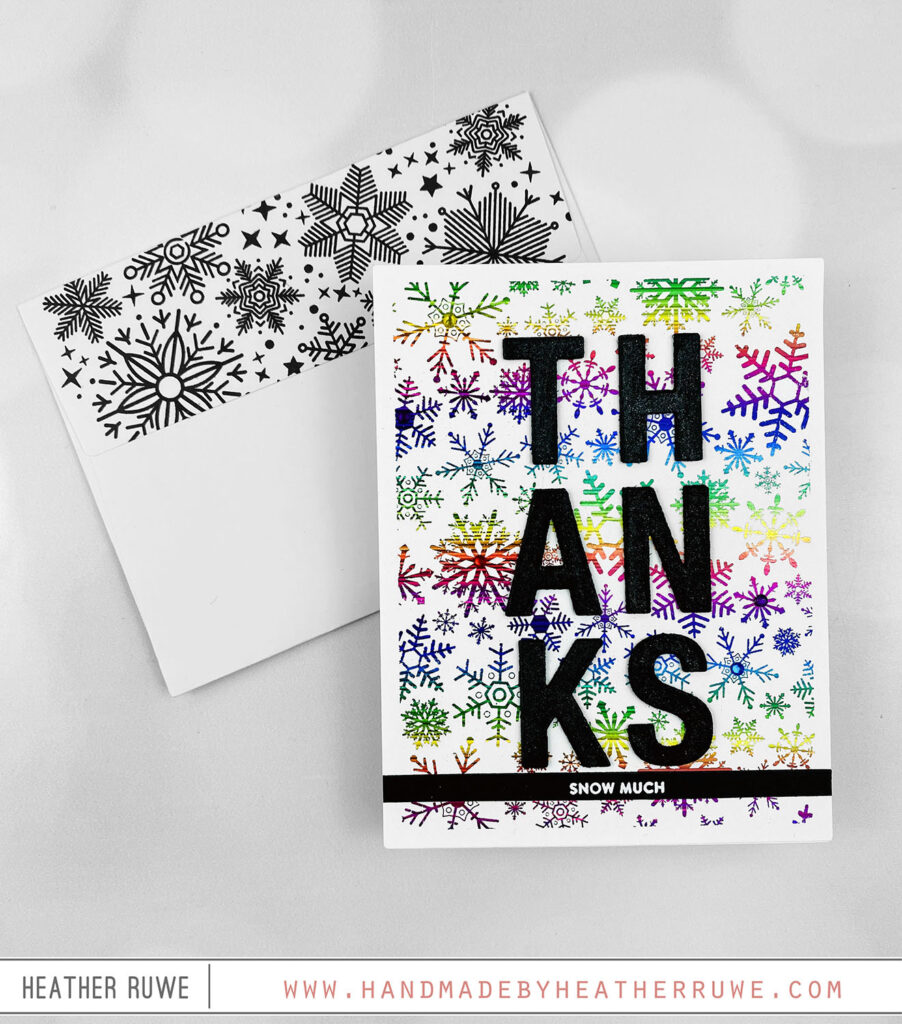
I laid THIS rainbow foil on top of THESE poly glaze sheets and ran them through my MINC machine to apply heat. Next, I die cut THIS thanks die from black cardstock. I also die cut it from vellum. I used the vellum as a guide when adhering the letters in place. I added THIS shimmer pen on top of the letters for some sparkle. I white heat embossed the sub sentiment and adhered it along the bottom. I finished it off with a few of THESE embellishments.
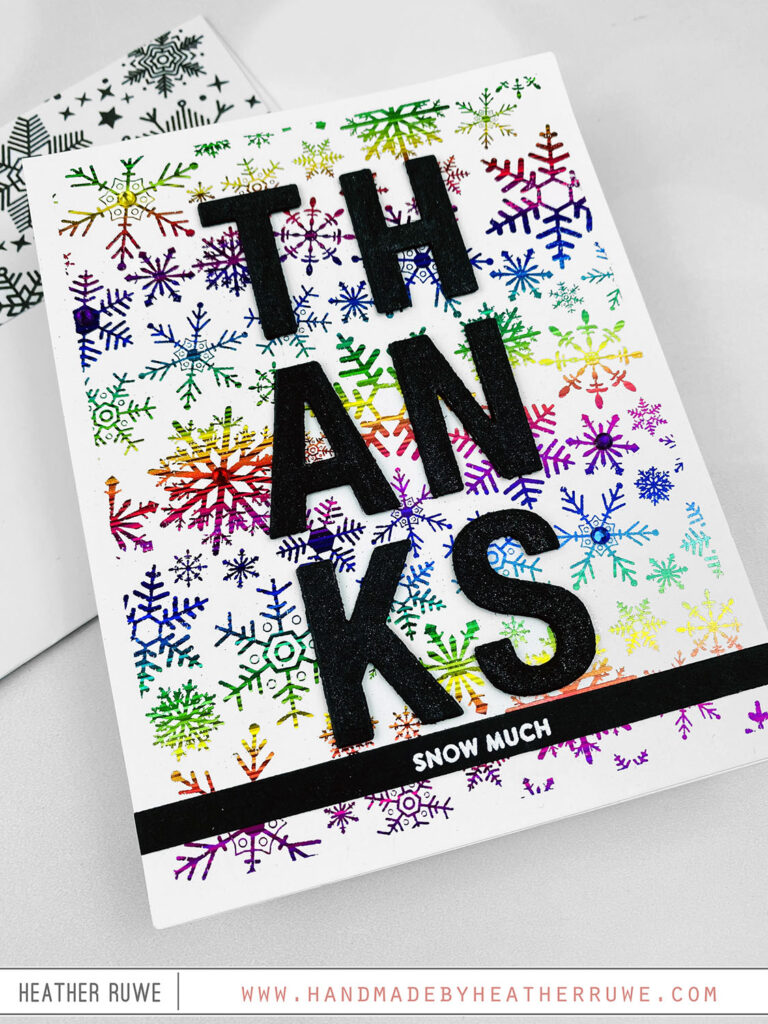
Here’s a closer look at the shine…

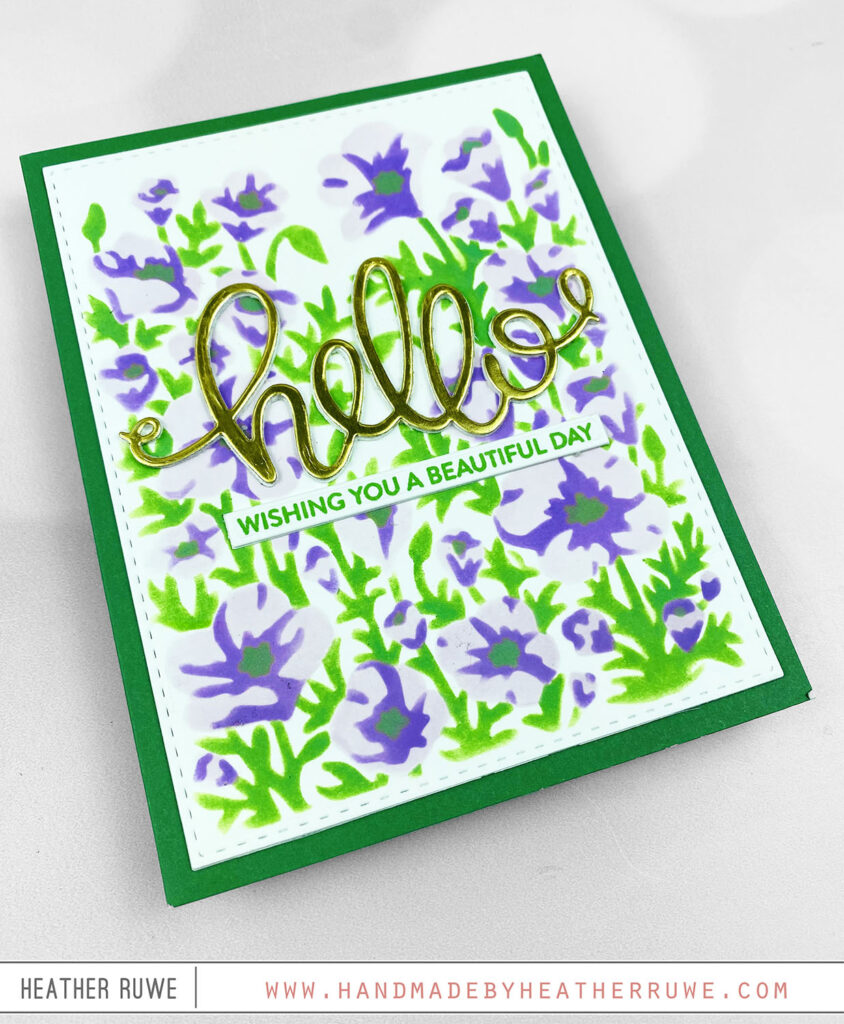
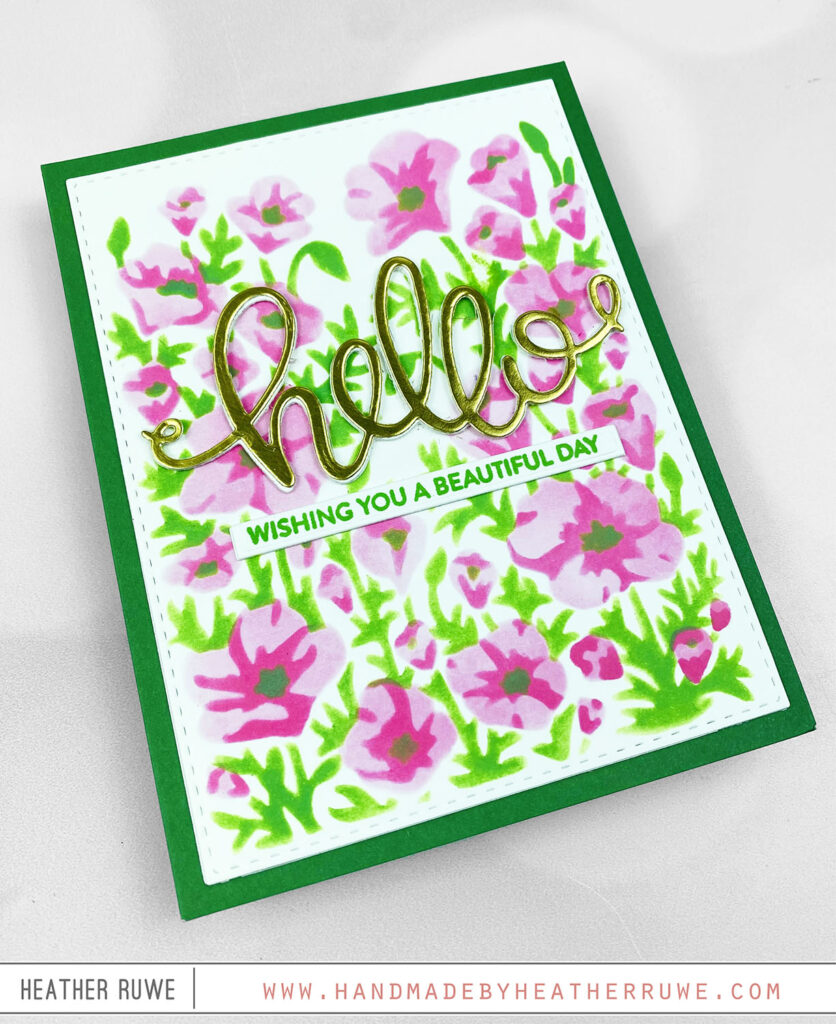
For the third card(s)…
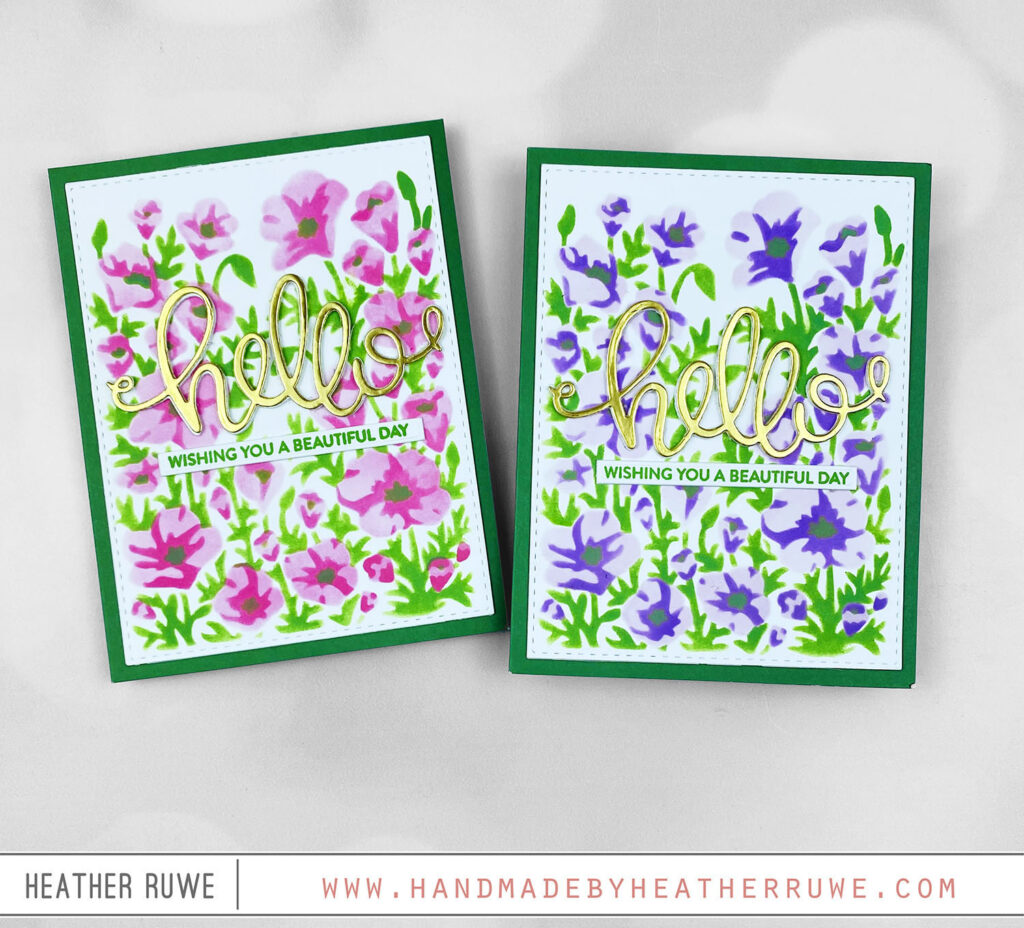
I wanted to give them options on color choices so I created a pink and purple example. I applied Distress Oxide inks through THESE layering stencils. I die cut the panel using THIS stitched rectangle and adhered it to a green card base. I die cut THIS hello die from THIS gold cardstock and finished off the card with a sub sentiment from THIS stamp set.
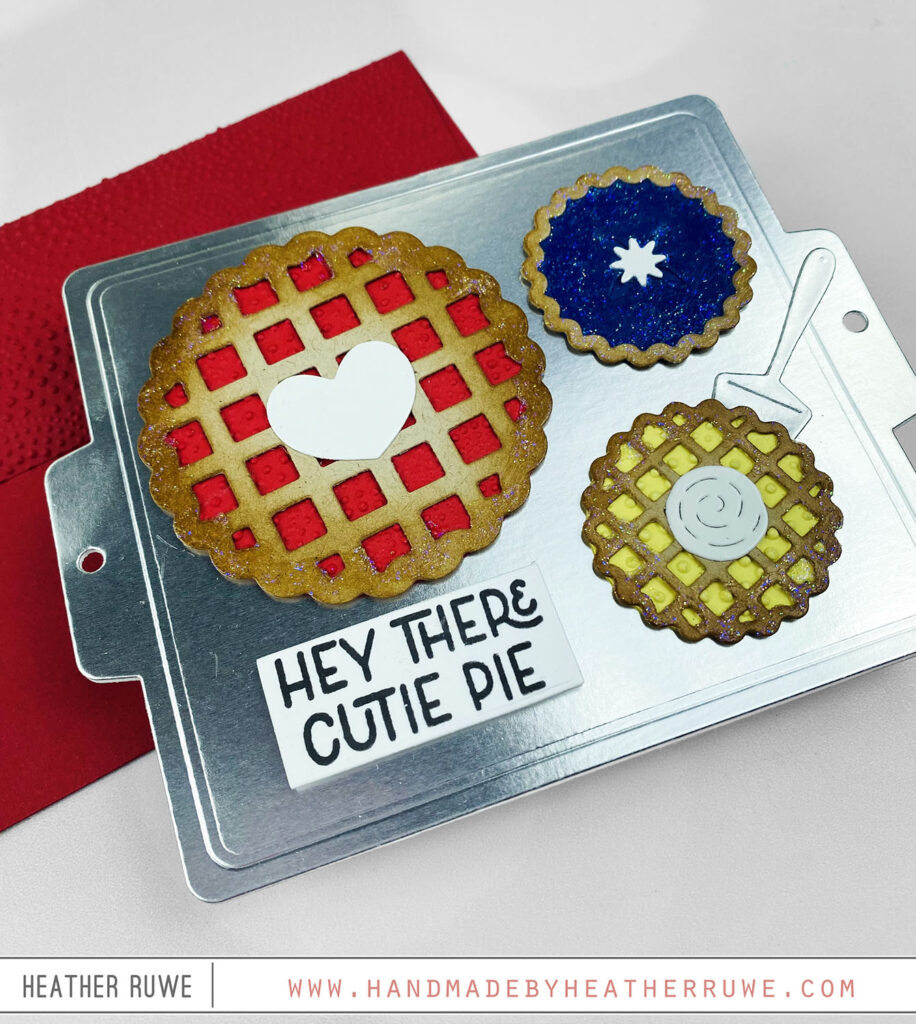
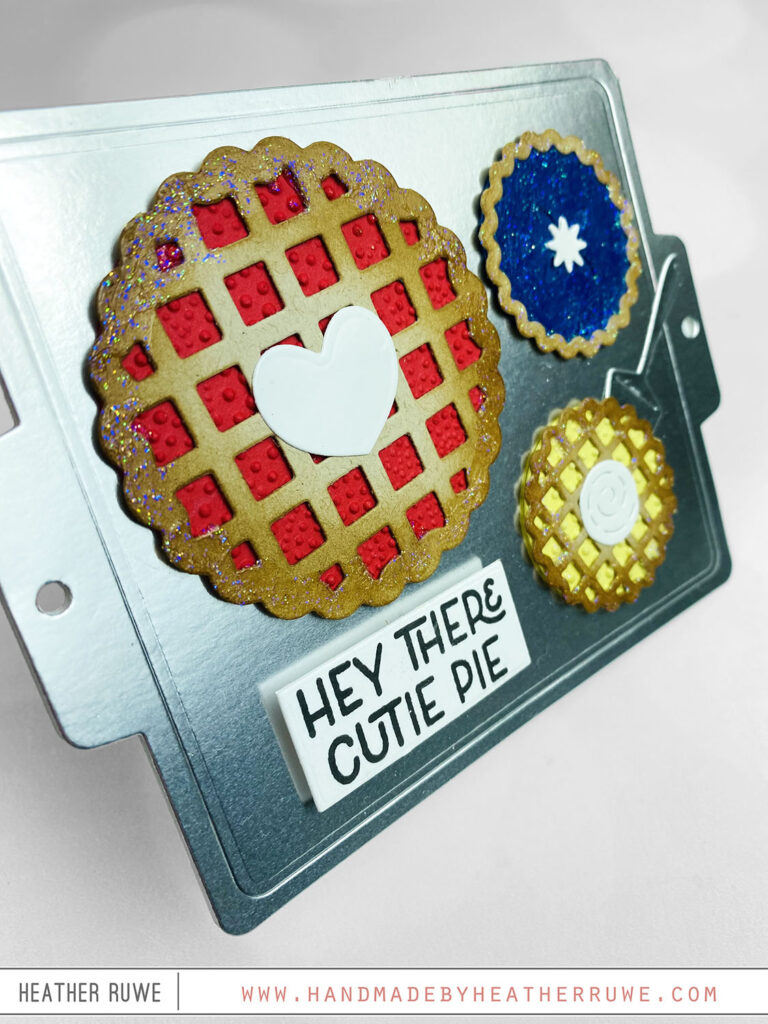
For the final card…
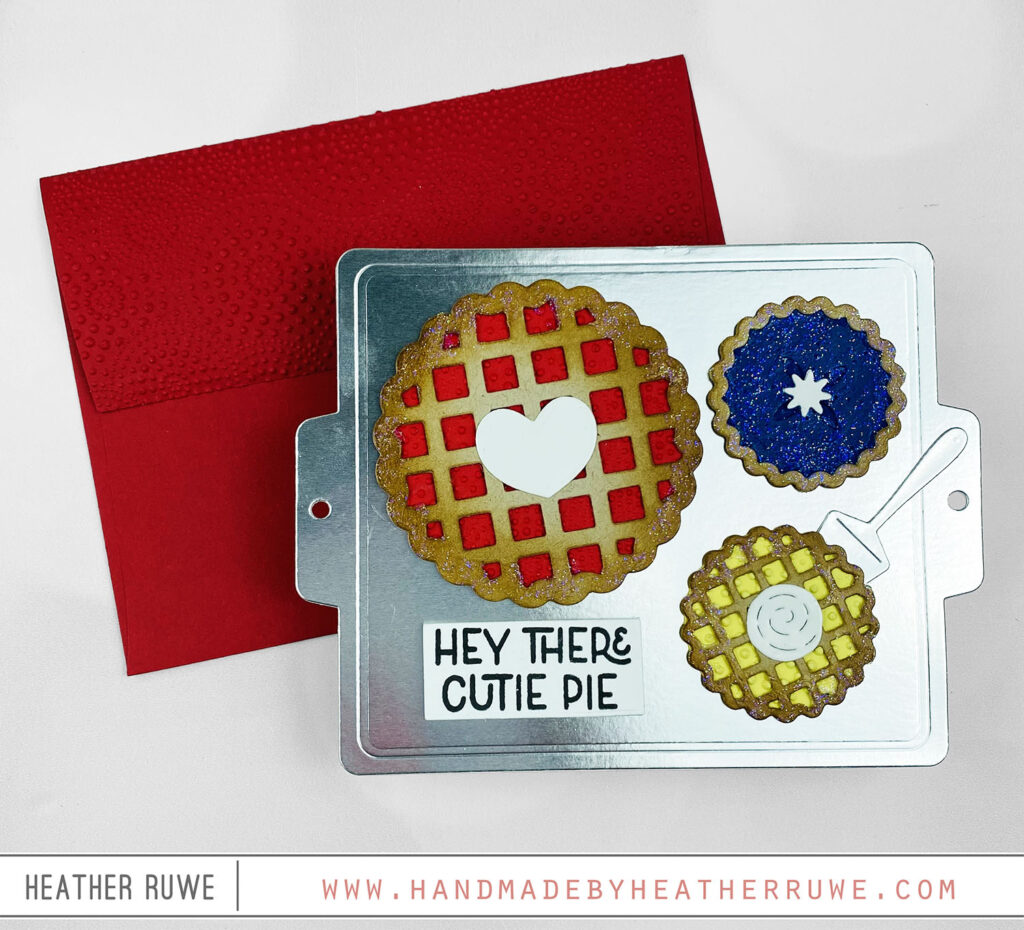
I die cut the (older) Cookie Sheet die from THIS silver cardtock and white cardstock. I embossed a line on the top of the white die cut piece and adhered the silver die cut to it by only applying glue above that line to create a hinge. This way I can have a shaped card. I love using larger dies as my card base. It’s something fun and unexpected. I die cut THESE pies from colored cardstock and embossed a couple of the circles with THIS embossing folder. For the blue pie, I cut the circle from THIS pattern. I die cut the whip cream pieces from THIS glossy cardstock and finished off the pies with some of THIS glitter pen for some sparkle to resemble sugar. I also added a sentiment from THIS stamp set.
Here’s a closer look…
Thank you for stopping by. Happy crafting!
LINKS TO SUPPLIES USED:
(Affiliate links used at no extra cost to you. Thank you for your support.)