Hi there, crafty friends. I have two cards to share today featuring products from THIS new release. These cards are part one. Stay tuned for tomorrow’s post where I’ll share two more cards that came from these backgrounds.
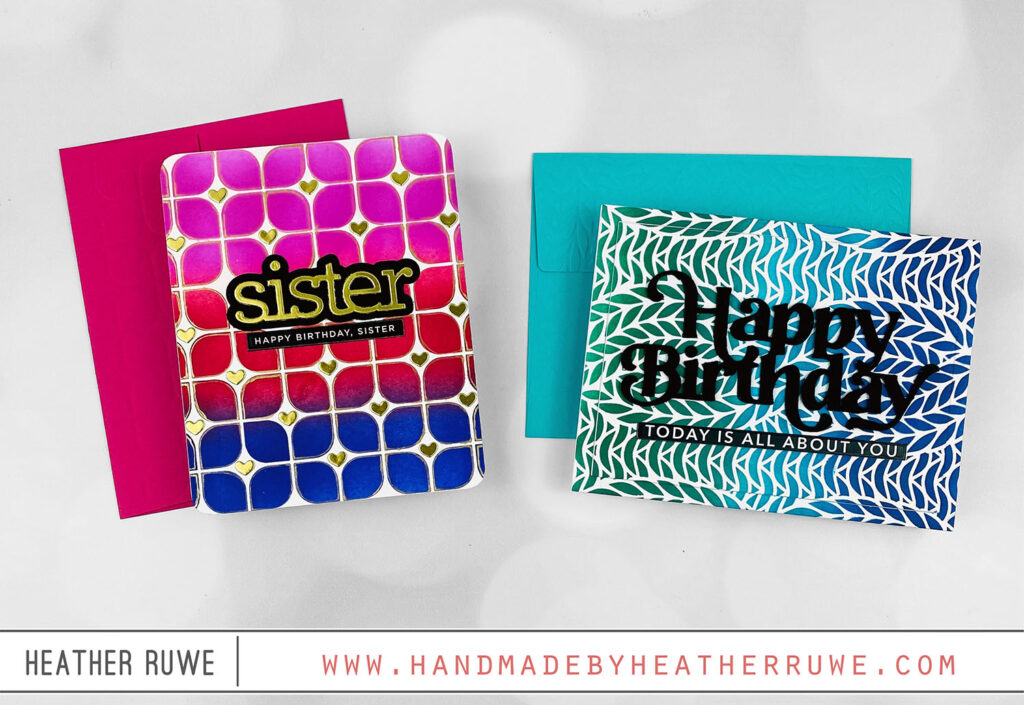
For both cards, I created stenciled backgrounds.
For the first card…
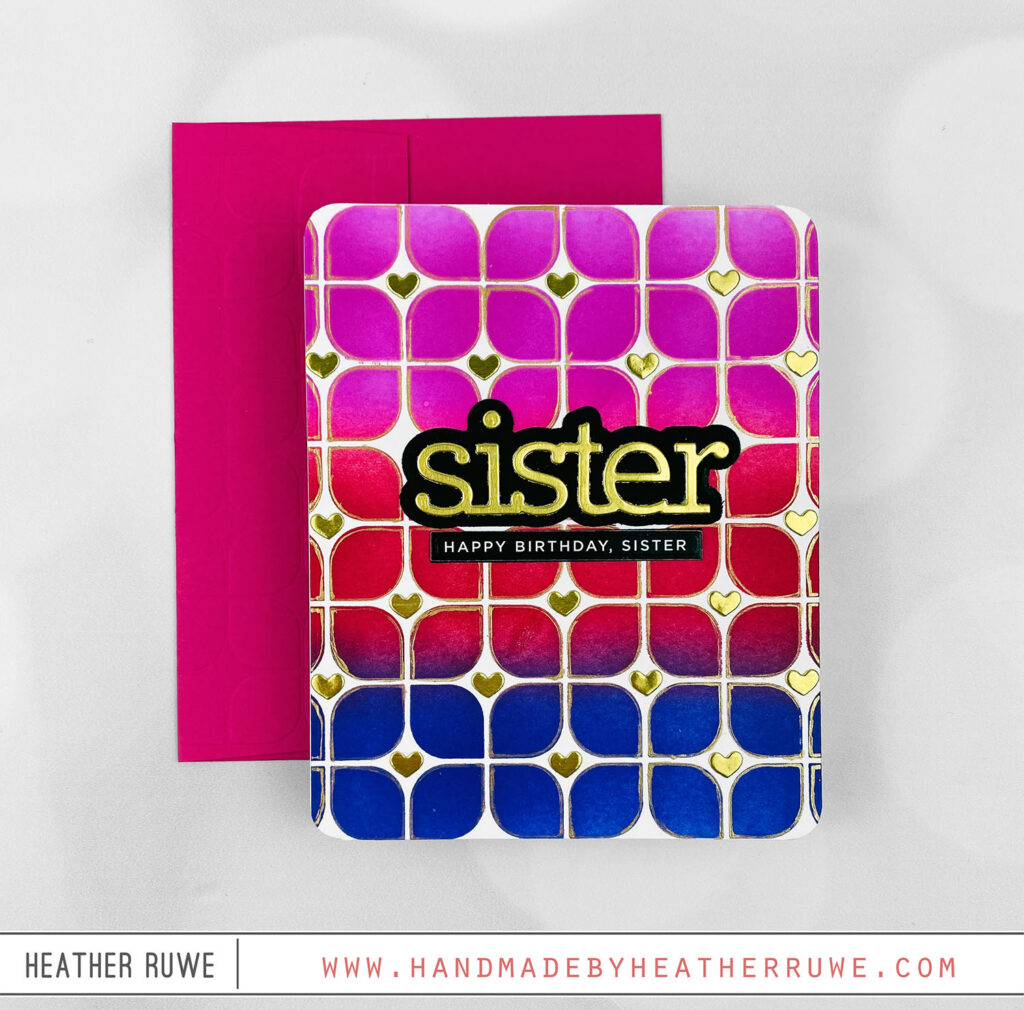
I applied three colors of ink through THIS stencil and then outlined the pattern with THIS gold pen. I die-cut THIS word die from black and gold cardstock and added one of THESE pre printed sentiments underneath. I also added THESE die cut hearts in the pattern to create a whole new look. I used the same stencil with THIS embossing mat in my die cut machine to dry emboss the envelope to tie everything together.
Here’s a closer look…
![]()
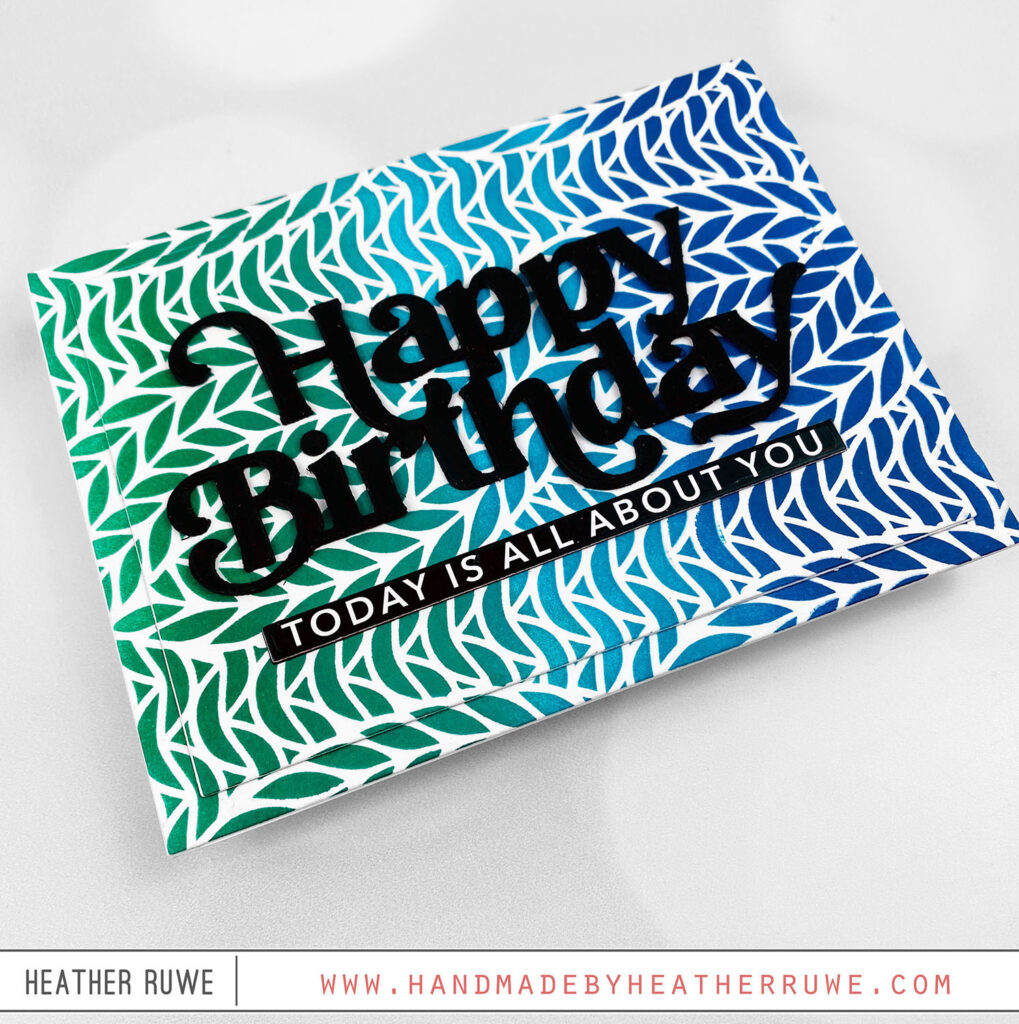
For the second card…
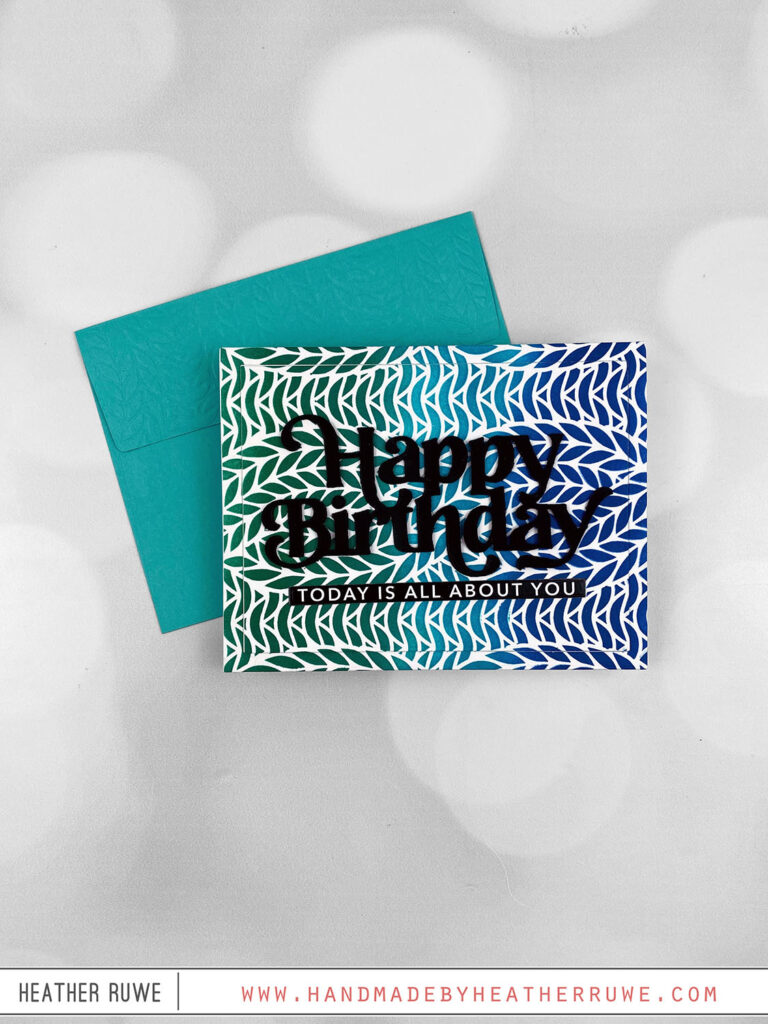
I applied three colors of ink through THIS stencil. I cut THIS rectangle die from the center, added a few layers underneath, and popped it back in place for some dimension. I added THIS die cut sentiment along with THIS pre printed sentiment underneath. I dry embossed the stencil on the flap of the envelope just like the first card.
Here’s a closer look…
Thank you so much for stopping by. Happy crafting!
LINKS TO ENTIRE BEAUTIFUL DAYS RELEASE:
(Affiliate links used at no extra cost to you. Thank you for your support.)

LINKS TO SUPPLIES USED:
(Affiliate links used at no extra cost to you. Thank you for your support.)