
Hello again, crafty friends. Today’s card features hot foiling on acetate…
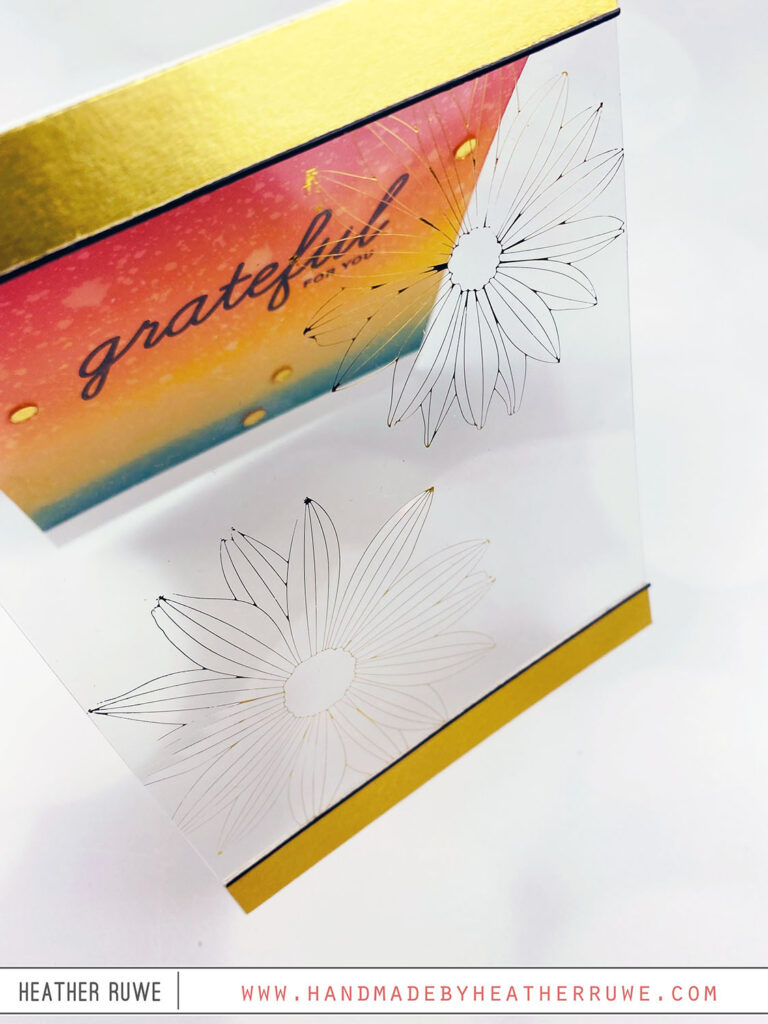
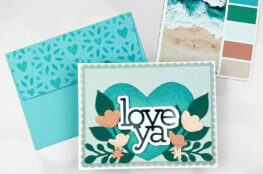
![]() I started by creating the clear acetate front panel. I hot foiled THIS plate using THIS gold foil on a piece of THIS heat resistant acetate. I trimmed down the piece to be 4.25 x 5.5 inches. Next, I trimmed down the front panel of the top folding card base. I cut the front panel so only 1/2 of an inch was left was left on the front panel. From that panel we cut, I cut two 1/2 inch strips for the bottom of the card and the inside bottom of the card. I adhered the top of the acetate piece to the front of that strip of the front panel that was left using THIS strong adhesive. I covered it with a strip of gold cardstock on top, sandwiching in the acetate piece.
I started by creating the clear acetate front panel. I hot foiled THIS plate using THIS gold foil on a piece of THIS heat resistant acetate. I trimmed down the piece to be 4.25 x 5.5 inches. Next, I trimmed down the front panel of the top folding card base. I cut the front panel so only 1/2 of an inch was left was left on the front panel. From that panel we cut, I cut two 1/2 inch strips for the bottom of the card and the inside bottom of the card. I adhered the top of the acetate piece to the front of that strip of the front panel that was left using THIS strong adhesive. I covered it with a strip of gold cardstock on top, sandwiching in the acetate piece.
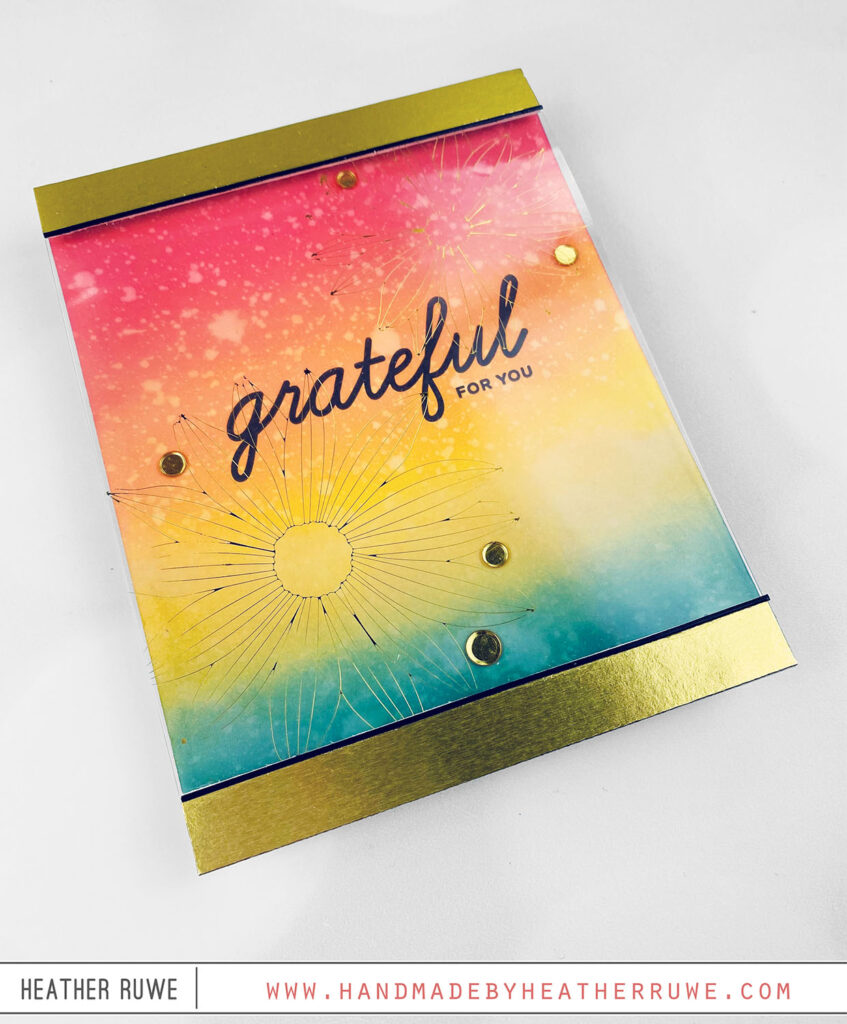
I did the same thing to the bottom. I sandwiched the acetate between a white 1/2 strip and a gold one. I finished off those pieces with a thin strip of black cardstock cut with THIS die.
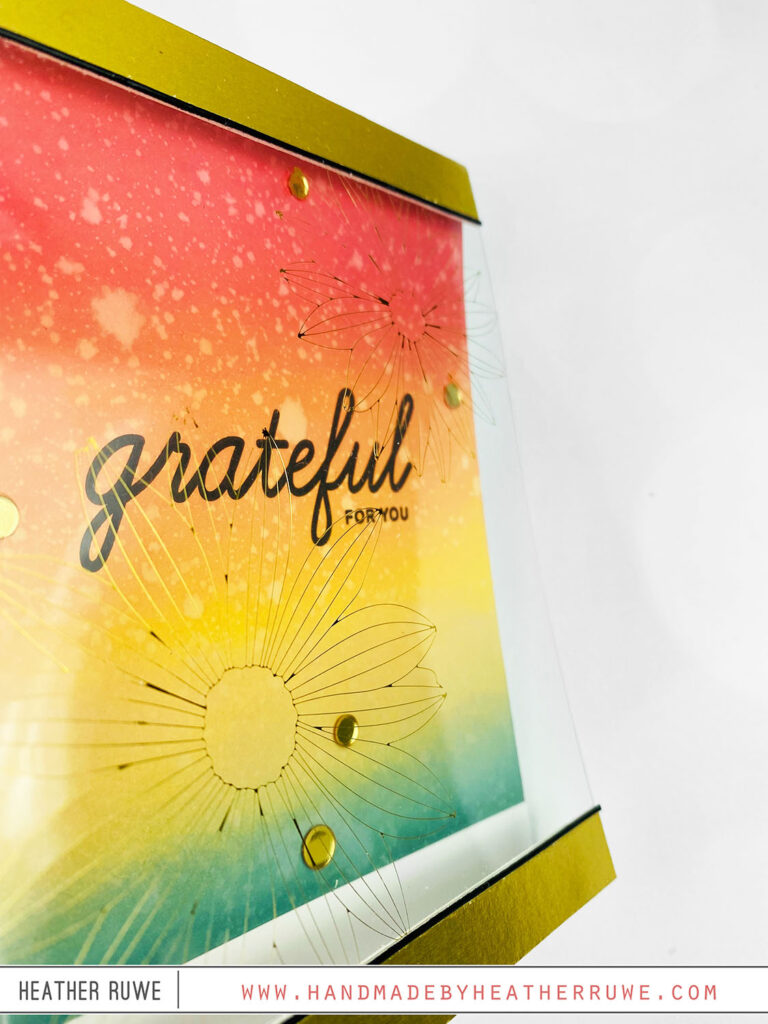
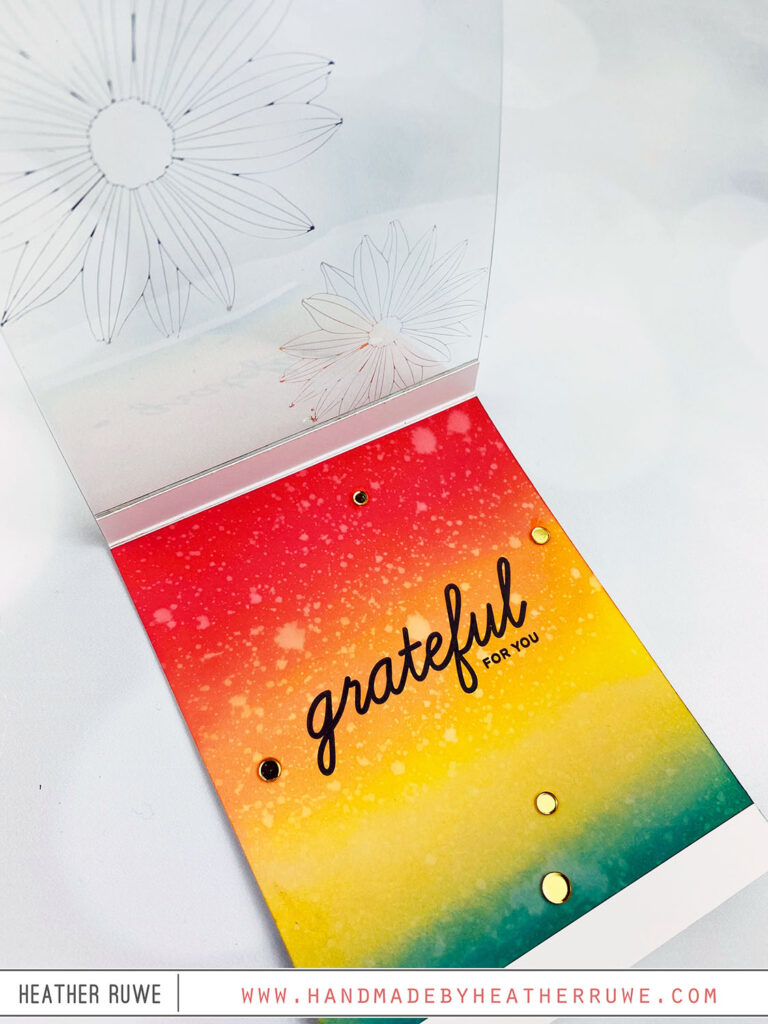
For the inside, I ink blended a panel using a few Distress Oxide inks. I spritzed the panel with water to add some texture. Once it was dry, I adhered it to the inside of the card. I stamped a sentiment on the ink blended panel using black pigment ink in the center of the flowers on the acetate front. I added a few sequins on the inside that were placed with the front of the design in mind. I wanted the sequins to be on the inside instead of the outside to hide the adhesive. I finished off the card by adding the last white strip to the inside bottom of the card for a place to write a sentiment to the recipient.
I hope this inspires you to create a hot foiled acetate front to your card.
Thank you so much for visiting. Happy crafting!
LINKS TO SUPPLIES USED:
(Affiliate links used at no extra cost to you. Thank you for your support.)
September 23, 2022
This is so so pretty, Heather!