
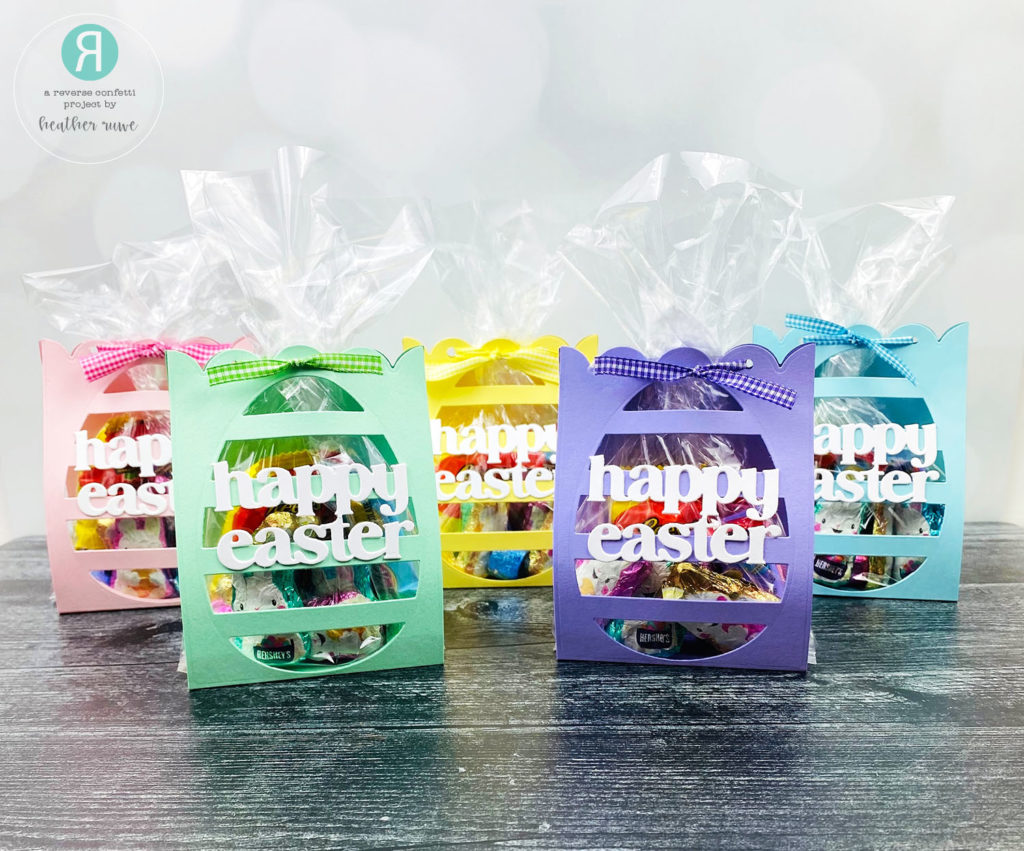
Hello there, crafty friends. I’m excited to be part of THIS blog hop and have some fun treat bags to share that I made for my son’s teachers…
VIDEO
You can watch the video on how I created these treat bags HERE or click on the video below…
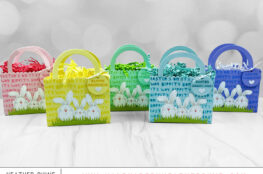
To create these bags, I started by cutting the scalloped die from the Scalloped Bag & Tags Creator Confetti Cuts from blue cardstock. You will need a total of three of these panels. Next, I die-cut the Big Egg Confetti Cuts from one of the scalloped panels. I chose this die because it cuts slits that I thought would make a great window so you can see the treats inside…

I needed to create a piece that made the bag wider and hold the candy better so I cut down one of the scalloped panels at 3 inches. I scored each side at an half of an inch. These two scored sides will attach the two remaining scalloped panels together. I die-cut the bottom of the egg die in the center of one of the scored panels. I did this so that when I adhered it behind the egg window panel, it will line up and you won’t be able to see it. So after the egg panel piece is adhered to that scored piece, I adhered the solid scalloped piece to the other scored piece. I held the top of the scallop pieces together and punched two holes for the ribbon to go through.
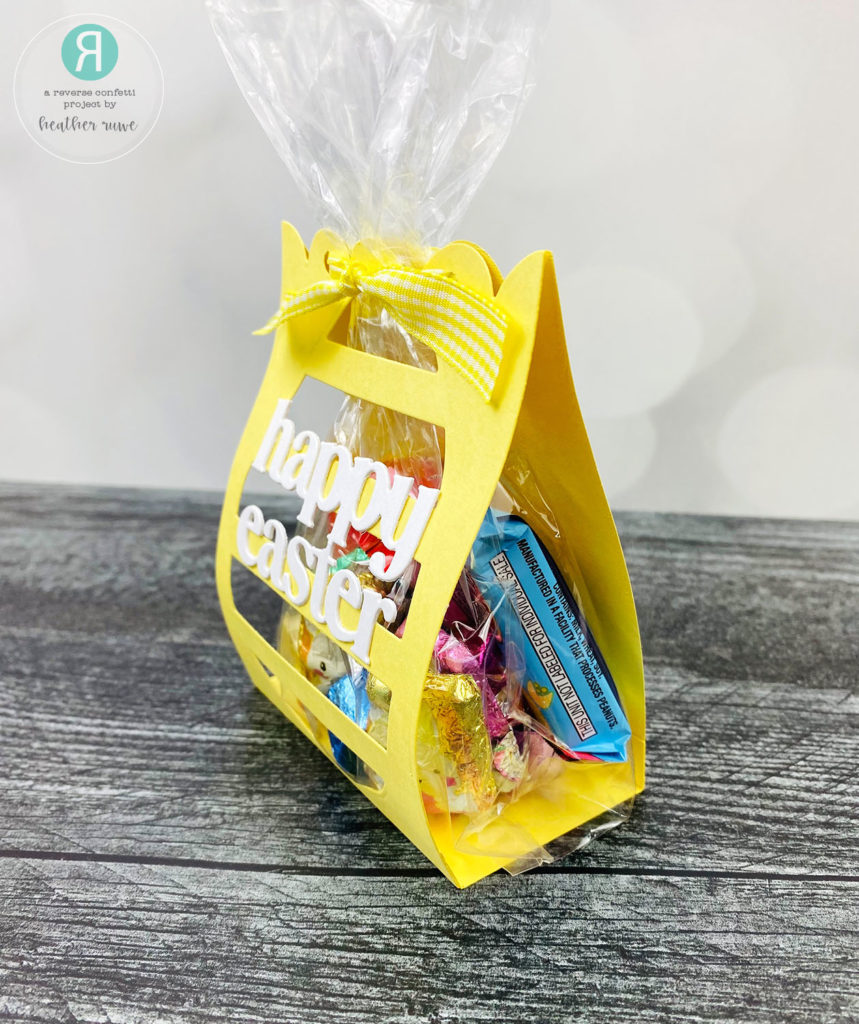
I filled up a clear treat bag with some easter candy and twisted it a few times. I did not secure it close because the Easter Treat Bag will do that. I placed the candy bag in between the two scalloped panels and pushed a piece of ribbon through the back holes. I tied it in a double knot in the front to secure the cardstock as well as the candy bag. This also makes it really easy for the recipient to get access to the candy. They simply untie the bow and it will open up the cardstock and the candy bag that isn’t sealed shut.

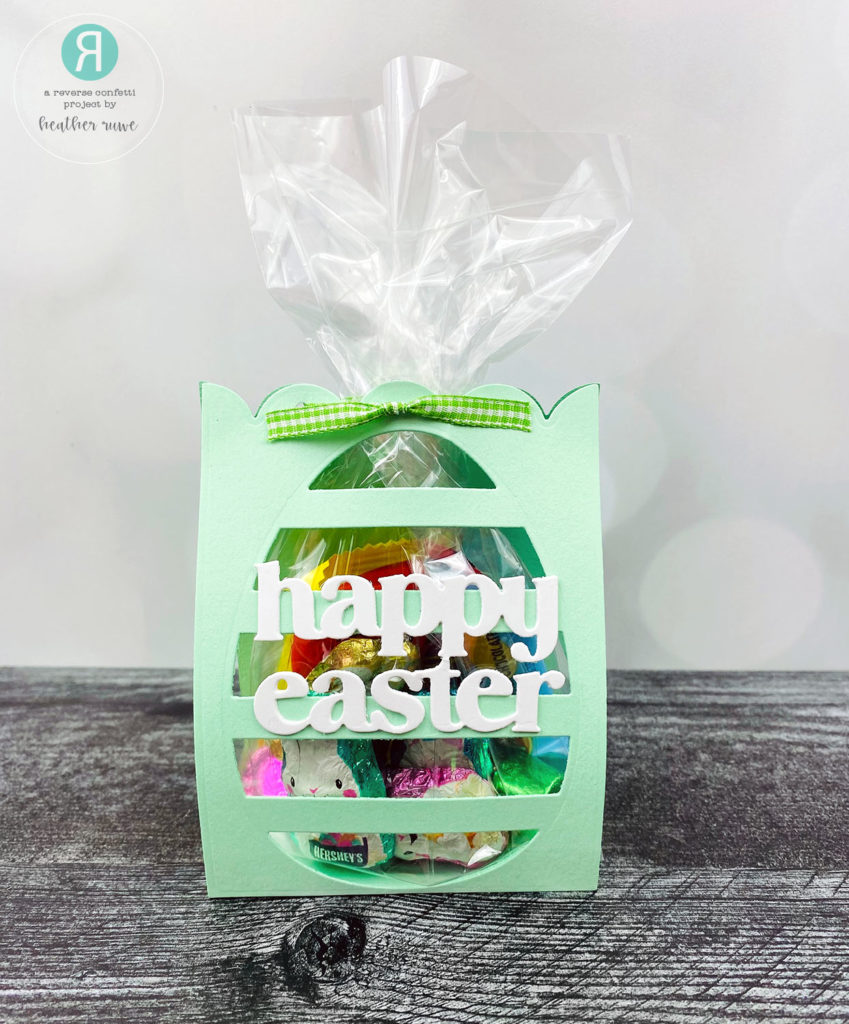
For a final touch, I die-cut the happy easter word die from the Easter Cover Panel Confetti Cuts twice from white cardstock and adhered them together. I adhered it to the front of the treat bag along the solid pieces of the window. 
Also, I decided to keep the back side of the treat bag plain but you could add more stamping or a written message.

Here’s a closer look…

Also, I decided to keep the back side of the treat bag plain but you could add more stamping or a written message.
I hope this has inspired you to spread some kindness and create one of these quick and easy treat bags to give to someone special. I added candy to mine but there are so many possibilities. Maybe a small stamp set and mini inks or even some cute socks. You can also create these for any occasion and they would make great party favors too!
BLOG HOP
There’s much more inspiration to see…
There’s much more inspiration to see…
Thank you so much for visiting today. Happy crafting!
P.S. Check out this great sale!…

LINKS TO SUPPLIES USED:
(Affiliate links used at no extra cost to you. Thank you for your support.)
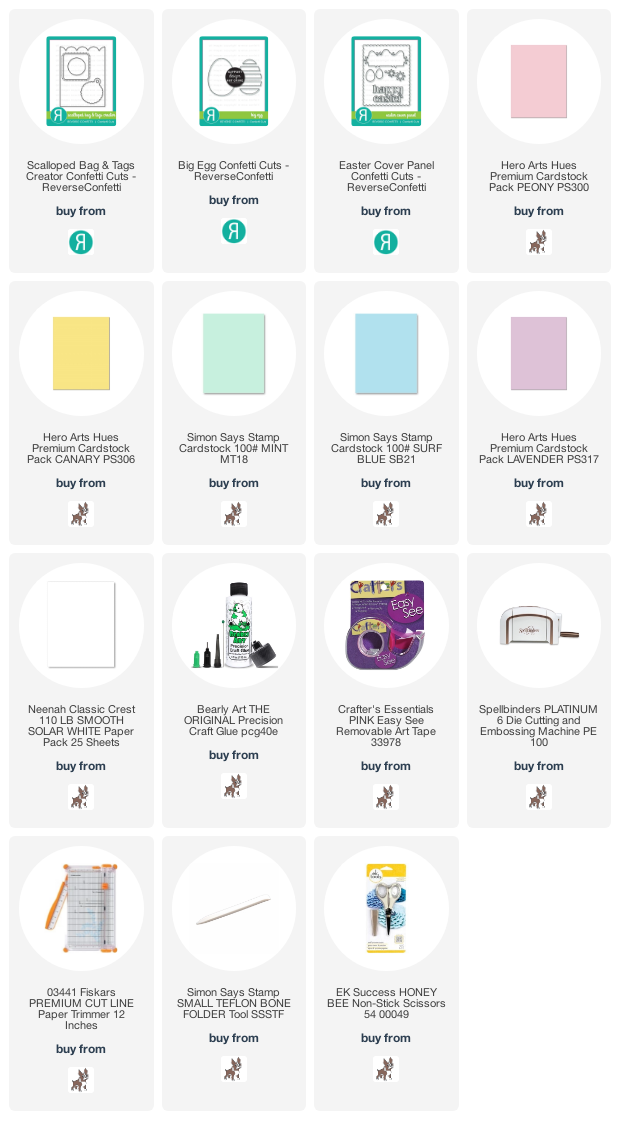
(Affiliate links used at no extra cost to you. Thank you for your support.)

April 8, 2022
What a sweet idea. Love all the color and it will be much appreciated by his teachers I’m sure. Great job and TFS this cool idea!
April 8, 2022
Love these Heather!