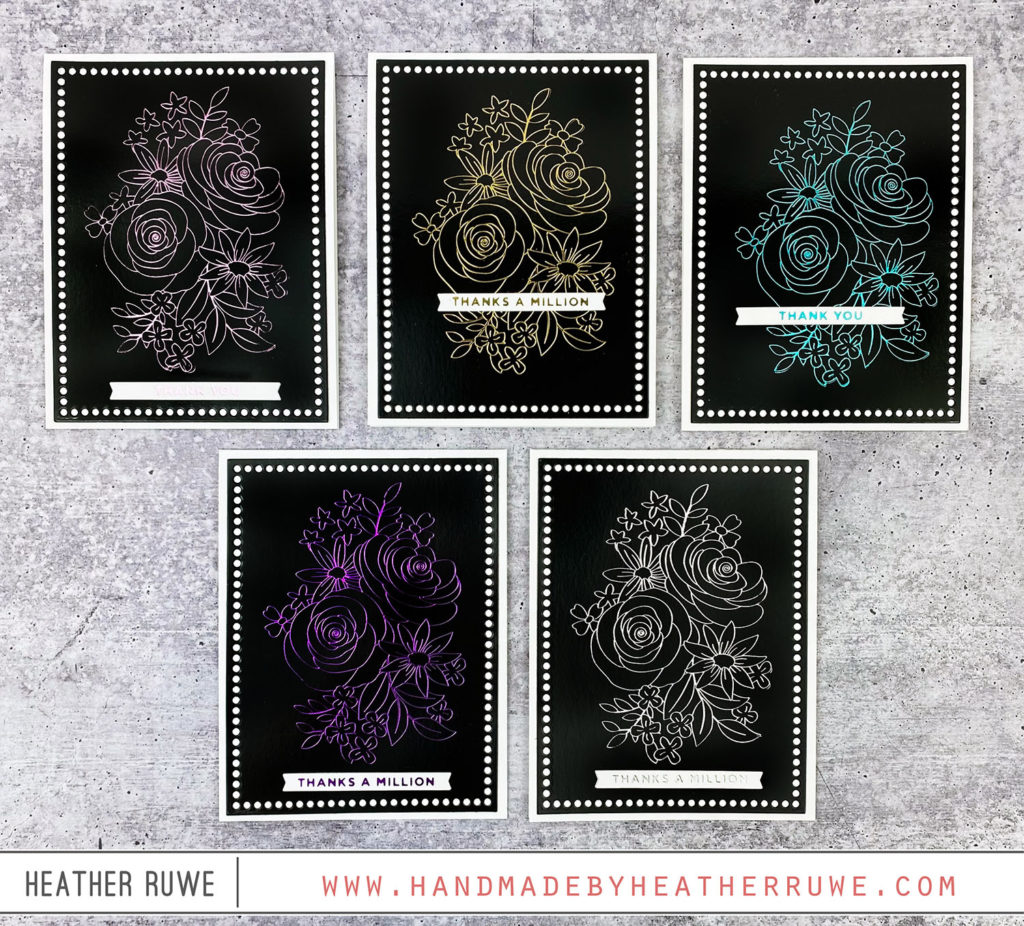
Hello, crafty friends. I’m excited to be part of THIS Blog Hop celebrating THIS new release. I have a card set to share that features hot foiling on black glossy cardstock… Now I am late to the hot foiling party and just started doing hot foiling on my projects and absolutely love it. I’ve been mainly using white paper for all my foiling and wanted to switch it up so I tried it on black glossy cardstock and fell in love with the result.
VIDEO
You can watch the video on how I created these cards HERE or click on the video below…
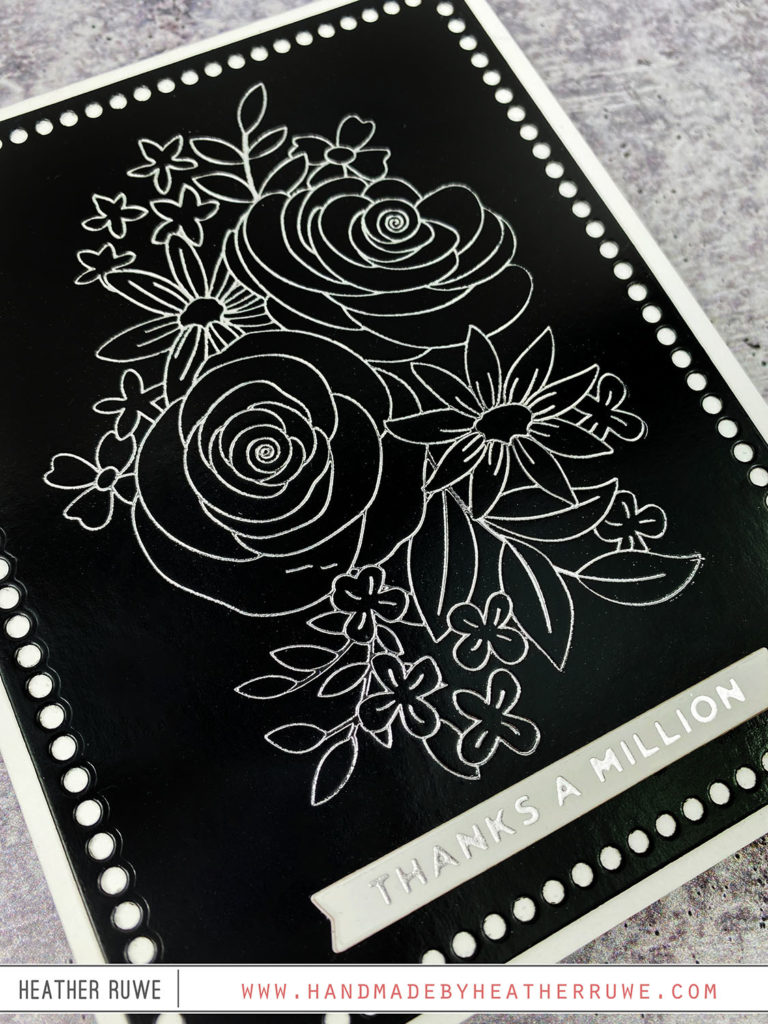
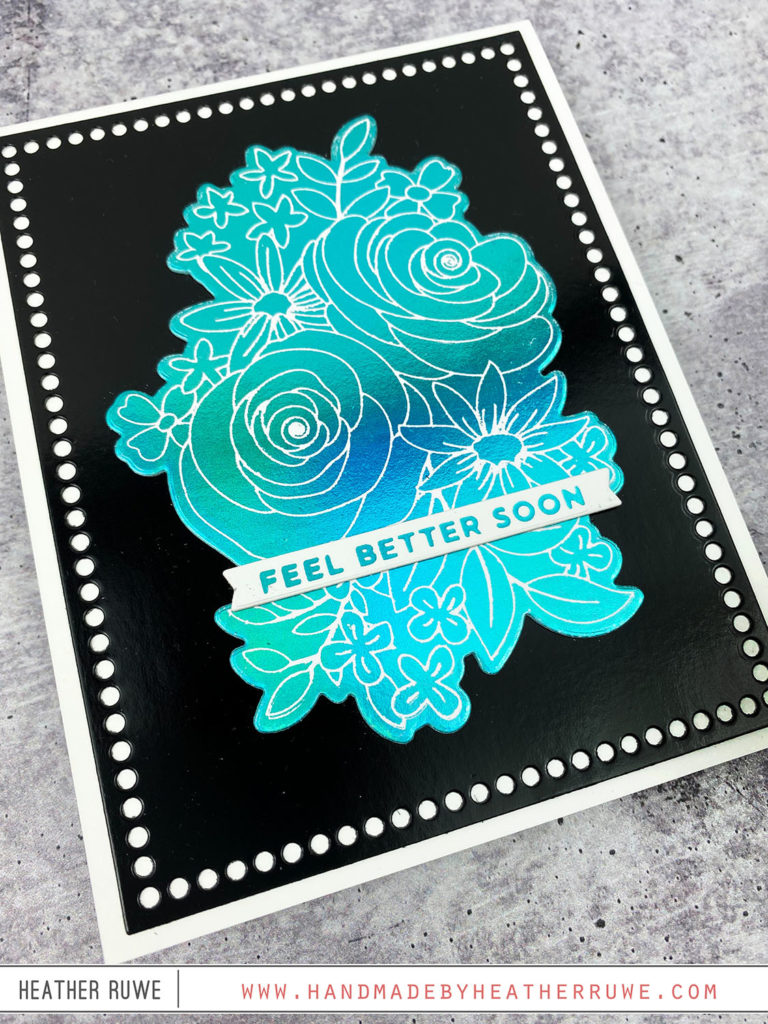
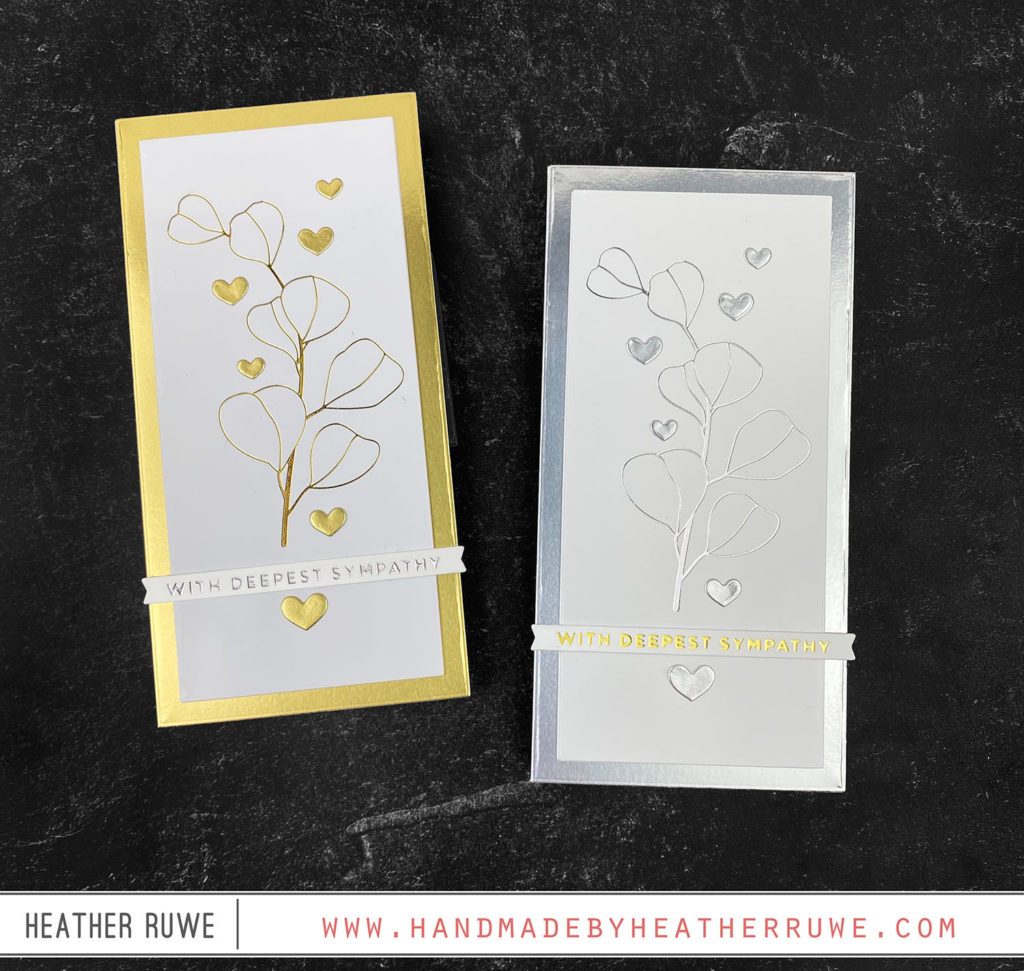
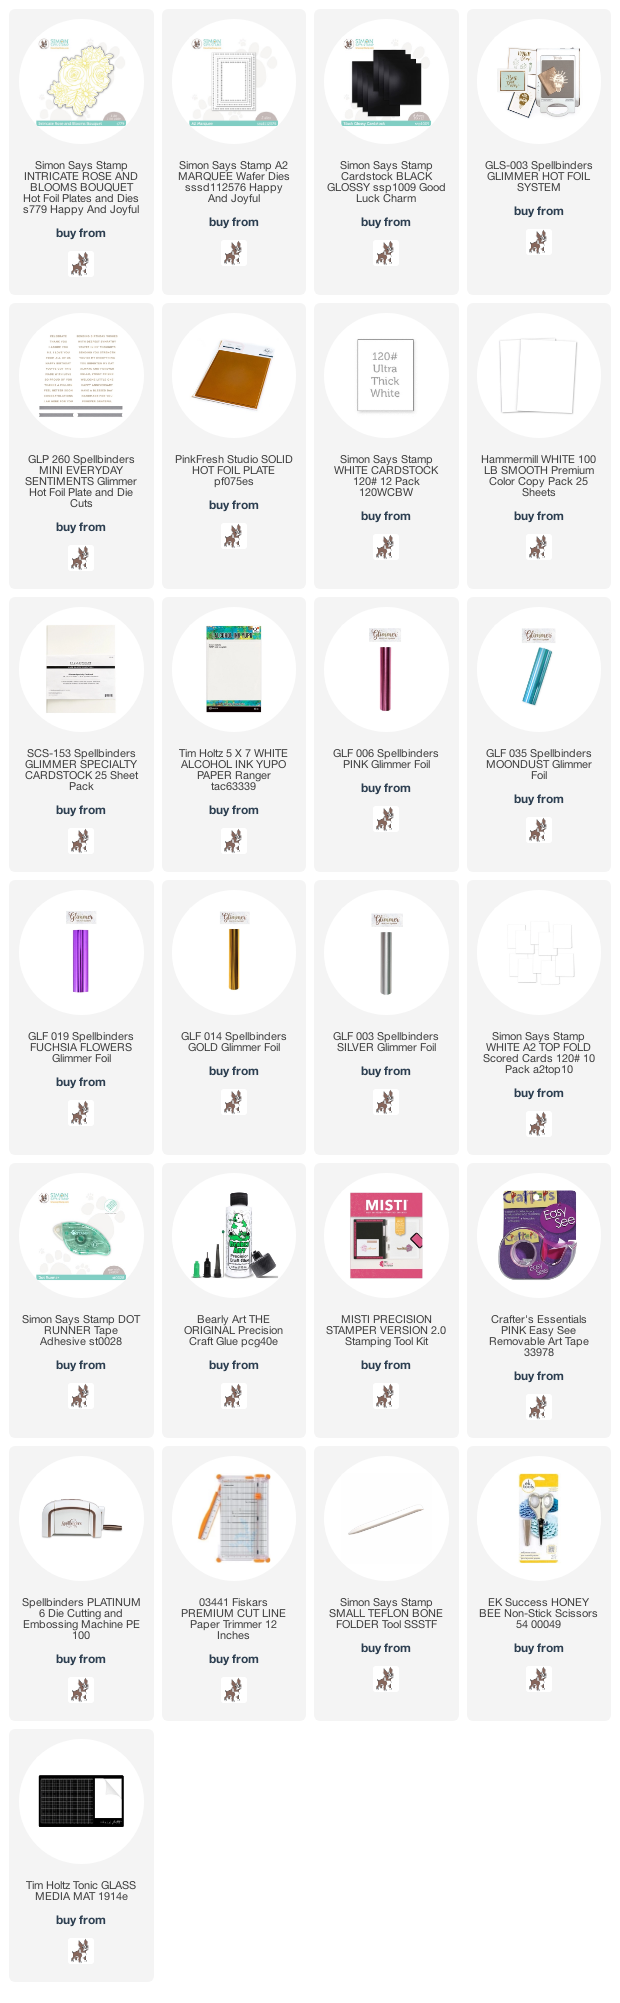
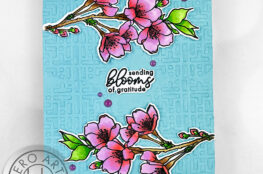
To do hot foiling, you will need some type of hot foiling machine along with a compatible die-cut machine. The combo I use is the spellbinders glimmer hot foiling machine along with the spellbinders platinum 6 die-cut machine. I laid down the Intricate Rose and Blooms Boquet hot foil die on to the platform with the design facing up.This die comes with he hot foil plate die as well as the outline cutting die. Next, I laid down a piece of Moondust glimmer foil on top. Make sure the pretty side of the foil touches the pretty side of the die. Next, I laid a piece of black glossy cardstock face down on top of the foil. I cut a piece larger than what I needed and was not worried about centering the design because I will be die-cutting around it. Next, I hit the timer button. It will flash until the platform is heated and ready and then will go to a solid green. Once it stops flashing, I pull the platform from the base then I add the two plates on top before running it through my die-cut machine. The reason I pull the platform out first before adding the plates is I find it really helps with shifting and getting a clean image. The die-cut is not cutting anything, it is just applying pressure. After you remove it from the die-cut machine, you can peel away the foil to reveal the hot foiled image. I just love how it looks on that dark black glossy cardstock.
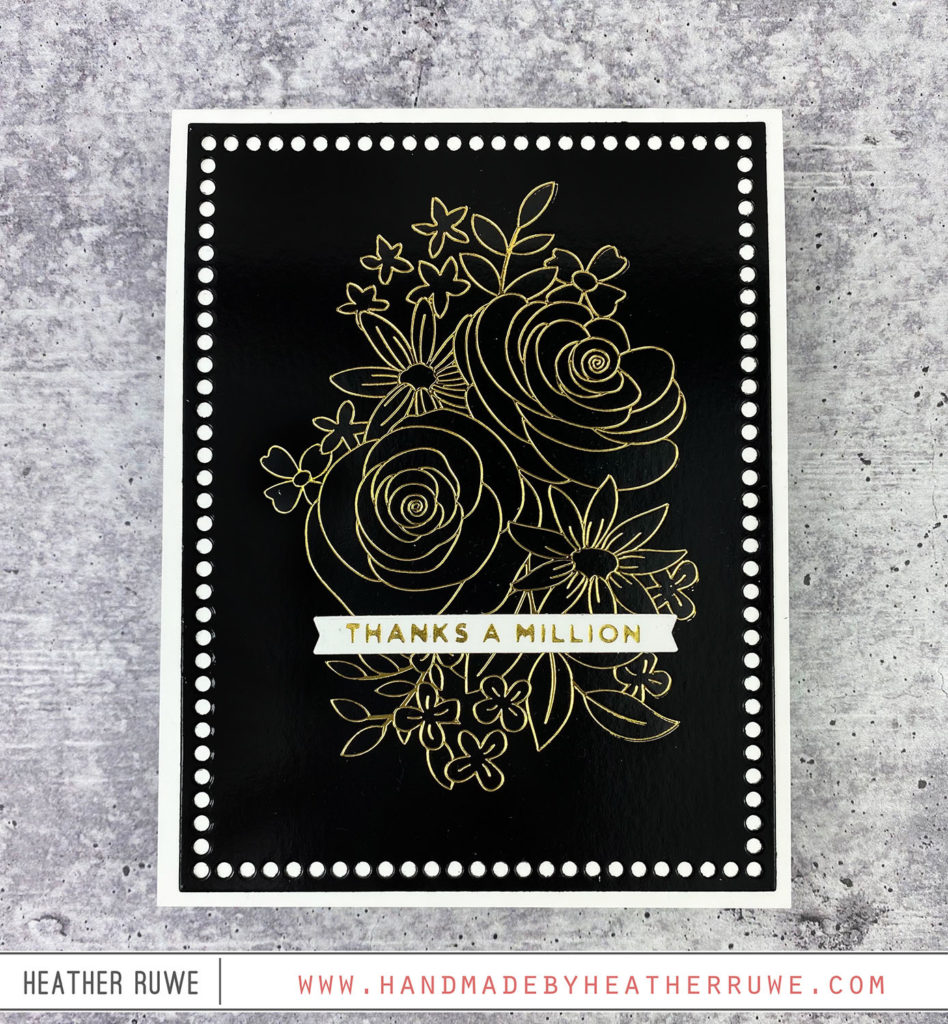
To turn this piece into a card, I die-cut it using the largest die from the A2 Marquee die set. I like to add a piece of thin copy paper on top of any specialty cardstocks or foiled pieces when I die-cut to keep the panel clean from any indentations that the die-cut machine plates might have on them. I also used that die-cut to center up my image. I finished the card off camera and added a foiled sentiment from this Mini Everyday Sentiments glimmer plate set from Spellbinders. I did the same foiling process but laid many sentiments out at once. I don’t worry about them being straight because I used the banner dies included in the set to cut them out.
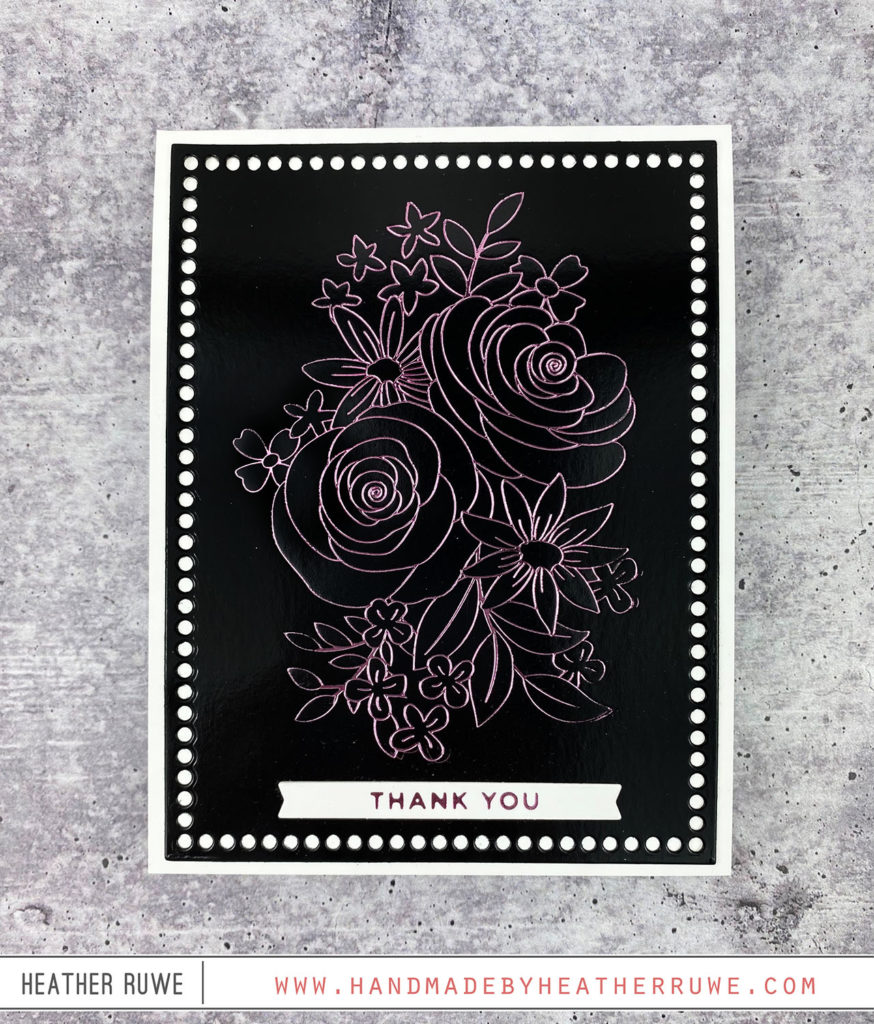
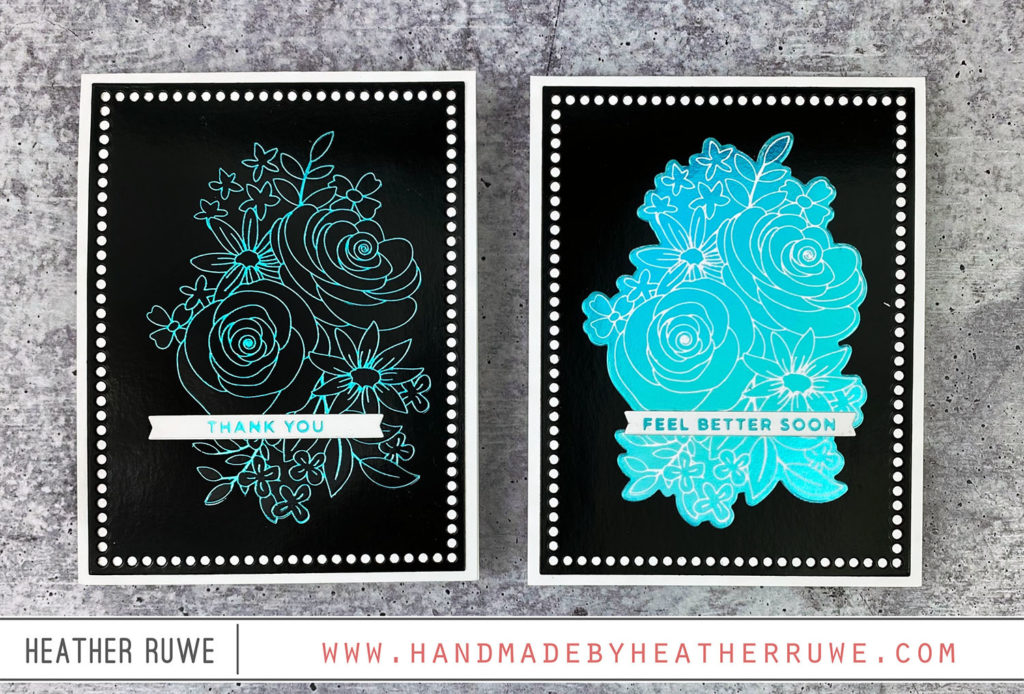
Now let’s use up that negative piece of foil. For this, you will need to repeat the same process but use the Solid Hot Foil Plate. This plate allows you to not waste any of those negative pieces of foil. So first, I laid on the solid hot foil plate, then the negative piece of foil from the first card on top. Again, make sure the pretty side of the foil touches the pretty side of the plate. Then I laid a piece of white cardstock on top. I’m loving using the 120 lb. cardstock from Simon Says Stamp for hot foiling. I hit the timer button and once it stops flashing and turns solid green, I remove the platform from the base just a bit and then add my two top plates. I place it in the die-cut machine and check out the beautiful result…
Also, There is a clear film on top that you need to remove when doing your negative foiling. Once that film was removed, I used the outline cutting die from the same set as earlier to cut out the image. Oh, and don’t throw out the remaining foiled piece around the die-cut portion. I am going to use this to die-cut tiny hearts and use as embellishments.
Here they are side by side. I love techniques that result in multiple cards…
I also wanted to share the white cardstocks that I’ve had success with when hot foiling. As I mentioned above, I am loving Simon Says Stamp’s 120 lb. cardstock. I also love Hammermill’s cardstock, Yupo paper, and Spellbinders Glimmer Specialty Cardstock. They have all given me great results. I will link to all of those along with the supplies used to make today’s cards below. You can also do foiling with colored cardstock as well but you have to experiment with those as some work better with hot foil than others.
BLOG HOP
There is much more inspiration to see. Click HERE for the next stop on the hop. Click HERE to start at the beginning of the hop.
GIVEAWAY Simon is so generous and giving away a $25 coupon to every stop on the hop so be sure to leave comments along the way for your chance to win. Simon Says Stamp will announce winners on their blog on Wednesday. Good luck!
Wait, there’s more…
Use the code GRDPTY to receive a Free Garden Party sticker sheet. Valid while supplies last or until 4/24 at 11:59 EST.
Thank you so much for stopping by. I’ve linked to the entire new release below as well as products used on today’s cards.
LINKS TO ENTIRE NEW RELEASE:
(Affiliate links used at no extra cost to you. Thank you for your support.)
LINKS TO SUPPLIES USED ON TODAY’S CARDS:
(Affiliate links used at no extra cost to you. Thank you for your support.)


April 27, 2022
so elegant!