Hello, crafty friends. I’m back today with more inspiration using THIS new release.
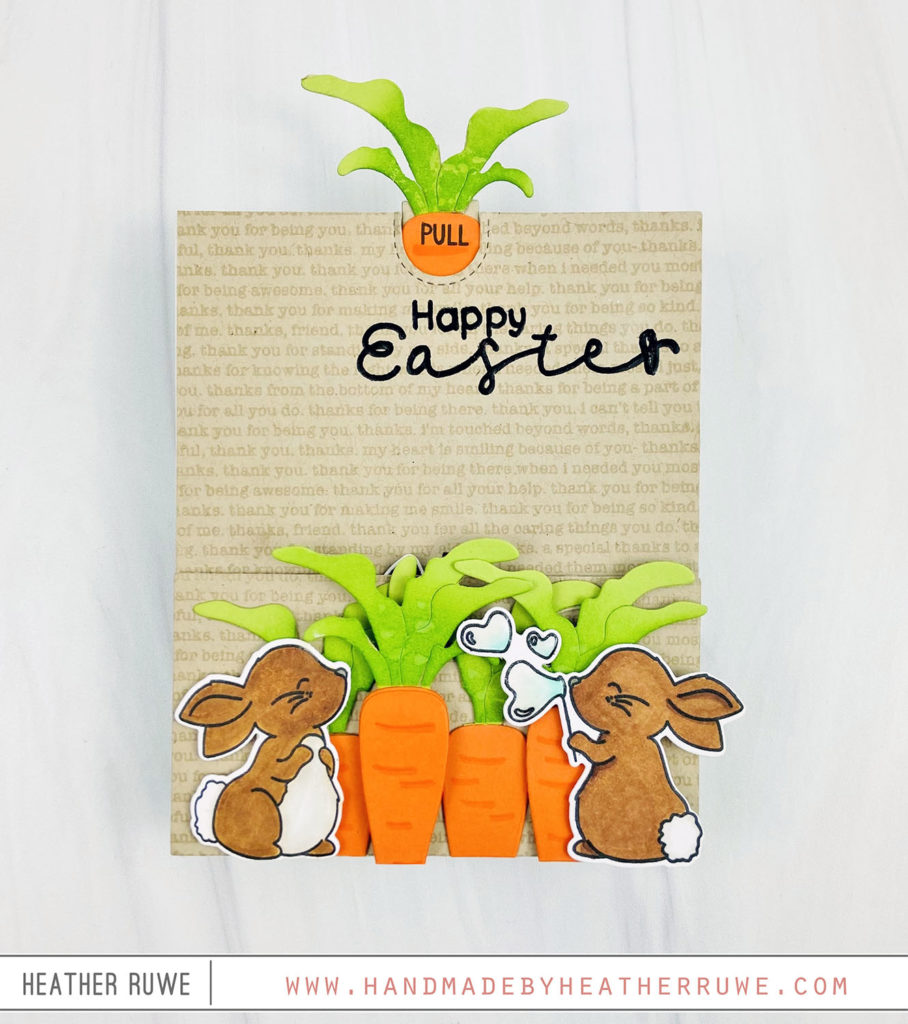
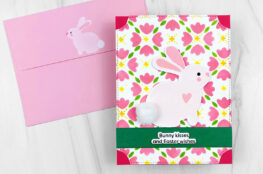
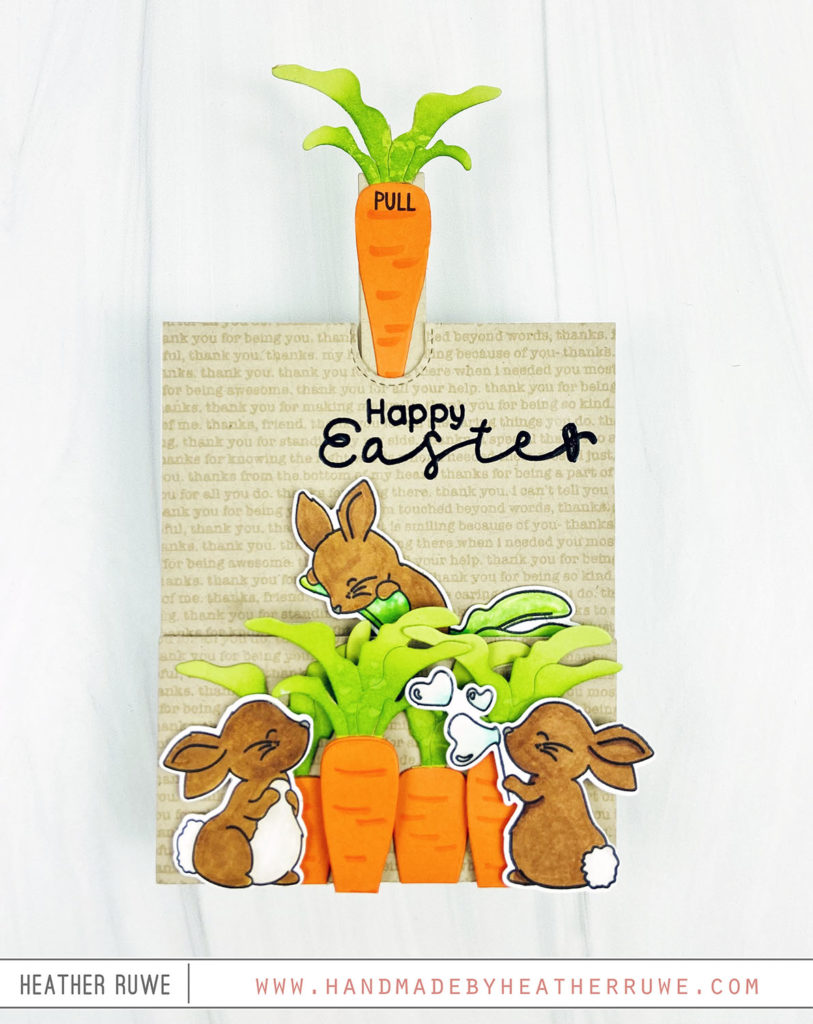
I started by stamping two kraft panels using THIS text background with clear ink. I used THIS interactive die to die-cut all the interactive elements to the card. I highly recommend watching THIS video when assembling all the pieces. It makes it so easy. I die-cut several of THESE carrots and added a bit of ink to the green and orange parts to add some interest. I stamped and colored the bunny images from THIS stamp set and used THESE coordinating dies to cut them out. I added them to the card along with a sentiment from the same stamp set.
Speaking of the sentiment, I forgot to add it until my card was completed. It didn’t stamp well because of all the layers of the completed card. Instead of starting over, I used THIS pen and just traced the letters to make them darker and fix any mistakes. As Tim Gunn says, “Make it work.” 🙂
I adhered one of the bunnies to the pull tab mechanism. When it’s closed, the bunny is hidden…
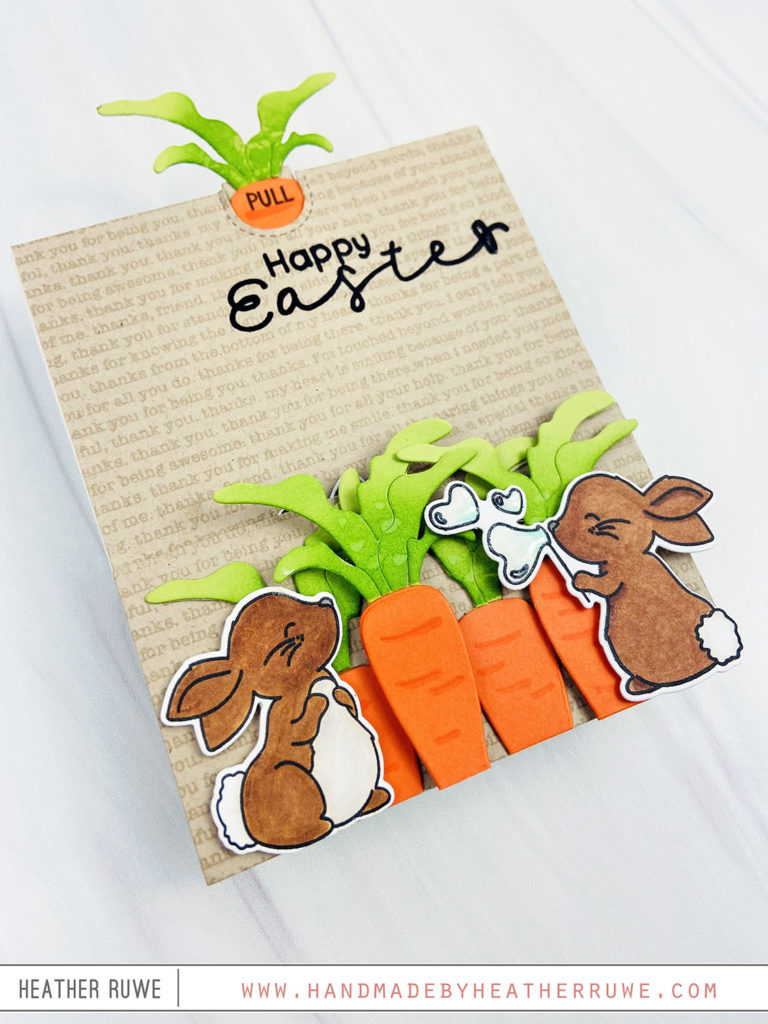
I added another die-cut carrot and stamped “pull” from THIS stamp on it to let the recipient know what to do. When the tab is pulled, a bunny appears to complete the scene…
I hope this inspires you to create an interactive card with a hidden surprise.
I’ve linked to the entire Hello Beautiful Release below as well as supplies used on today’s card.
Thank you so much for joining me today. Have a great day.
LINKS TO ENTIRE HELLO BEAUTIFUL RELEASE:

LINKS TO SUPPLIES USED:
(Affiliate links used at no extra cost to you. Thank you for your support.)