Stretching your Supplies: Crafty Cart Card

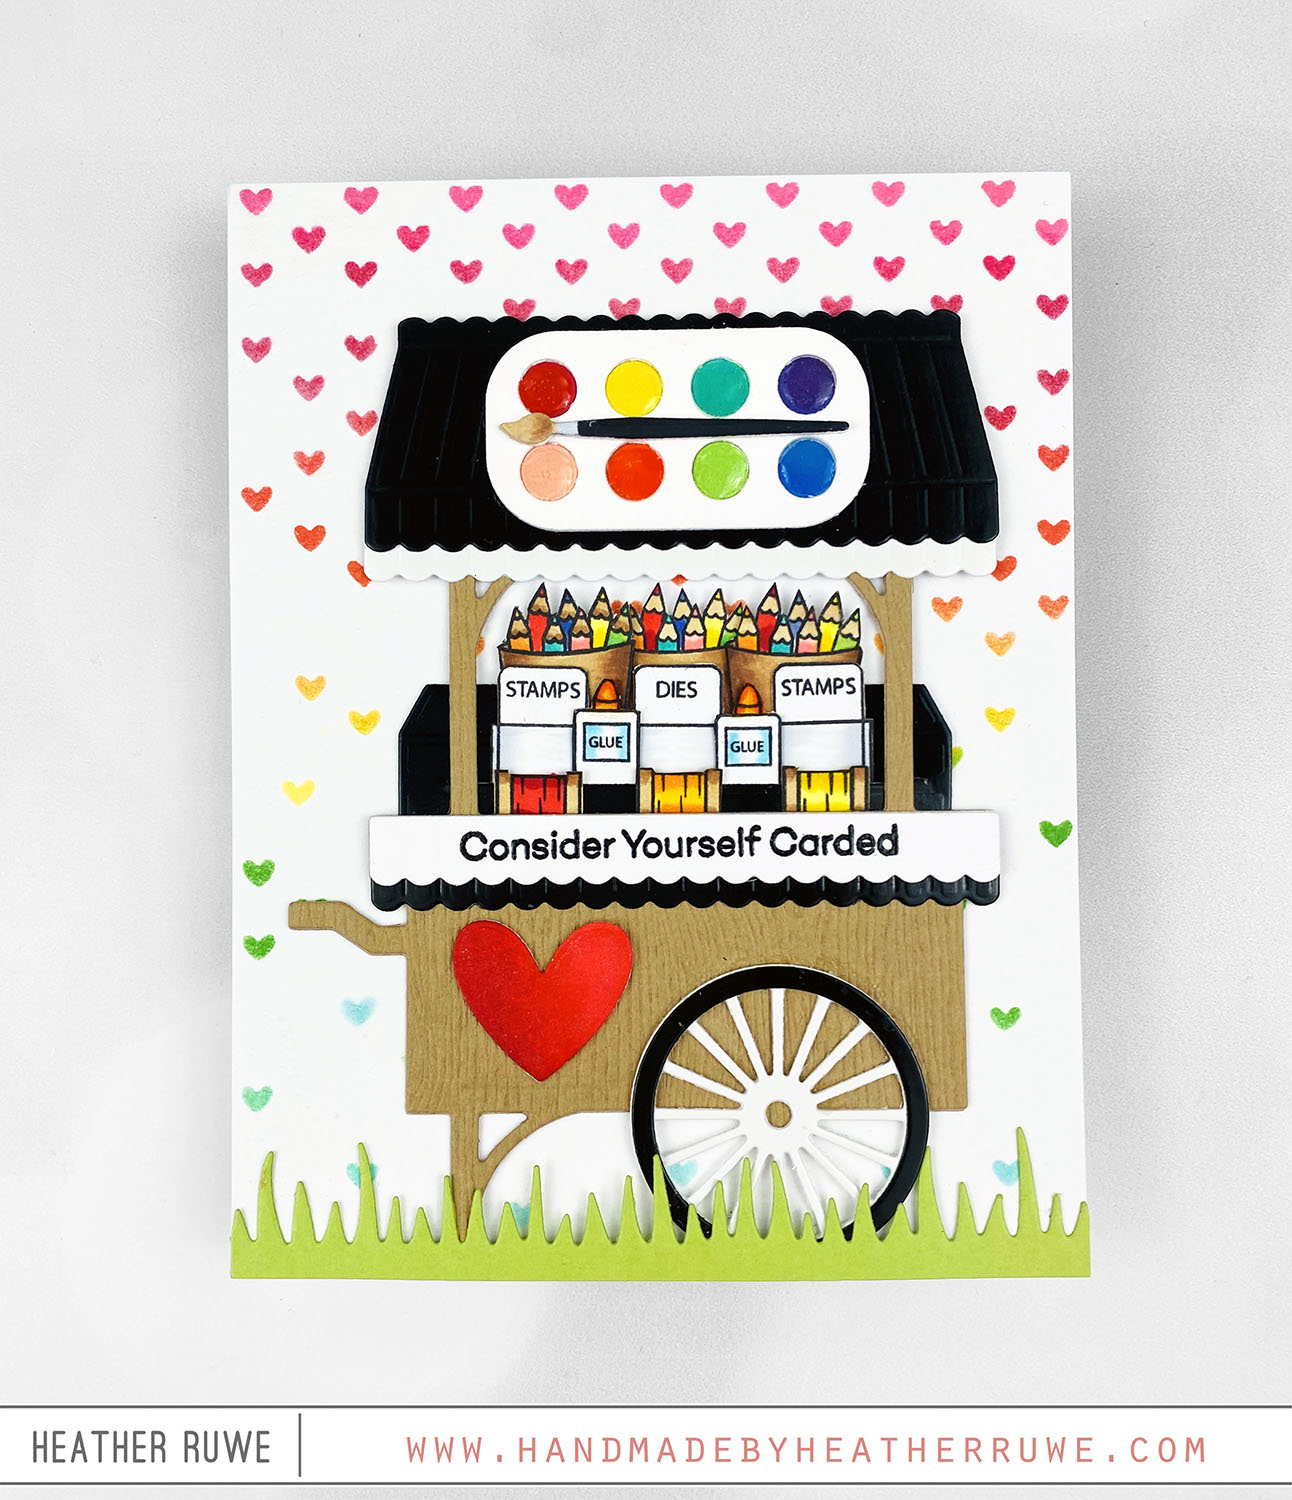
Hi there, crafty friends. Today’s card was so fun to make. What crafter wouldn’t love shopping at this crafty cart!? I started by creating the background. I applied a rainbow of inks through THIS stencil on a piece of white cardstock. I die cut THIS cart from black and white glossy cardstock and woodgrain cardstock. I wanted to transform it to a crafty cart. I stamped, Copic colored, and cut out the craft items...

Citrus Slice Background

Hello, crafty friends. Today’s card share features a fun and sparkly background… To create this card, I die cut THIS background die using black glossy cardstock and glitter cardstock. I used the pattern to add THESE die cuts on top cut from white cardstock. I inlaid the glitter cardstock in the openings to create lemons, oranges, and limes. I finished it off with a sentiment from THIS stamp set. It’s hard to see in...

More Diecember Inspiration

Hi there, crafty friends. I’m back with more inspiration from THIS new DieCember release… I started by die-cutting the Detail Tapestry Plate on a white panel for the background. I love that it pierces a pattern instead of cutting. I embossed the Mini Slimline Lattice die on a piece of kraft cardstock using an embossing mat in my die-cut machine. I cut it down and added a thin black mat to three sides and...

Thankful For You

Happy Thanksgiving, crafty friends! I have a shaped card to share today. I love creating these as they are unique and unexpected. To create this card, I stamped the wreath image from the Thankful Wreath Stamp set using black ink on white cardstock. I used the coordinating die to cut it out (the coordinating dies will be released soon!) and colored the entire image using Copic Makers. I used the coordinating die to cut...

Holly Jolly Blog Hop

Hi, crafty friends. I’m excited to be part of THIS blog hop celebrating THIS new release. I have two cards to share that have a peek-a-boo opening that holds a gift… For the first card… I laid out sentiments from THIS, THIS, and THIS stamp set on a gray A2 panel in my MISTI. I used THIS to help me align all of the stamps straight. I stamped all the sentiments at once using...

My Favorite Things STAMPtember 2020 Collaboration

Hi, crafty friends. The STAMPtember party continues with THIS exclusive stamp collaboration with My Favorite Things… I adhered a piece of THIS patterned paper to the front of THIS card base. I die-cut windows on the front of the card panel using THIS die repeatedly. Inside the windows and on the inside card panel, I stamped cat images from THIS stamp set. I colored them with Copic Markers. I finished off the card by...

Card Sharing Notes

Hello there, crafty friends. Today’s project idea is all about sharing handmade kindness… I stamped the sentiments from THIS stamp set on post it notes. I chose to stamp in coordinating ink colors for a tone on tone look. I can add these to the inside of cards, write my message, and the recipient can choose to remove the note and send the card on to a loved one. I love the idea of...

Stitching Panel Card Bases

Hi, crafty friends. I wanted to do something a bit different for today’s project so I created card bases from THIS stitching panel die… I die-cut it from three colors of card stock and folded it in half to create a smaller card base. They measure 3.5 x 5 in size and still fit nicely inside a regular A2 envelope. For the pink card, I pushed out all of the circles in the holes...

DIY Dessert Table Sign

Howdy, crafty friends. Today’s post is a bit different. I have a home decor/party sign to share. A friend of mine asked me to create a sign for the dessert table at her daughter’s bridal shower… I started by stamping the flower image from THIS stamp set on each side of a 5 x 7 pink card stock panel. For the majority of the sign, I die-cut THESE alphabet letters from THIS card stock....

Cheer and Joy Release Inspiration Week-Day Five

Hi, crafty friends. I’m wrapping up the Cheer and Joy Release Inspiration Week here on my blog with this card… I’m a big fan of THESE coloring cards, but wanted to change the design a bit. I started by die-cutting the birds using THIS die. I die-cut a piece of patterned paper using a larger die from the same set to mat behind the panel. I colored in the scene using THESE markers. I...