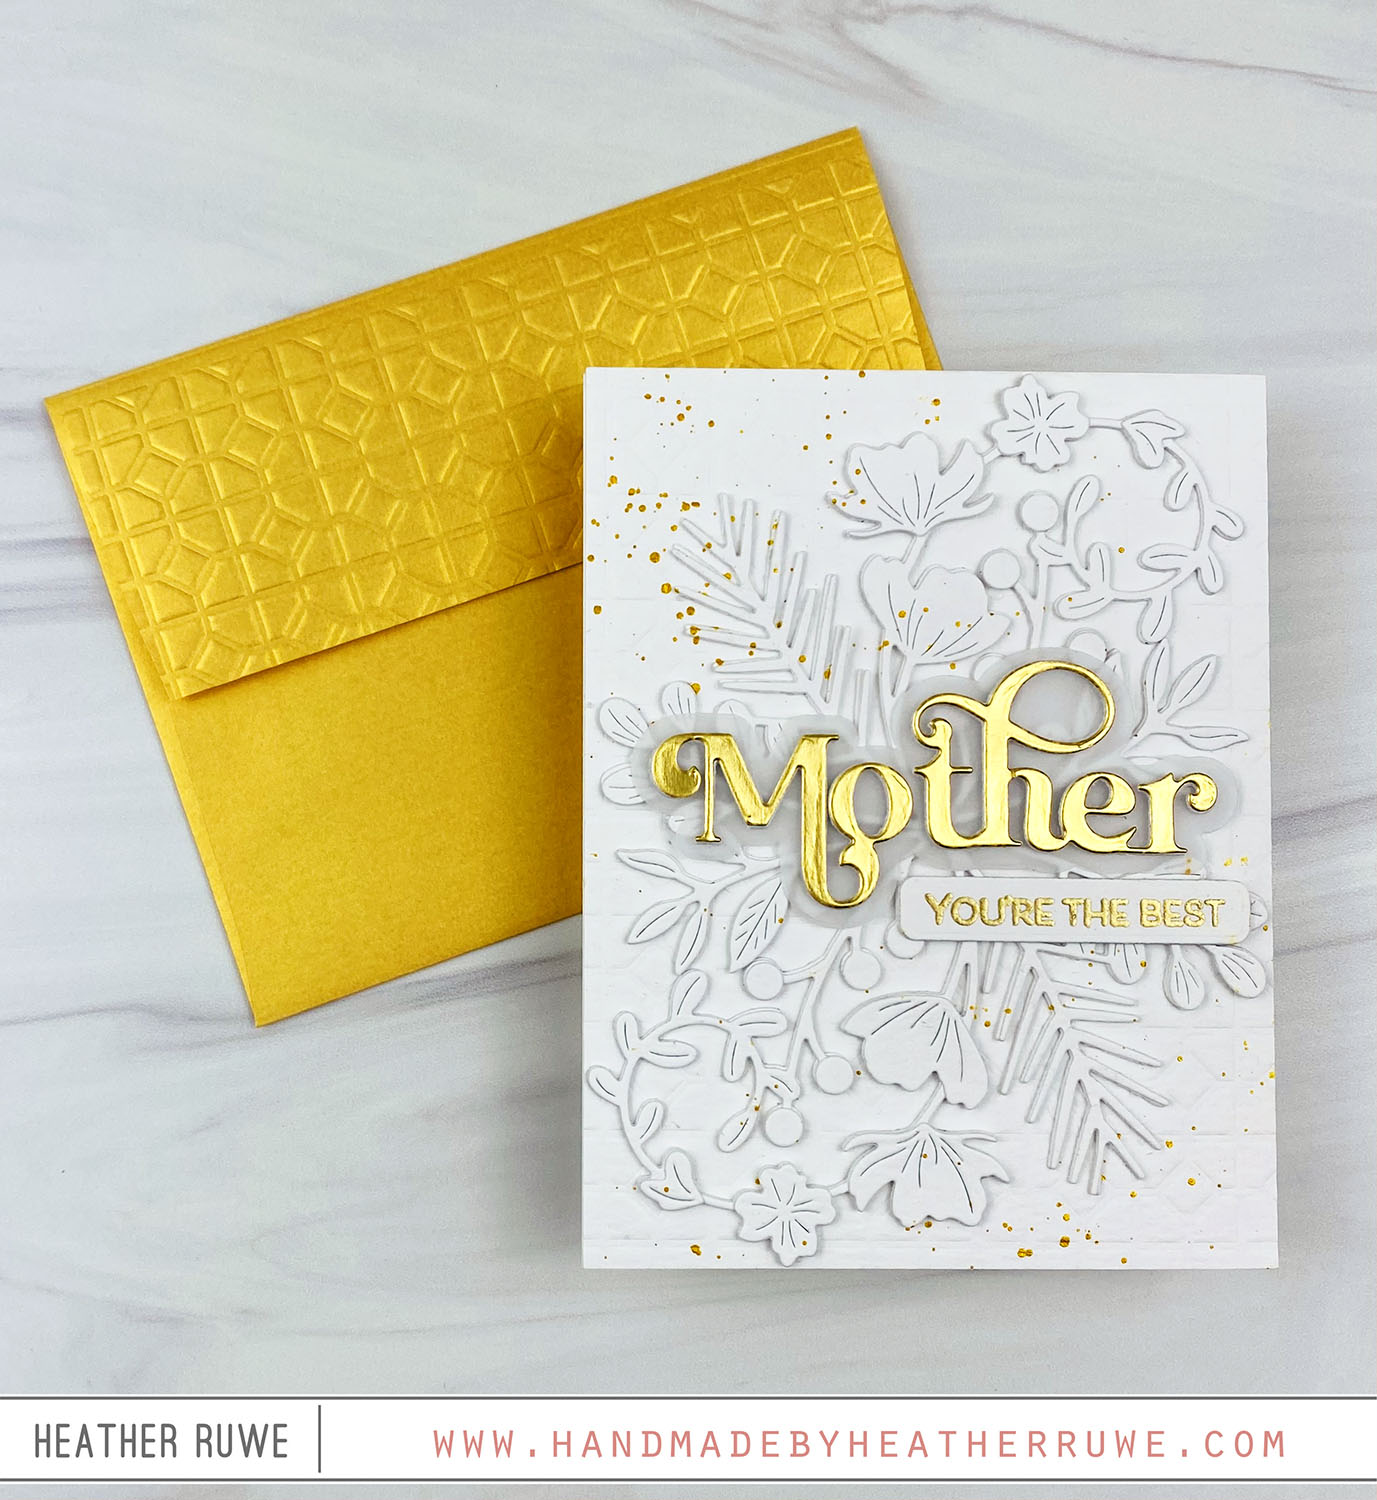
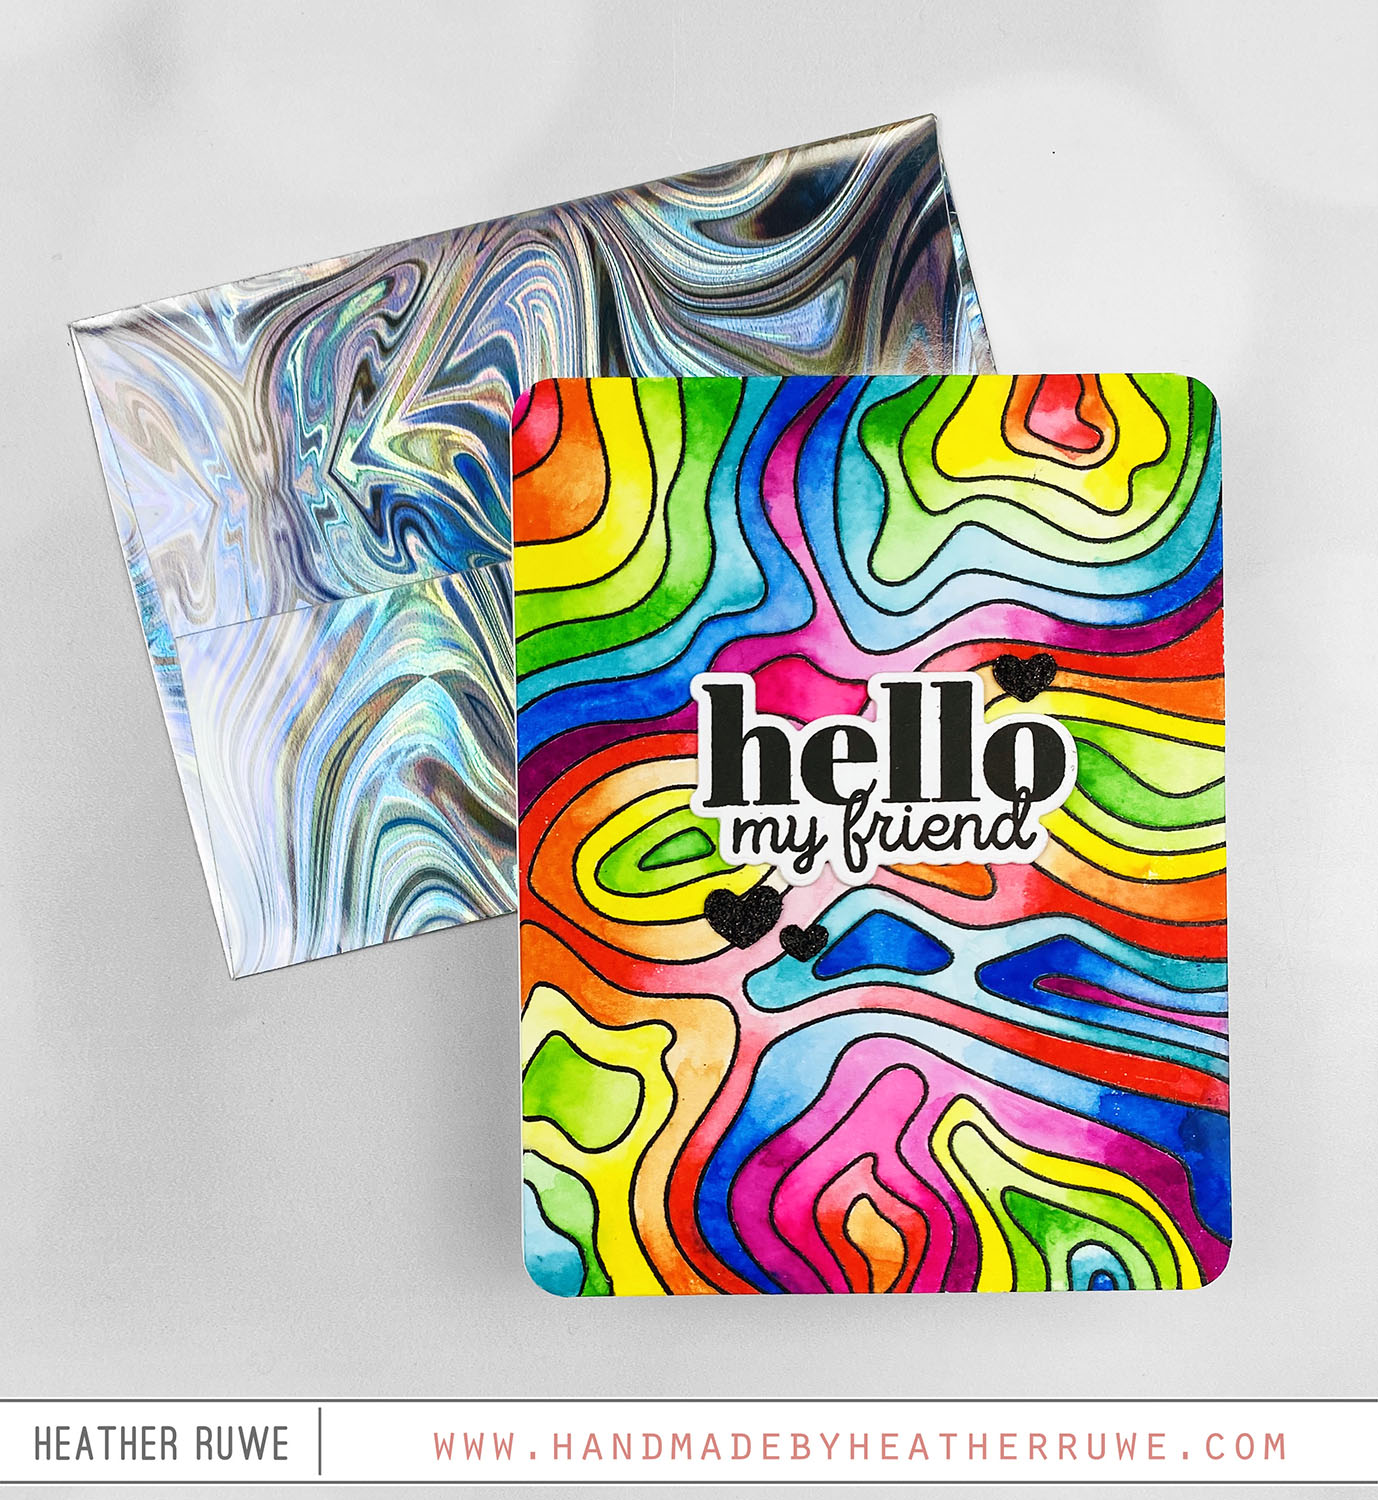
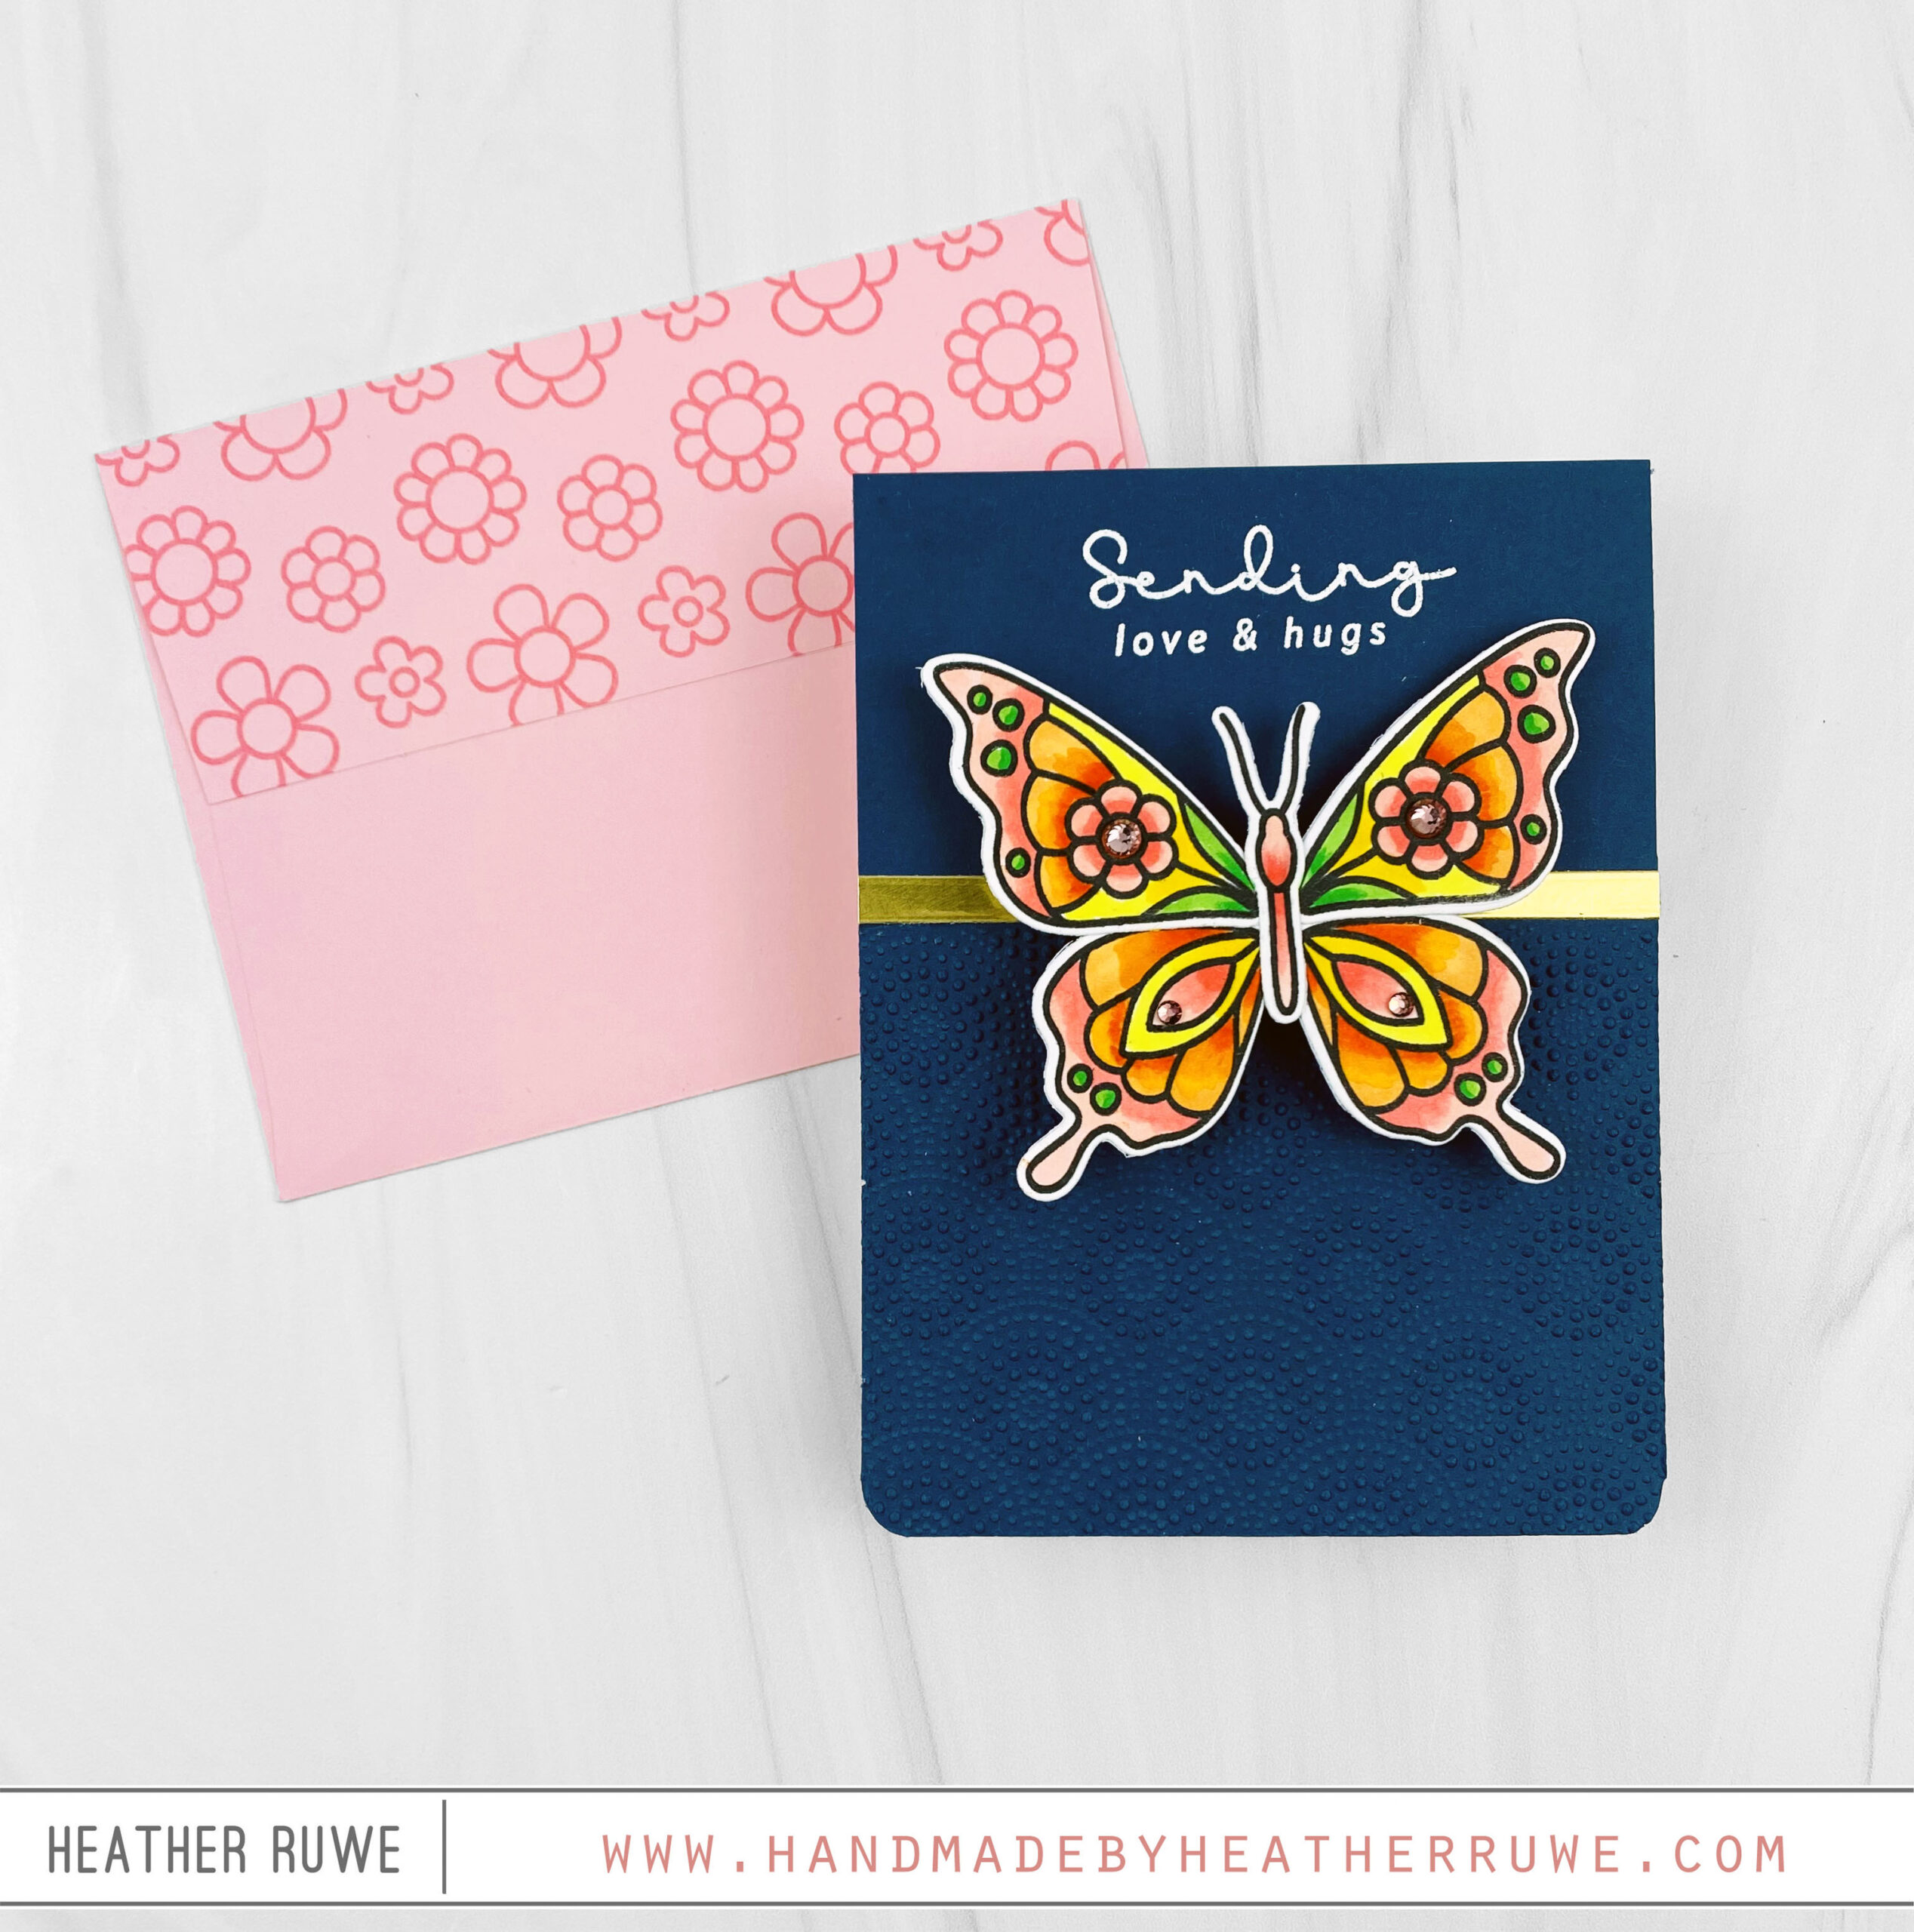
Tips for Masculine Cards

Hello, crafty friends. It’s Father’s Day so I thought it would be a good time to share some tips when creating cards for guys. First, let me tell you how I created today’s card… To create this card, I started by stamping an older background stamp ( on gray cardstock with gray ink for a tone on tone look. I stamped the rock border from THIS stamp set along the bottom to complete the...

Through the Window Card Kit

Hi, crafty friends. Today’s card features THIS new card kit… To create this card, I started by cutting the kit’s teal and cream cardstock with THIS die. I cut them and adhered the teal on top of the cream panel. I added a small strip of pink cardstock where they meet. I white heat embossed a sentiment from the kit’s stamp set along the bottom of the teal portion. I die cut one of...

Happy Graduation Shaker Card

Hi, crafty friends.I have a graduation shaker card to share today… To create this card, I cut THIS die from 5 pieces of black cardstock and adhered them to a piece of A2 sized red cardstock that I stamped THIS graduation sentiment on in the lower right corner. I added some embellishments and THESE stamped graduation caps inside the letters and then adhered a piece of acetate on top. I cut one more die...

Teacher Thank You Card

Hello, crafty friends. Even though summer is over, I always like to stock up on teacher thank you cards to have on hand for the upcoming school year. To create this card, I started by white heat embossing THIS background on kraft cardstock. I trimmed it down and added a white and black mat around it. I adhered the entire piece to a side folding note card. I stamped the same background on red...

Happy Bee Day Card

Hello there, crafty friends. Today’s my birthday so I thought I would share a birthday themed card… To create this card, I applied pink ink through a honeycomb pattern stencil (an older stencil from Honey Bee Stamps) on an A2 panel of white cardstock. I die cut a hexagon shape to create a window and added a stamp bee image from THIS stamp set behind it. I colored it in with Copics and added...

Moments in Time Release Blog Hop

Hi there, crafty friends. I have two cards to share today as part of THIS Blog Hop featuring products from THIS new release… To create these cards, I started with the background. I masked off a section of an A2 panel of white cardstock and blended three colors of Distress Oxide Ink. For the bee card, I blended Picked Raspberry, Wild Honey, and Squeezed Lemonade. For the second card, I blended Evergreen Bough, Peacock...

Moments in Time Release

Hello, crafty friends. Today’s card features THIS new release from Simon Says Stamp… To create this card, I started with the background. I stamped THIS background stamp on a purple A2 sized cardstock panel. I trimmed it down and added it to a gray note card. I adhered it to the bottom right of the card so the gray border would be on the left side and top of the note card. Next, I...

Mini Slimline Congratulations Card

Hi there, crafty friends. I have a mini slimline card to share today… To create this card, I started by blending Pink and Yellow Distress Oxide ink on the front of a mini slimline panel. I love the orange it creates where the two colors meet. I spritzed it with THIS spray for some shimmer and shine. Next, I stamped three bunnies from THIS stamp set on white cardstock and colored them with Copic...

Captured Joy Card Kit

Hi there, crafty friends. Today’s card features THIS card kit from Simon Says Stamp… To create this card, I die cut the patterned papers from the kit. I used THIS and THIS die to create the background. I stamped the polaroid image from the kit’s stamp set and placed a photo of me and my friend behind the opening. I stamped a sentiment from the same stamp set and used the coordinating dies (included...

Happy Summertime Slimline Card

Howdy, crafty friends. I have a slimline sized scene card to share today. I’m so excited that summertime is just around the corner… To create this card, I started by creating the background. I applied yellow ink through THIS stencil on the front of a white slimline card base. The stencil is designed for a smaller sized card so I just inked up half of the slimline card and then did the other half...