Snow Love Card Kit

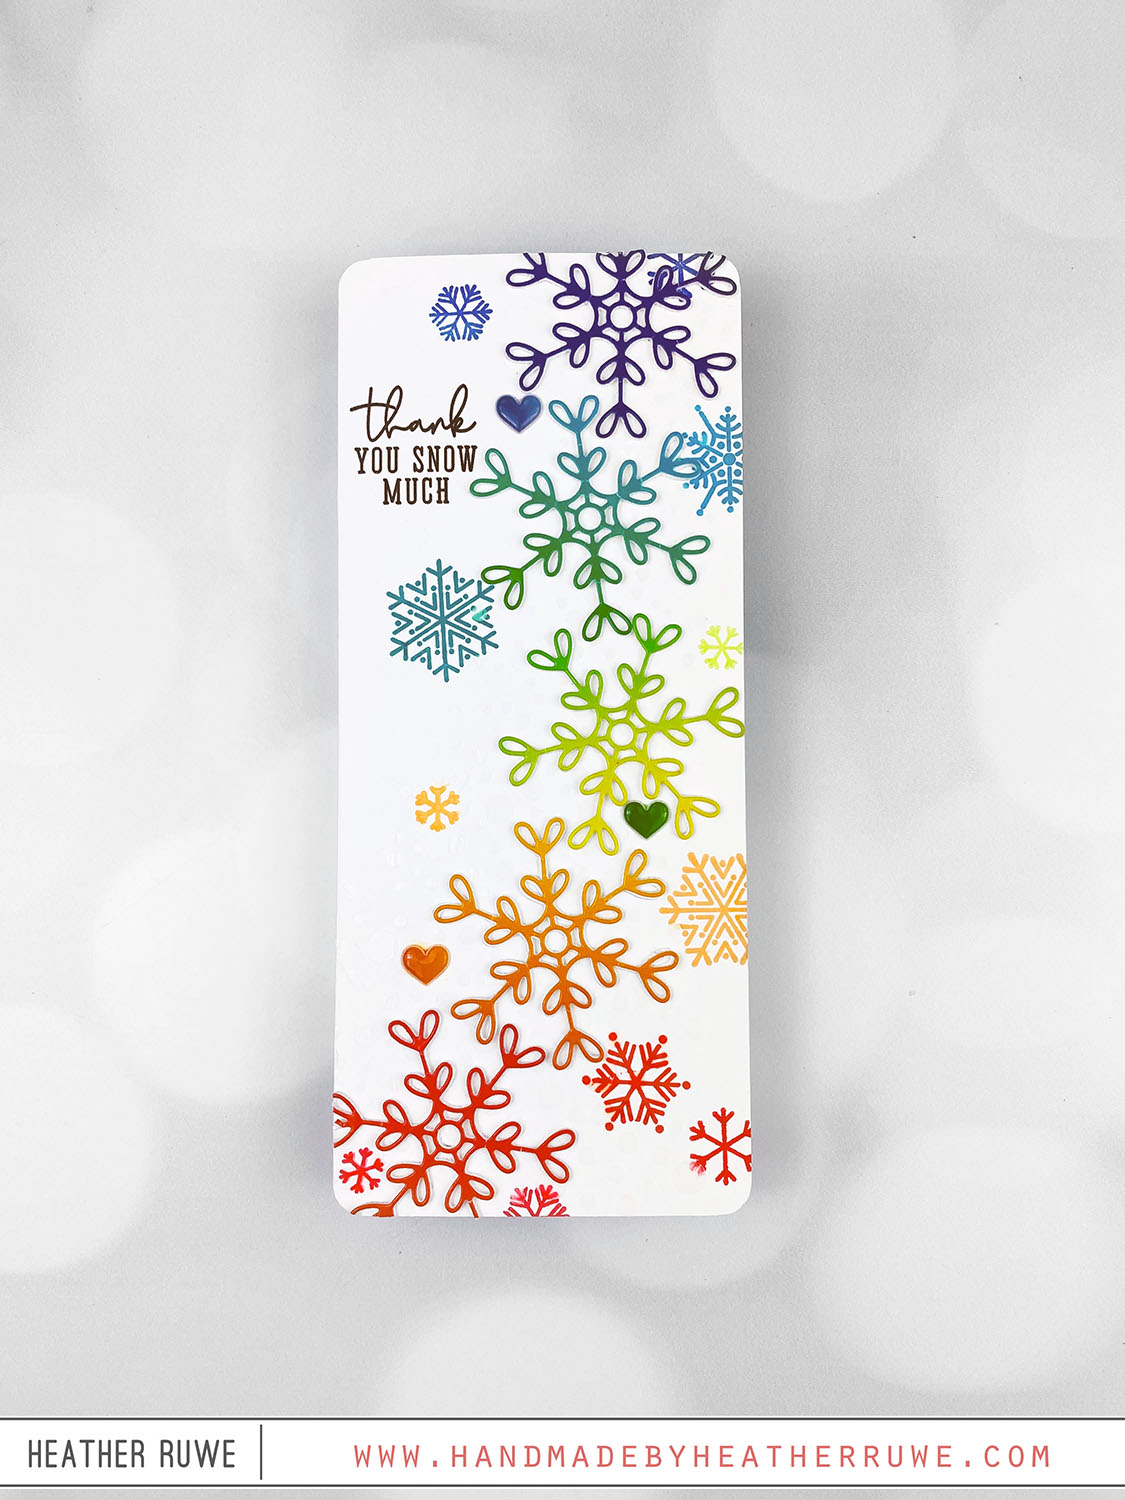
Hi, crafty friends. Today’s card share features THIS new card kit. I decided to create some rainbow snowflakes… I started by die-cutting the snowflake die (included in the kit) form the Kit’s Color Blend Cardstock. Next, I applied THIS paste through THIS stencil on one of THESE slimline card bases. After it was dry, I stamped snowflakes from the kit’s stamp set in rainbow colors. I adhered the snowflake die-cuts on top and stamped...

Just For Fun Cards

Hello there, crafty friends. I have three cards to share that I recently created just for fun. I usually have deadlines but I carved out some time just to play with some products that I’ve wanted to play with for awhile… To create the first card… I cut out THIS palette die twice to create the card base. I cut the top layer from THIS woodgrain card stock for some added texture. I stamped the...

STAMPtember 2022 Pretty Pink Posh Collaboration

Hi there, crafty friends. Today’s STAMPtember collaboration stamp set is THIS one from Pretty Pink Posh… I started by stamping the coffee cup images from THIS stamp set using the Gina K. Wreath Builder to get the spacing just right. I colored in the images with Copic Markers and stamped hearts in the center of the cups. I also stamped the steam image above the lids on the small cup images. I white heat...

STAMPtember 2022 Avery Elle Collaboration

Hello, crafty friends. Today’s STAMPtember collaboration stamp set is THIS one from Avery Elle. I started by die-cutting THIS oval die from the center of a white card stock panel. I inked up the outer portion of the frame with a rainbow of ink colors. I stamped the reindeer image from THIS stamp set in the center of the front card panel and colored it in with Copic Markers. I added some crystal glaze...

Rainbow Positive and Negative Hot Foiling

Hi, crafty friends. Today’s cards feature Positive and Negative Hot Foiling… I started by hot foiling THIS plate using THIS rainbow foil on a piece of THIS black glossy paper. I shared a video HERE explaining the hot foil process. I love the look of the rainbow foil on the black glossy card stock… I used the leftover, negative foil piece with THIS hot foil plate to create this card… I hot foiled the...

More Let’s Chill Release Inspiration

Hello, crafty friends. I have a slimline card to share today featuring THIS new stamp set… I started by creating the background. I cut a slimline panel from yupo paper and applied a variety of blue alcohol inks to it along with rubbing alcohol to resemble a sky. I stamped and Copic colored the images from the Soaring Birthday stamp set and used the coordinating dies to cut them out. I adhered the images...

Alcohol Ink Strips

Hello again, crafty friends. Last week, I shared some alcohol inked cards HERE and HERE and I had a lot of good leftover pieces left over… So, I cut them into strips… …and adhered them one on top of the other to create a background… I added an older Summer die-cut on top cut from holographic cardstock… I added a sentiment from an older stamp set (Vacation Time) and finished it off with some...

Joseph’s Coat Technique

Hi, crafty friends. I’ve been loving the Spring Card Camp 2022 class from Online Card Classes. I have another card to share today inspired by Day Two’s Joseph’s Coat Technique… I die-cut a slimline card panel from white card stock using the Slimline Nested Rectangles dies and ink blended the panel using a rainbow of Distress Oxide Inks. I applied Black Soot Distress Oxide Ink through the XL Rose Boquet Stencil on top of...

Reverse Confetti March 2022 Release

Hello, crafty friends. Reverse confetti has a new release HERE and I have lots of inspiration to share using the new products… VIDEO I created a walk through video for them of the new release sharing inspiration as well. You can find that video HERE on Reverse Confetti’s YouTube Channel or click on the video below… Since I have so much inspiration to share today, I will share the supplies used at the end...

Tim Holtz Distress Embossing Glaze

Hi there, crafty friends. I’m back with a slimline card featuring the Distress Embossing Glazes from Tim Holtz… These embossing glazes are translucent, not opaque like many other embossing powders. I like that they come in the Distress Ink color line and they are great for layering. To create today’s project, I masked off grouping of the hearts on the Fading Hearts Slimline Stencil and applied the matching color of Distress Oxide ink through...