Celestial Wishes Card Kit

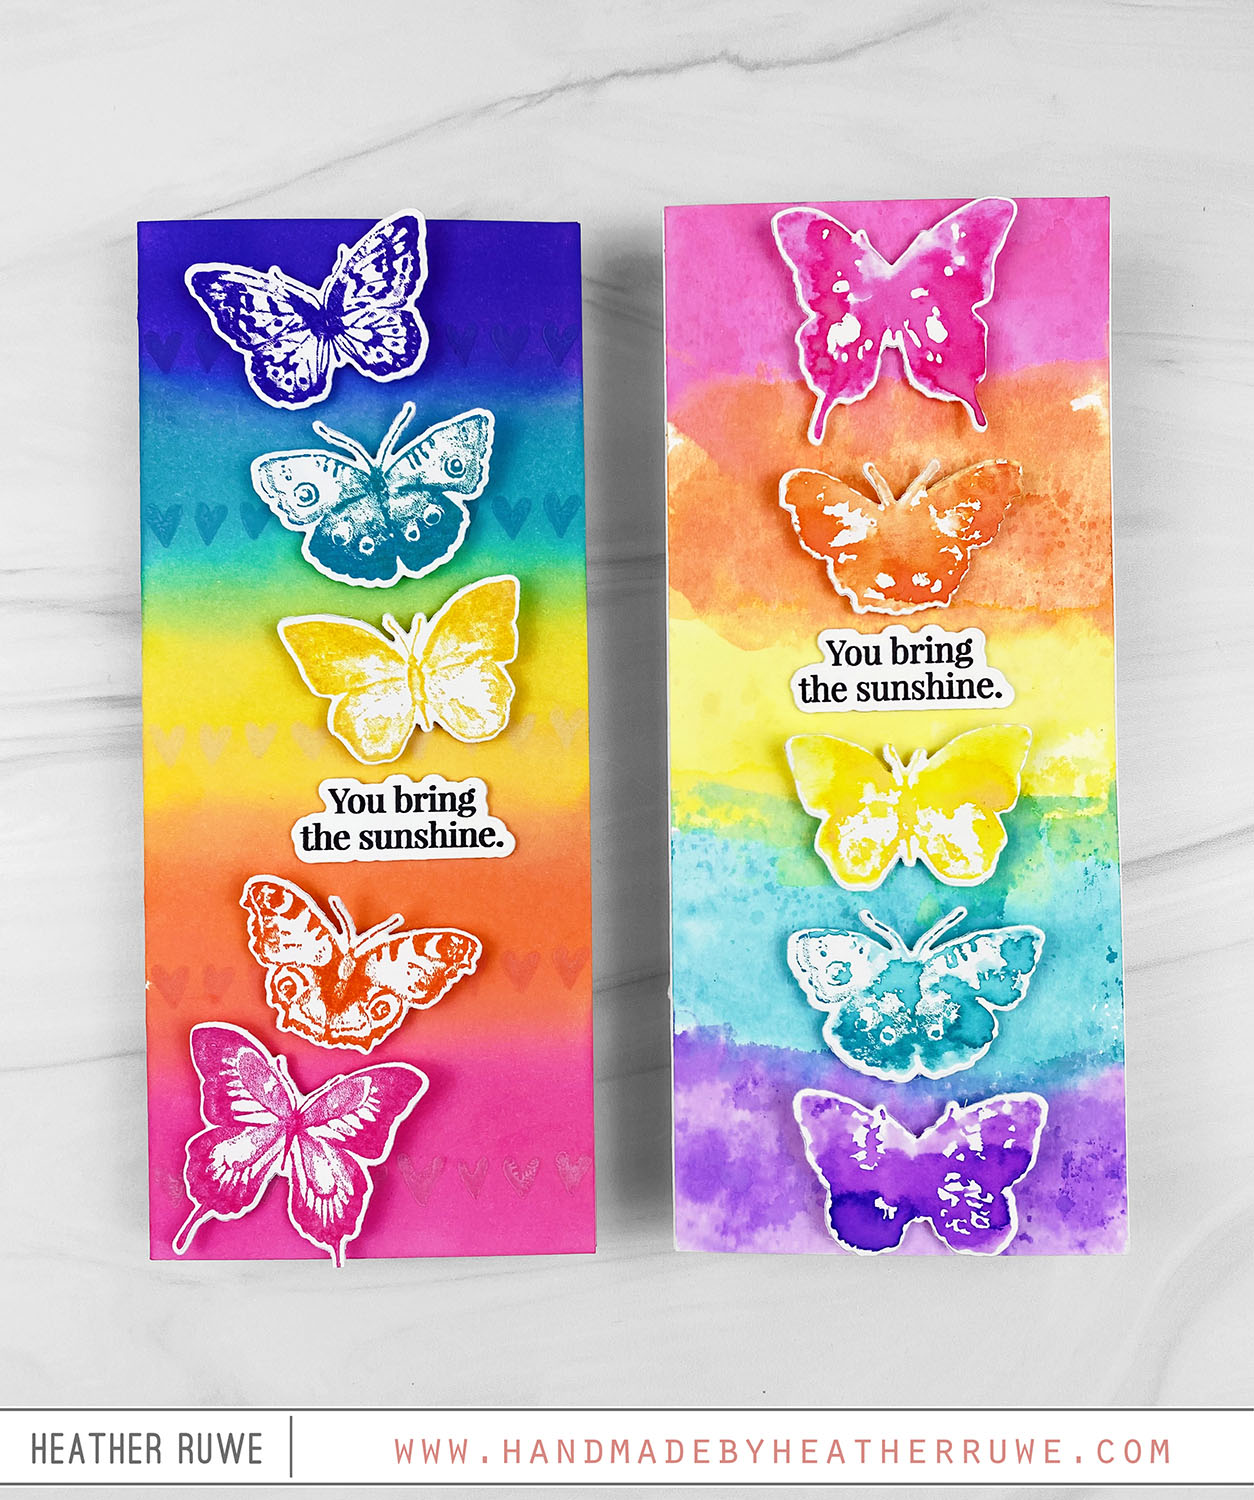
Hello there, crafty friend. Today’s card features THIS new card kit… To create this card, I cut the kit’s patterned paper into strips. I adhered the strips to a panel, creating a rainbow background. I die cut it with THIS stitched rectangle die and adhered it to a white top folding note card. I stamped an image and sentiment from the kit’s stamp set four times on one of THESE circles. I cut one...

Tim Holtz Watercolor Stamp Set Bundle

Howdy, crafty friends. I have two cards to share featuring THIS stamp set and coordinating dies… For the first card… I started by ink blending a rainbow of Distress Inks on the front of a saline card base. I stamped the row of hearts image from THIS stamp set on top of each color using the same color to add some interest to the background. I stamped the butterflies from the same stamp set...

Repeated Image Backgrounds

Hi, crafty friends. Today’s card features a repeated image background using new products from the Hero Arts Spring Catalog Release… To create this card, I started by stamping the musical notes image from THIS stamp set multiple times using a rainbow of ink colors to create a background. The inks that I used are listed below. I die cut the panel using THIS die. I cut a few more from white cardstock to adhere...

My Monthly Hero Countdown February 2024

Hello again, crafty friends. Today’s card is part of the My Monthly Hero Countdown to the February 5th Kit release. My card features THIS Premium Kit… To create this card, I started by ink blending an A2 white panel cut with THIS die using a rainbow of Hero Arts inks (all linked below). Next, I applied black ink through THIS stencil on top of the ink blending. I spritzed it with THIS shimmer spray....

Smitten Release

Hello there, crafty friends. Today’s card share features THIS new release by Simon Says Stamp… To create this card, I stamped the houses from THIS layering stamp set from a variety of ink colors and used THESE dies to cut them out. I adhered them to a slimline background that was stamped with THIS street stamp and ink blended the background to create a sky. I die cut the clouds from THIS coordinating die...

Happy DieCember! 2023

Hello there, crafty friends. Happy DieCember! If you’re unfamiliar with DieCember, it’s a month long party hosted by Simon Says Stamp celebrating dies and die-cutting. Today’s card shares features how to use the negative pieces when die cutting. To create today’s card, I die cut THIS candles die from and A2 piece of black cardstock. I removed the candles image to just leave the negative piece from the die cutting. On a piece of...

More inspiration using the Retro Wishes Card Kit

Howdy, crafty friends. I have more inspiration to share today using THIS new card kit… To create his card, I stamped the rainbow layers of the kit’s stamp set and stamped a sentiment under it. I trimmed down the arch and adhered it to one of the kit’s patterned papers that I embossed with the embossing folder included. I added a strip along the bottom of the arch with the specialty paper included and cut...

Thinking of You Card

Hello again, crafty friends. I have a simple thinking of you card to share today… To create this card, I used THIS die to add some texture to a white piece of cardstock. I added a black mat around it and adhered it to a card base. Next, I used THESE watercolors to create a rainbow background and used THESE dies to cut out square panels form it. I adhered those to the center...

Best Year Yet Card Kit

Hi, crafty friends. I have a Birthday card to share today featuring THIS new card kit…  To create this card, I started with a 6×6 piece of white cardstock and stamped an image from THIS stamp set (included in the kit) towards the top center. I rotated the cardstock 180 degrees in my MISTI and stamped again. I did the same process for the image on the right and left. I continued in the corners...

Beautiful Days Release

Hello there, crafty friends. Today’s card features products from THIS new release… To create this card, I started by ink blending the background. I used a rainbow of Distress Oxide Inks. I die cut THIS die and adhered the hands to each side of the rainbow background. I adhered the entire piece to a black panel. I created a smaller white card and used THIS stencil to dry emboss the pattern on the front...