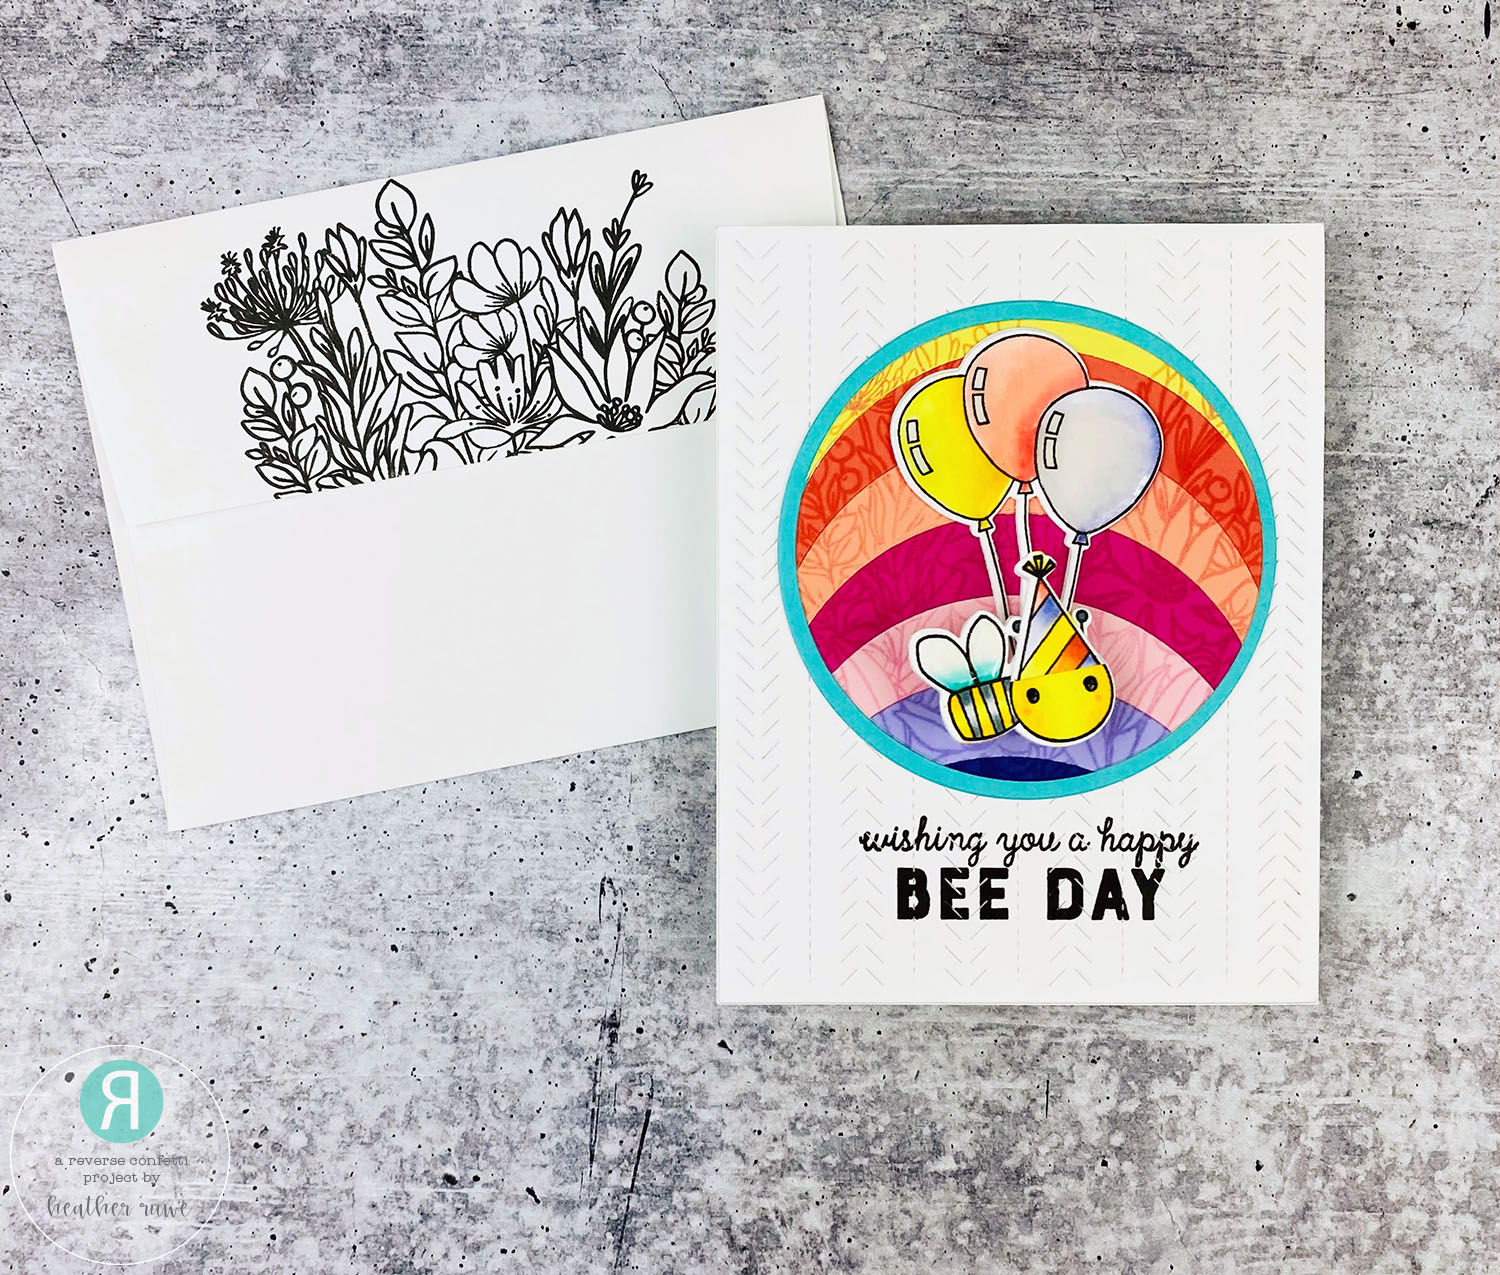
Hi, crafty friends. It’s time for another STAMPtember collaboration stamp set… How cute is this stamp set from Art Impressions!? I used it to create an interactive card… I started by stamping the ladies from the Hug in the Mug stamp set towards the bottom of a white panel. I colored the image with Copic Markers. I stamped snowflakes from the Feline Like Christmas Spinners stamp set around the image and die-cut the slit...
STAMPtember 2021 Party
Hello, crafty friends. Happy STAMPtember! I’m excited to be part of THIS party celebrating THIS new STAMPtember release from Simon Says Stamp. I have three Holiday Gift Card Holders to share today… I give a lot of gift cards out during the Holiday Season and always try to make them a little more personal by incorporating the gift card into the design of the card. Today, I’m sharing three different ways to do that...
STAMPtember 2021-Halloween Gnomies
Hello, crafty friends. I’m continuing the STAMPtember party and sharing a card featuring the Halloween Gnomies stamp set and coordinating dies (linked at the bottom of this blog post)… To create this card, I die-cut the Box Card Die from black card stock. I adhered the pieces to a back panel that I ink blended on to create a night sky. I spritzed a bit of water on top for some added texture. The...
More Make Magic Release Inspiration
Hi there, crafty friends. I’m back with more inspiration from THIS new release from Simon Says Stamp… To create this card, I started by cutting a piece of white card stock to 2.75 x 5.25 to create the reveal panel. I stamped the Handwriting Paper background stamp using blue ink. Next, I stamped it with sentiments from the Teacher Thank Yous stamp set. I also added a few stars from the Magic Stars die....
Interactive Birthday Card
Hi, crafty friends. I’m sharing a card today featuring the new 3D Card Die Set… I started by cutting a piece of blue card stock to 2.75 x 5.25 to create the reveal panel. I applied the Blanco transfer gel through the Fading Circles stencil on the panel. I chose to use the Blanco transfer gel because I was applying it on top of colored card stock. After it was completely dry, I laid...
Beach Box Card
Hi there, crafty friends. I’m back with even more inspiration using THIS new release from Simon Says Stamp… I started by cutting the pieces out from the Box Card Die as well as one of the borders from the Box Card Die Borders. I cut the back panel from white card stock and stamped the Sea and Sky Background on it. The back piece can be as tall as you would like but needs...
Rainbows Release
Howdy, crafty friends. Simon Says Stamp’s newest release is HERE. It’s called, “Rainbows” and it’s fabulous. Today’s card share features a gatefold design with a vellum belly band… I started by creating a gate fold card base. I used two side folding A2 card bases and scored the front panel down the center. I folded each side back in opposite directions and adhered the back of the card bases together. I stamped and colored...
Interactive Graduation Card
Hi, crafty friends. I’m back with more inspiration using THIS release by Simon Says Stamp… To create this card, I stamped the Party Balloons background on a white A2 panel and colored it in with Copic Markers. I die-cut it using the Sliding Window die and assembled the interactive parts. I die-cut the Cap and Gown dies from black card stock and adhered them to the bottom portion of the sliding window. I stamped...
New Ink Blot Shop Release
Howdy, crafty friends. I have two cards to share using THIS new release from the Ink Blot Shop… To create the first card… I started by stamping the image from the Happy Mail Heart stamp set on to a white card stock panel and coloring it with Copic Markers. I used basic rectangle dies to create a thin border frame. I sandwiched some acetate between the layers of the frame and added some small...
Welcome Home Shaker Card
Hello, crafty friends. I’m back with a fun shaker card featuring products from THIS release… I started by stamping THIS house image on a white card stock panel and coloring with with Copic Markers. I stamped it again on a piece of THIS patterned paper and fussy cut it out. I didn’t have the coordinating die at the time so I poked my scissors in the center of the image to create a hole...