Hello, crafty friends. I have even more inspiration to share today using the Warmest Wishes Card Kit… To create this card, I cut down one of the kit’s patterned paper to A2 size. I used the kit’s embossing folder to emboss the panel and adhered it to a white note card. I stamped, colored, and cut out the images from the kit’s stamp set and adhered them on a snow bank. I finished it...
Winter Flower Card
Hi, crafty friends. I have a 5×7 Christmas card to share today… To create this card, I dry embossed the Imperia die in the center of a 5 x 7 black cardstock panel. I stamped and Copic colored the large image from the Winter Flower stamp set. I used the coordinating die to cut it out and adhered it to the black panel. I added a pre printed sentiment and a few enamel dots...
Thankful For You
Happy Thanksgiving, crafty friends! I have a shaped card to share today. I love creating these as they are unique and unexpected. To create this card, I stamped the wreath image from the Thankful Wreath Stamp set using black ink on white cardstock. I used the coordinating die to cut it out (the coordinating dies will be released soon!) and colored the entire image using Copic Makers. I used the coordinating die to cut...
Sunshine Flowers Card Kit
Hi there, crafty friends. I’m sharing a card set today created from the September Card Kit from Simon Says Stamp… I started by stamping the large floral image from one of the kit’s stamp set on to three card bases created from colored card stock in the kit. I stamped it at the bottom and flipped the card around to stamp it at the top. I also stamped it on the flap of the...
You’re tops in my book
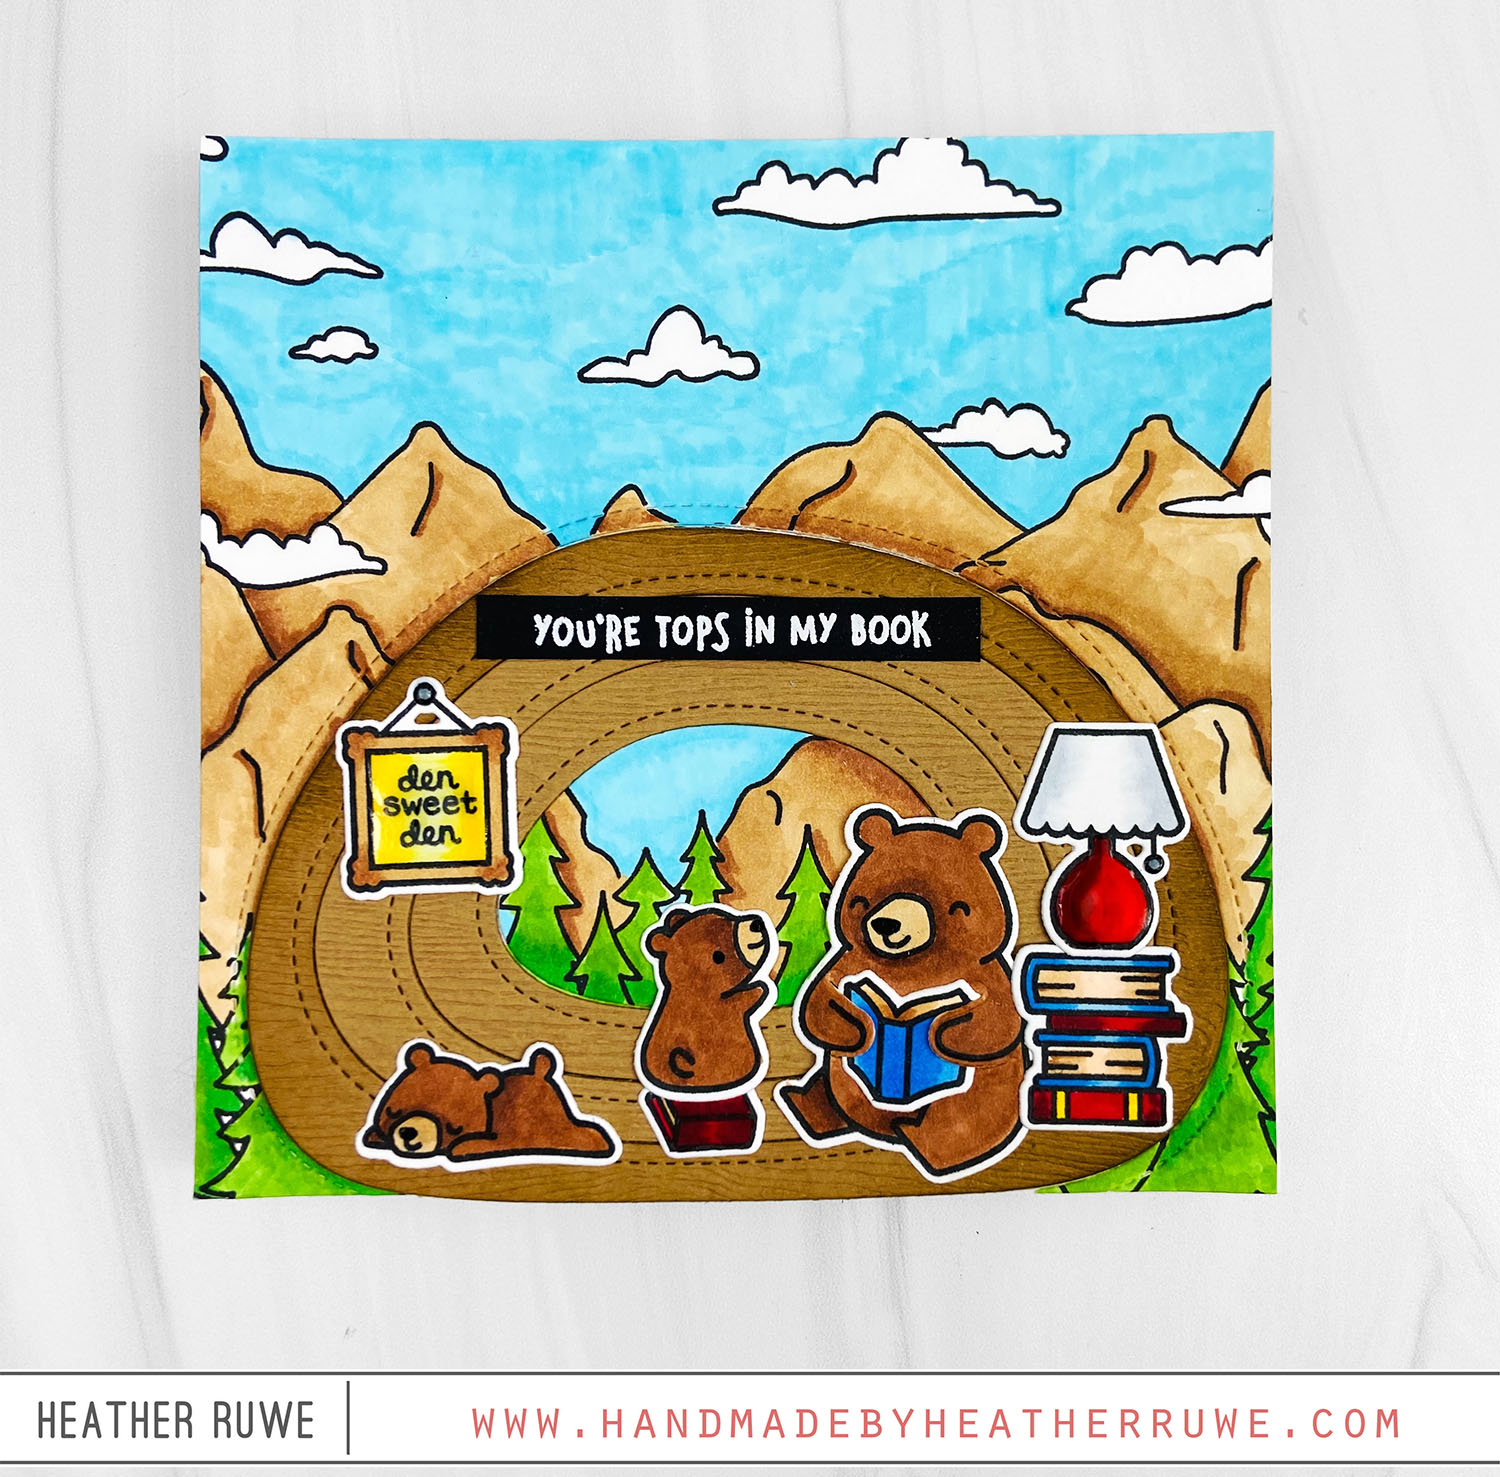
Hello, crafty friends. I’m back with a fun scene card today… I started with a 5.25 x 5.25 card panel. I stamped the Mountainscape Background and colored it with Copic Markers. I stamped and colored images from the Den Sweet Den stamp set and used the coordinating dies to cut them out. I die-cut the Stitched Den dies from the card panel and from woodgrain card stock. I layered the woodgrain pieces into the...
Reverse Confetti July Release Blog Hop
Hi there, crafty friends. I’m excited to be part of THIS blog hop celebrating THIS new Reverse Confetti release. I have two cards to share using the new release… For the first card… I stamped the large floral image from the Bloom stamp set and colored it in with Copic Markers. I added lots of shine with a shimmer pen and some gloss with Nuvo Crystal Glaze. I white heat embossed the sentiment from...
Beach Box Card
Hi there, crafty friends. I’m back with even more inspiration using THIS new release from Simon Says Stamp… I started by cutting the pieces out from the Box Card Die as well as one of the borders from the Box Card Die Borders. I cut the back panel from white card stock and stamped the Sea and Sky Background on it. The back piece can be as tall as you would like but needs...
Rainbows Release
Howdy, crafty friends. Simon Says Stamp’s newest release is HERE. It’s called, “Rainbows” and it’s fabulous. Today’s card share features a gatefold design with a vellum belly band… I started by creating a gate fold card base. I used two side folding A2 card bases and scored the front panel down the center. I folded each side back in opposite directions and adhered the back of the card bases together. I stamped and colored...
Happy Birthday Beautiful Slimline Card
Hi, crafty friends. I’m really loving creating slimline cards lately. I have one to share today… I stamped and colored the floral image from the Slimline Florals stamp set. I used the coordinating die to cut it out. I white heat embossed the happy birthday sentiment on a black slimline card panel and added the Beautiful die to finish the sentiment. Here’s a closer look… I also created an envelope using the Slimline Envelope...
More Born to Sparkle Release Inspiration
Hi, crafty friends. I’m back with more inspiration using THIS new release from Simon Says Stamp… To create this card, I started by inking up a brick stencil on a side fold white note card. I die-cut the Window Blooms coordinating die in the front to create an opening. I also die-cut some grass and adhered it along the bottom. I stamped, colored, and die-cut two window boxes. One for the front of the...