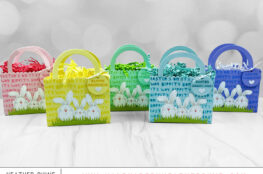
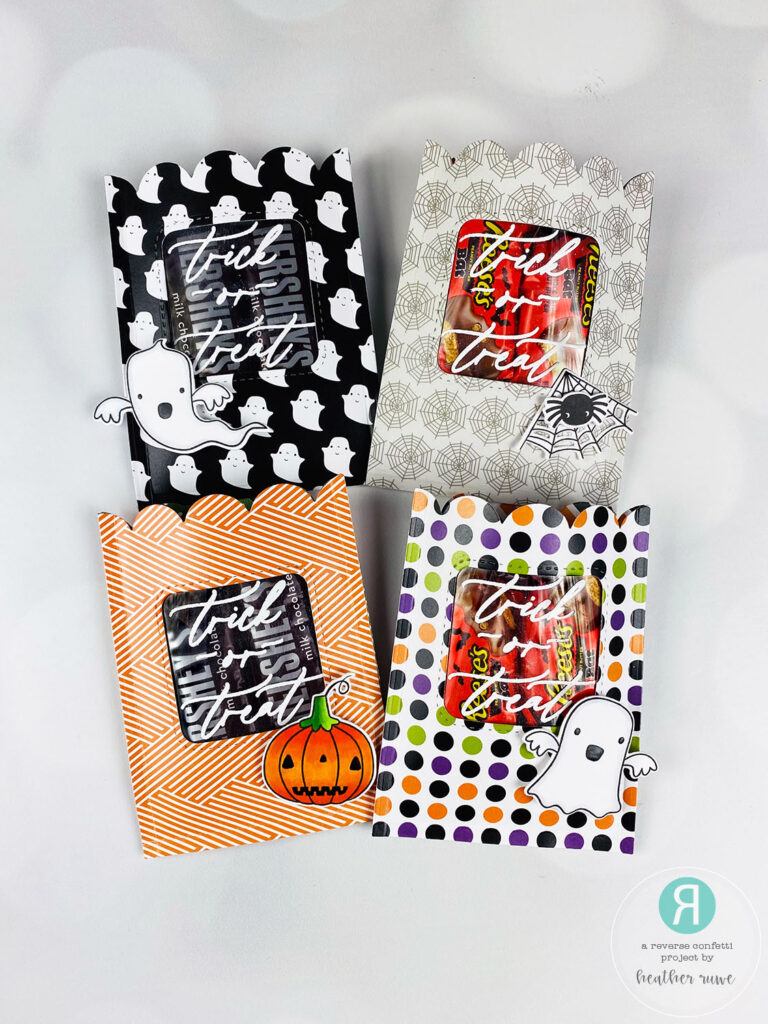
Hello, crafty friends. I have a few Halloween Treat Bags to share featuring THIS new release from Reverse Confetti…
VIDEO
You can watch the video on how I created these cards HERE or click on the video below…
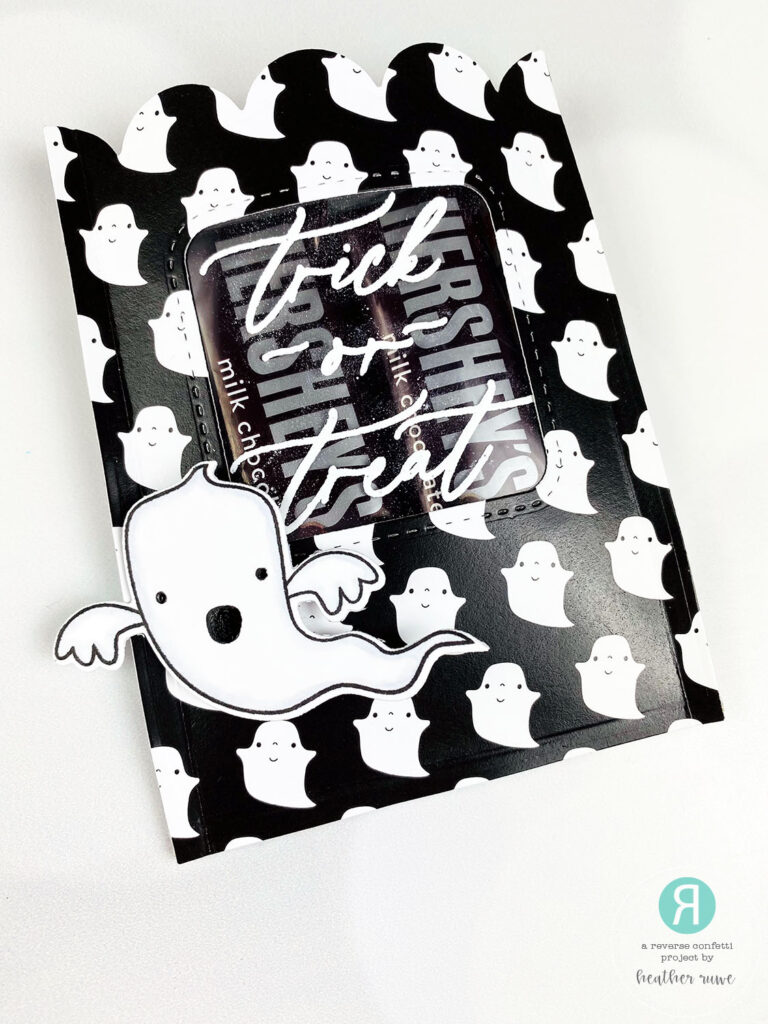
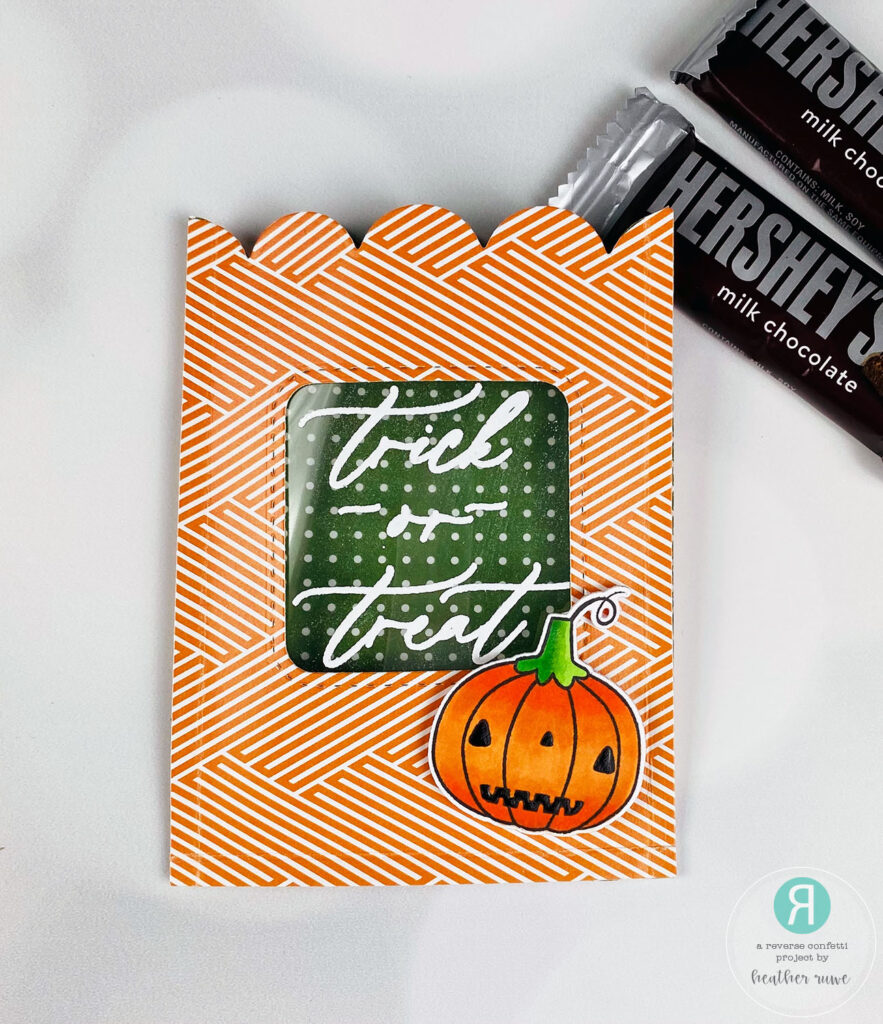
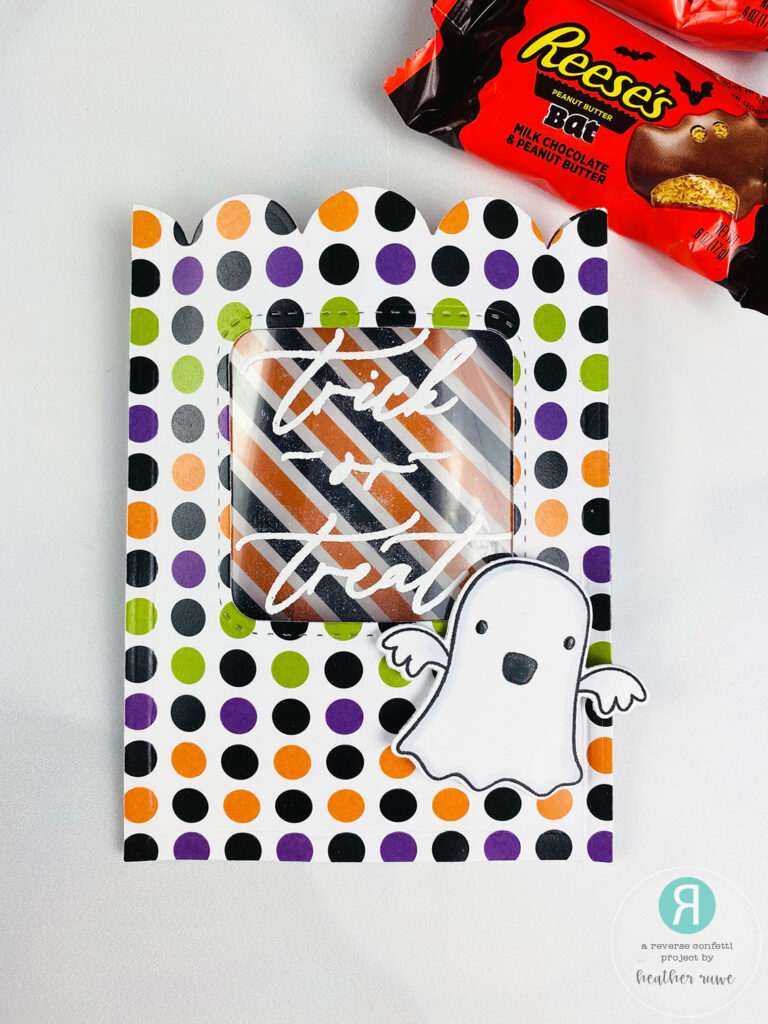
First, I stamped the images from THIS adorable new stamp set called Hello Bootiful. After stamping, I used the coordinating dies to cut them out. I colored them with Copic Markers. I applied THIS black glaze pen to the eyes and mouth to make them stand out.
To create the treat bag. I chose two sheets of pattern paper from an older Reverse Confetti Hello Holidays Paper Pad and die-cut them using THESE Scalloped Bag and Tag Creator dies. I like using a double sided patterned paper so that you can see a different pattern on the inside of the treat bag. I die-cut the front panel using another die in that set to create a window.

For the window piece, I stamped the trick or treat sentiment from the stamp set on to a piece of heat resistant acetate using clear ink and sprinkled on white embossing powder. Make sure to use an anti static powder before stamping to prevent the embossing powder from sticking in places you don’t want. After heat embossing, I applied score tape along the window on the inside panel and adhered the acetate piece in place.
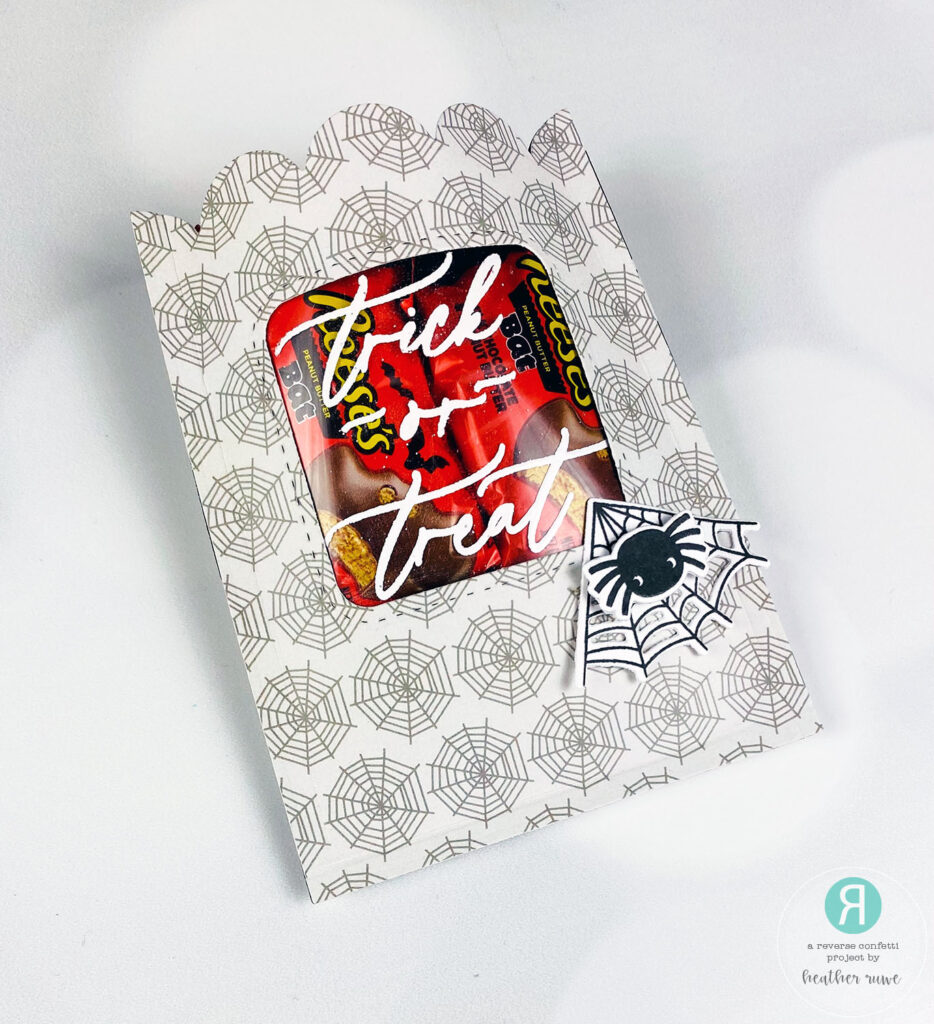
Next, I used the groove in my trimmer to score about a quarter inch in on three sides of the bag. I did this along the sides and the bottom. I added score tape to the inside of those lines. Once they were adhered, I reinforced the score lines making sure the bag was secure and creating a pocket for the treats. You can skip the score lines but I feel that it keeps the bag adhered better and allows for bulkier items to be able to be placed inside.
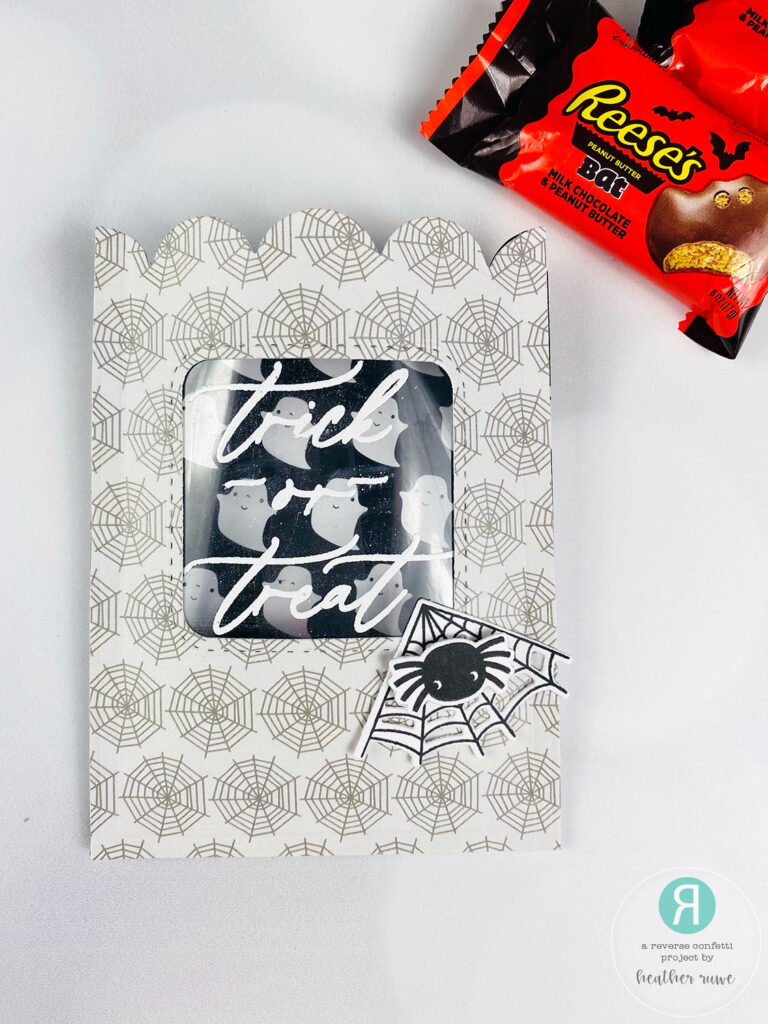
To finish off the bag, I adhered the ghost image with some foam squares and placed a couple of mini candy bars inside. I love that when the recipient pulls out the candy, another pattern paper is revealed. I made a few more of these treat bags. I made one using the pumpkin image, one with the spider image, and another with the other ghost image. The Reese cup candies were a bit thicker and that is where the score lines help create a cone shape to accomadate the larger candies.

I hope this has inspired you to create some of these simple Halloween treat bags. It’s a great way to use pattern paper and your stamped images. I plan on giving these to my son’s teachers with a gift card slipped inside too.
These treat bags are part of an Instagram Hop HERE celebrating the new release.

Thank you so much for visiting today. Happy crafting!
P.S. I’ve linked to the entire release below as well as supplies used on today’s treat bags.
LINKS TO ENTIRE RELEASE:
(Affiliate links used at no extra cost to you. Thank you for your support.)
(Affiliate links used at no extra cost to you. Thank you for your support.)