
Hi there, crafty friends. I’m thrilled to be part of THIS Blog Hop Celebrating THIS new release. I have a Slimline Tri-fold Scene Changing Card to share today…
VIDEO
I’m excited to bring more video content in 2022. You can watch the video on how I created this card HERE or click on the video below…
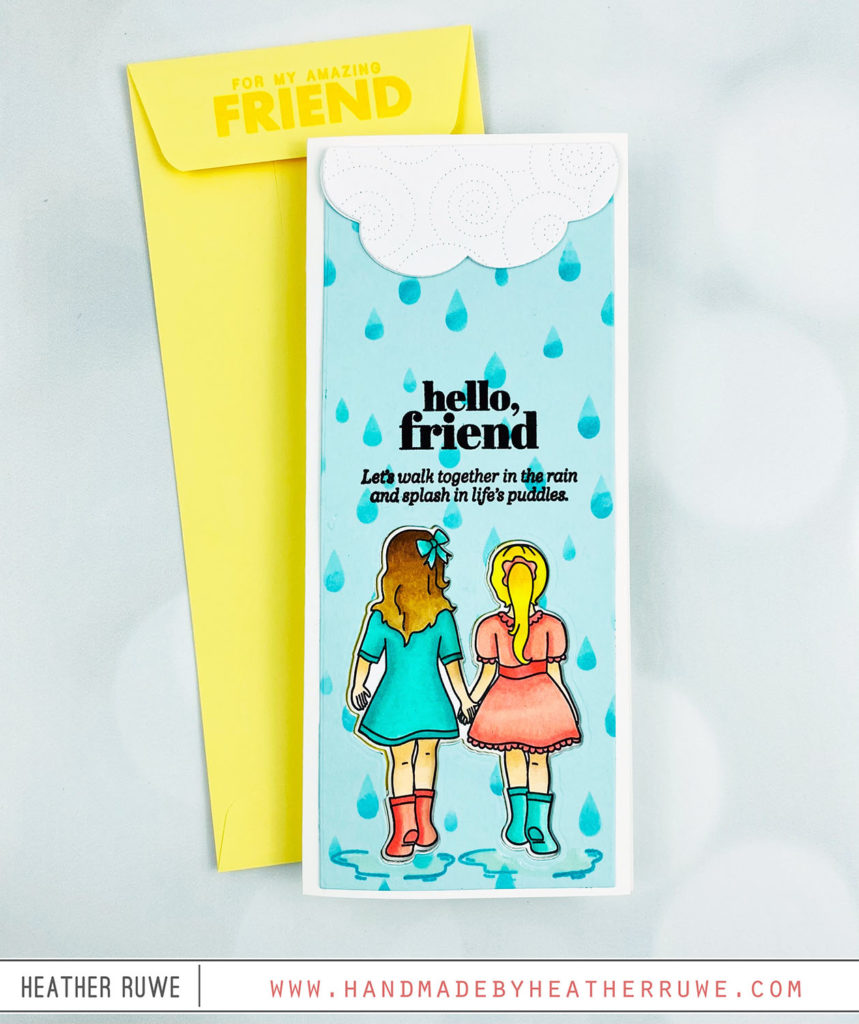
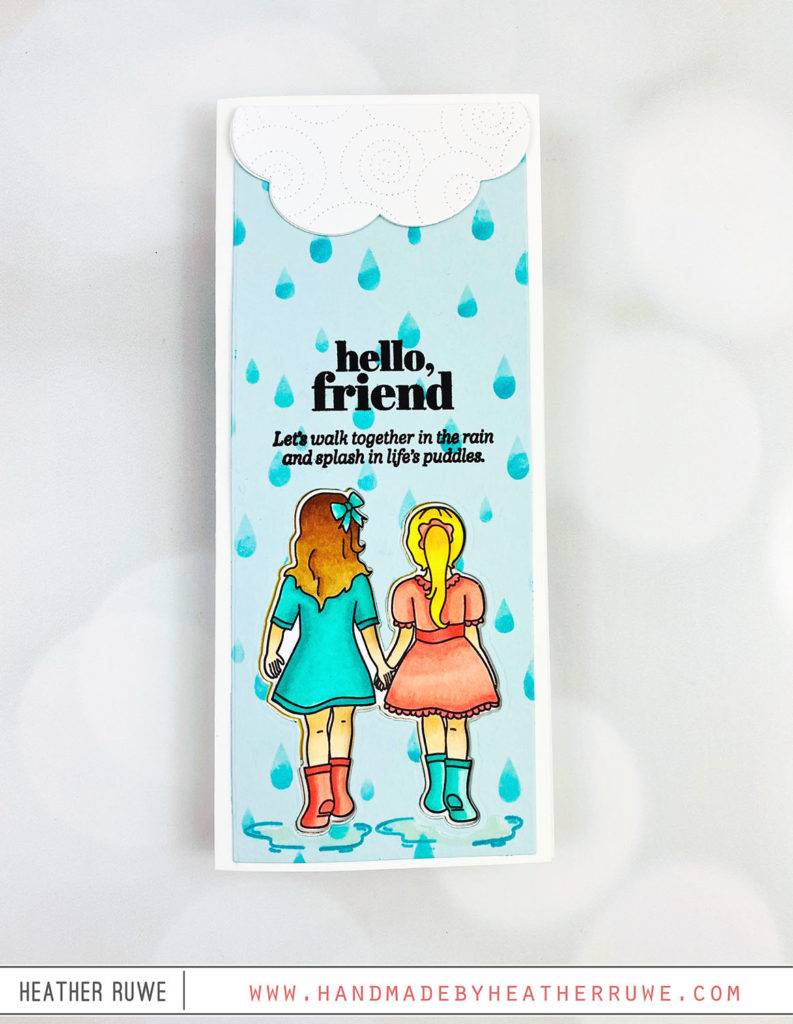
I started by applying ink through the Large Raindrops stencil on a blue slimline panel. I used two different colors of blue ink to add a bit of dimension to each raindrop. Next, I used the coordinating die from the Kindred Spirits stamp set and die-cut it towards the bottom of the panel. I laid the panel on top of the front of the slimline card base and traced the opening. I set the blue panel aside and used that same die to cut from the front of the card.
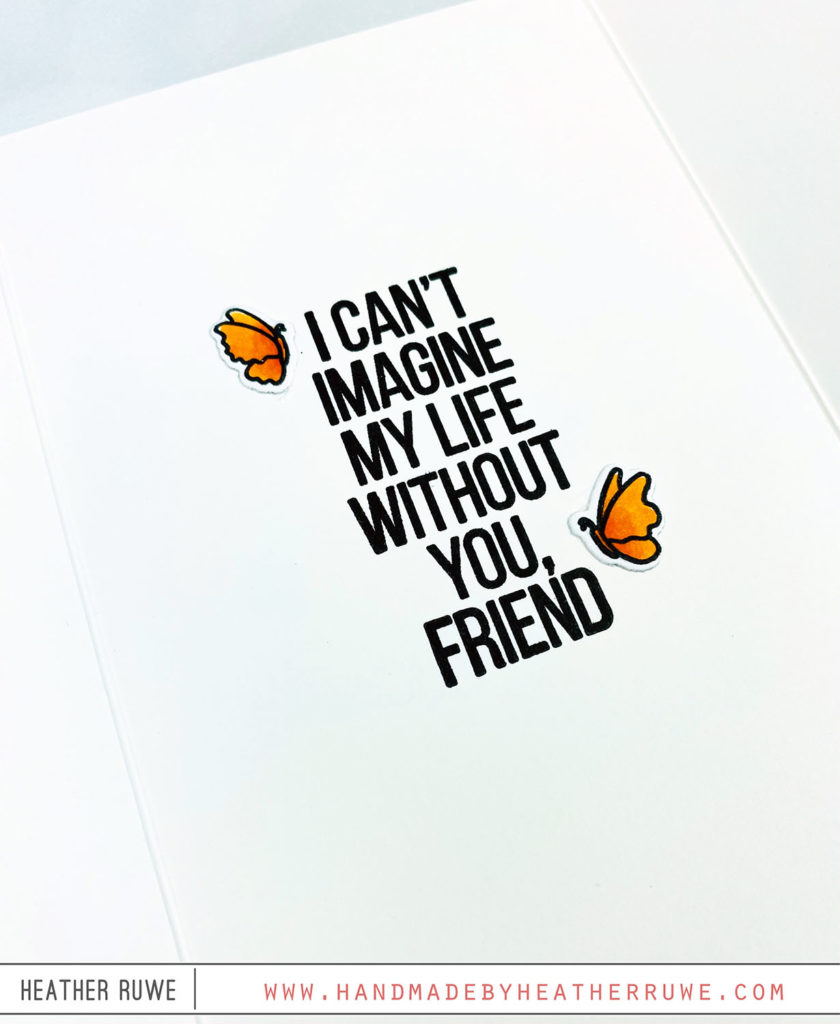
I adhered the blue panel on to the slimline card and stamped a sentiment from the Friend Greetings and the Kindred Spirits stamp sets. To create the cloud, I die-cut the Detail Swirls Plate from white card stock and then used a cloud die and cut from that piece. This adds a bit of interest and texture to the cloud. I stamped puddle lines by the girl’s feet and added some crystal glaze for some shine…
Let’s move on to the inside of the card. When the recipient opens the card, the scene changes from a stormy day to a sunny day…
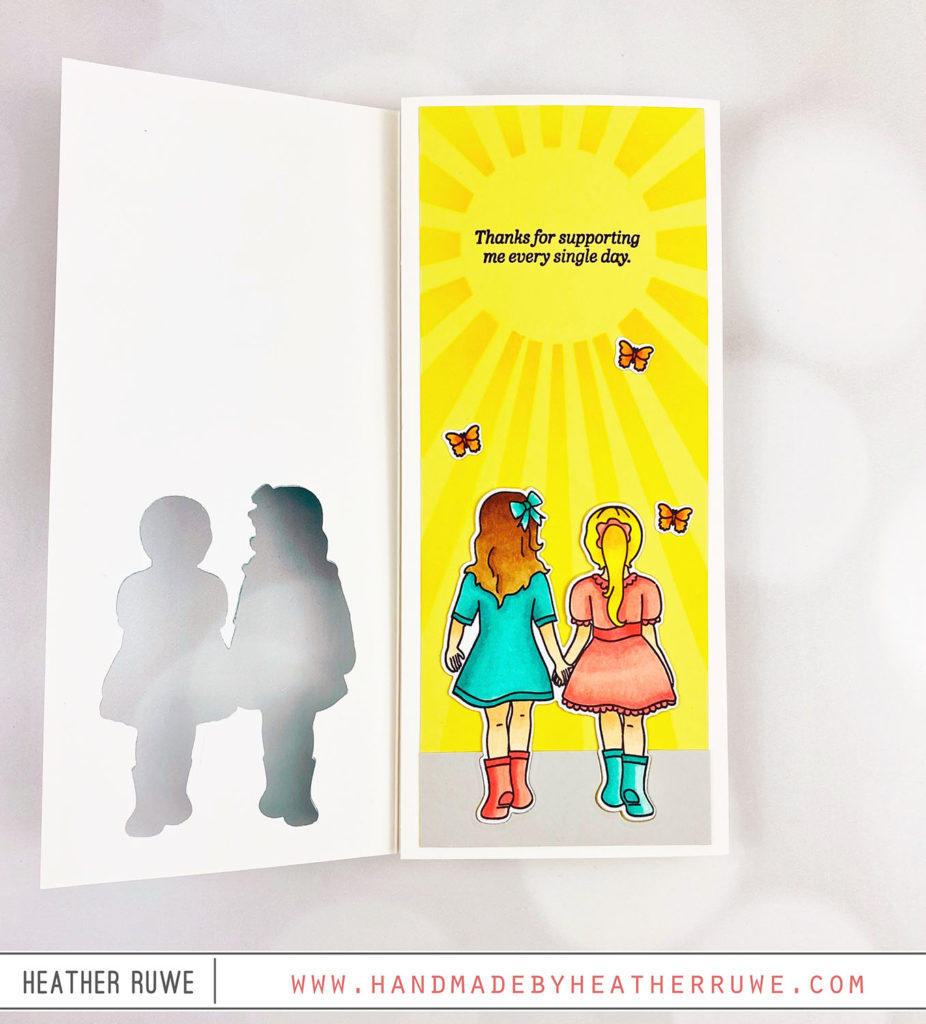
To create the yellow panel, I started by applying ink through the Slimline Sun Rays stencil using yellow ink and stamped a sentiment from the Kindred Spirits stamp set inside the sun. I stamped and Copic colored the images from the same stamp set and used the coordinating die to cut them out.
To create the trifold fold, I adhered another slimline card base to the back side of the first. So, I flipped the second card base 90 degrees so the opening is on the left and applied adhesive to the back of the blue panel card base and adhered the back of the yellow panel card base on top of it.
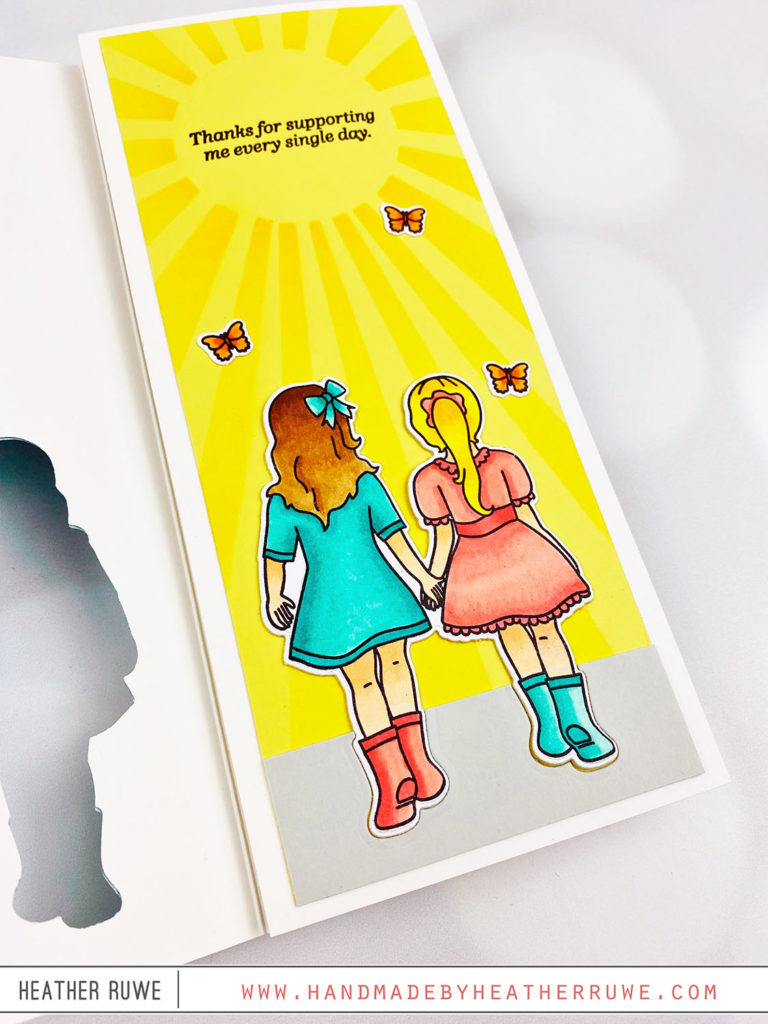
Once that fold is put together, I adhered the yellow panel on the inside flap and added adhesive to the back of the girls image and held it in place while I closed that card. That helps get the perfect alignment. I also used liquid glue which makes it easy to wiggle into place. I cut a small gray piece of cardstock for the bottom of the panel to ground the image. I finished off the scene with a few butterflies.
Once the recipient opens the yellow panel, there is another stamped sentiment on the inside to tie everything together…
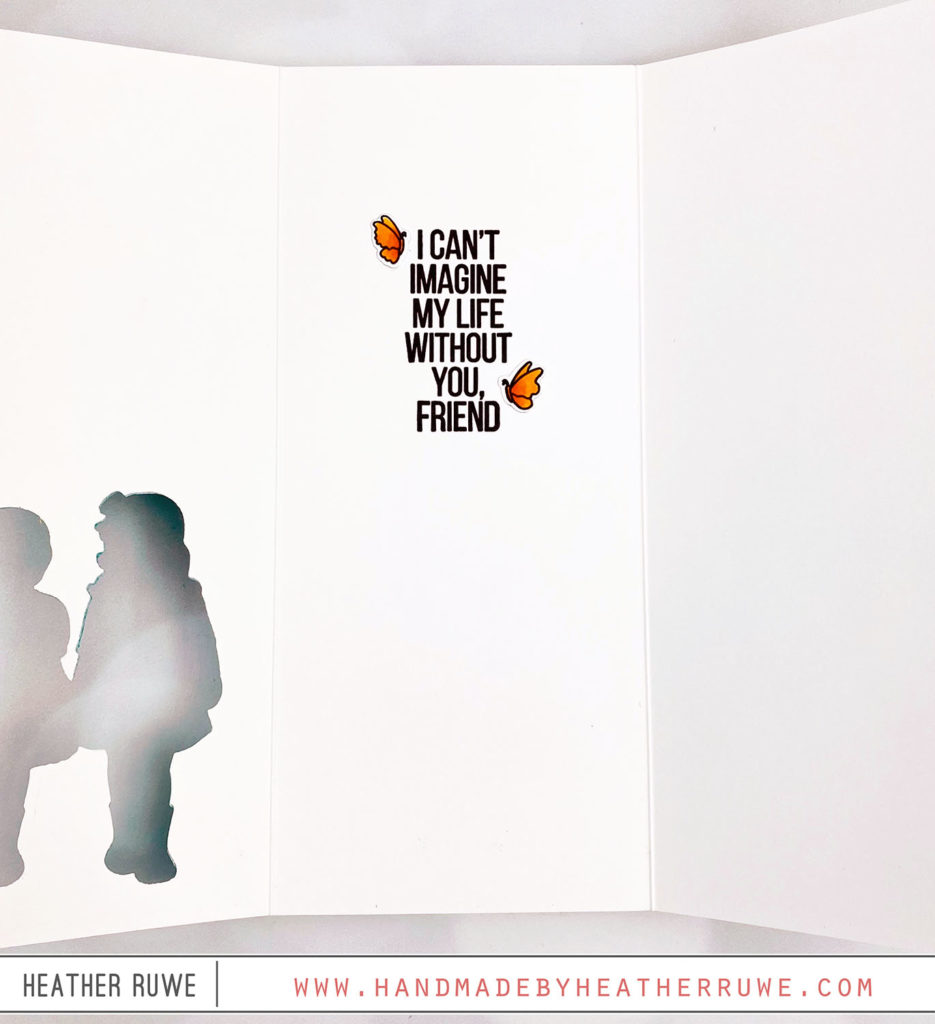
The stamped sentiment is from the Friend Greetings stamp set and I added a few more butterflies to tie everything together…
I hope this has inspired you to create a scene changing card.
P.S. I also stamped on the flap of the envelope using a sentiment from the Friend Greetings.
BLOG HOP
There is much more inspiration to see. Click HERE for the next stop on the hop. Click HERE to start at the beginning of the hop.
Here’s the complete Blog Hop list…
Looking for even more inspiration using THIS release? I shared another project HERE…
…and HERE…
GIVEAWAY
Simon is so generous and giving away a $25 coupon to every stop on the hop so be sure to leave comments along the way for your chance to win. Simon Says Stamp will announce winners on their blog on Wednesday. Good luck!
Wait, there’s more…
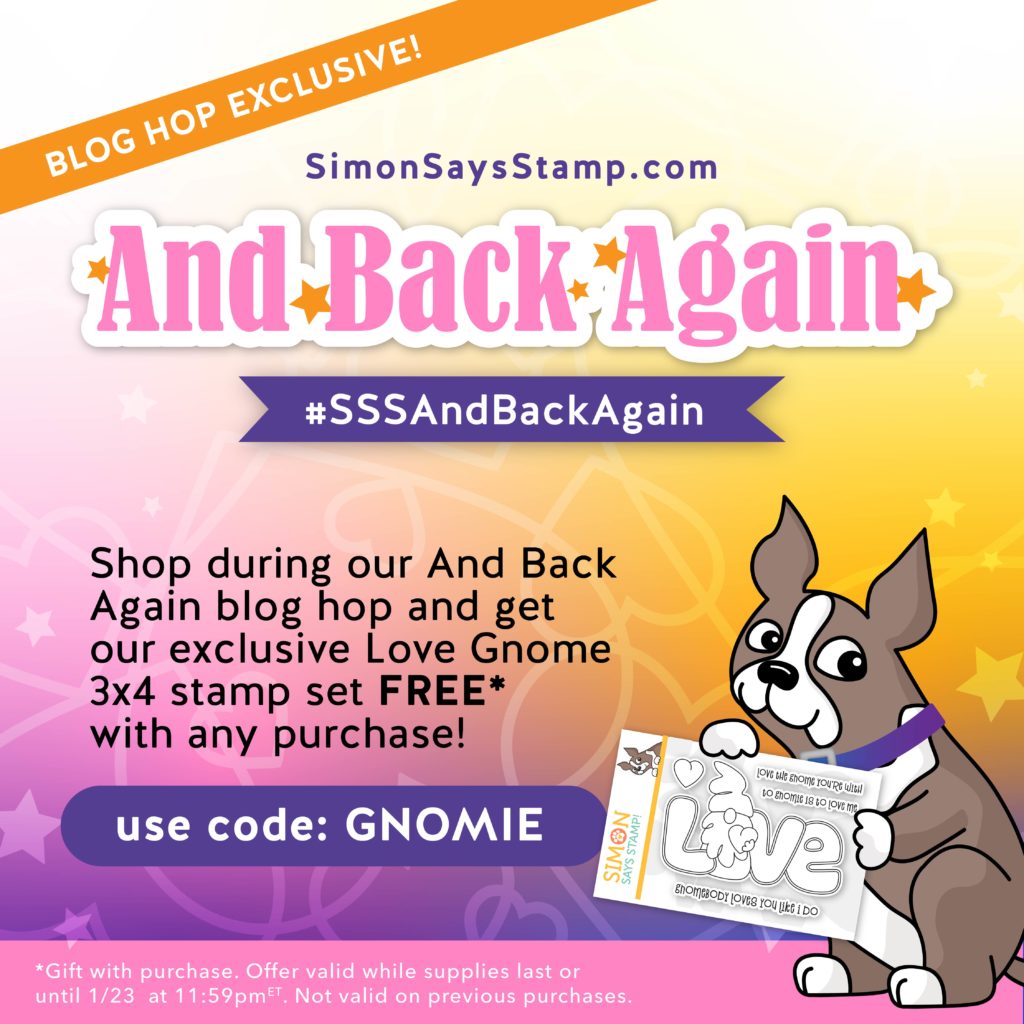
Use the code GNOMIE to receive a free 3×4 Love Gnome Stamp Set. Valid while supplies last or until 1/23 at 11:59 EST.
Thank you so much for stopping by. I’ve linked to the entire new release below as well as products used on today’s cards.
LINKS TO ENTIRE NEW RELEASE:
(Affiliate links used at no extra cost to you. Thank you for your support.)

LINKS TO SUPPLIES USED ON TODAY’S CARD:
(Affiliate links used at no extra cost to you. Thank you for your support.)

January 26, 2022
so beautiful!