Hi, crafty friends. I’m wrapping up stencil week with a stencil stamping technique to get a reverse look…

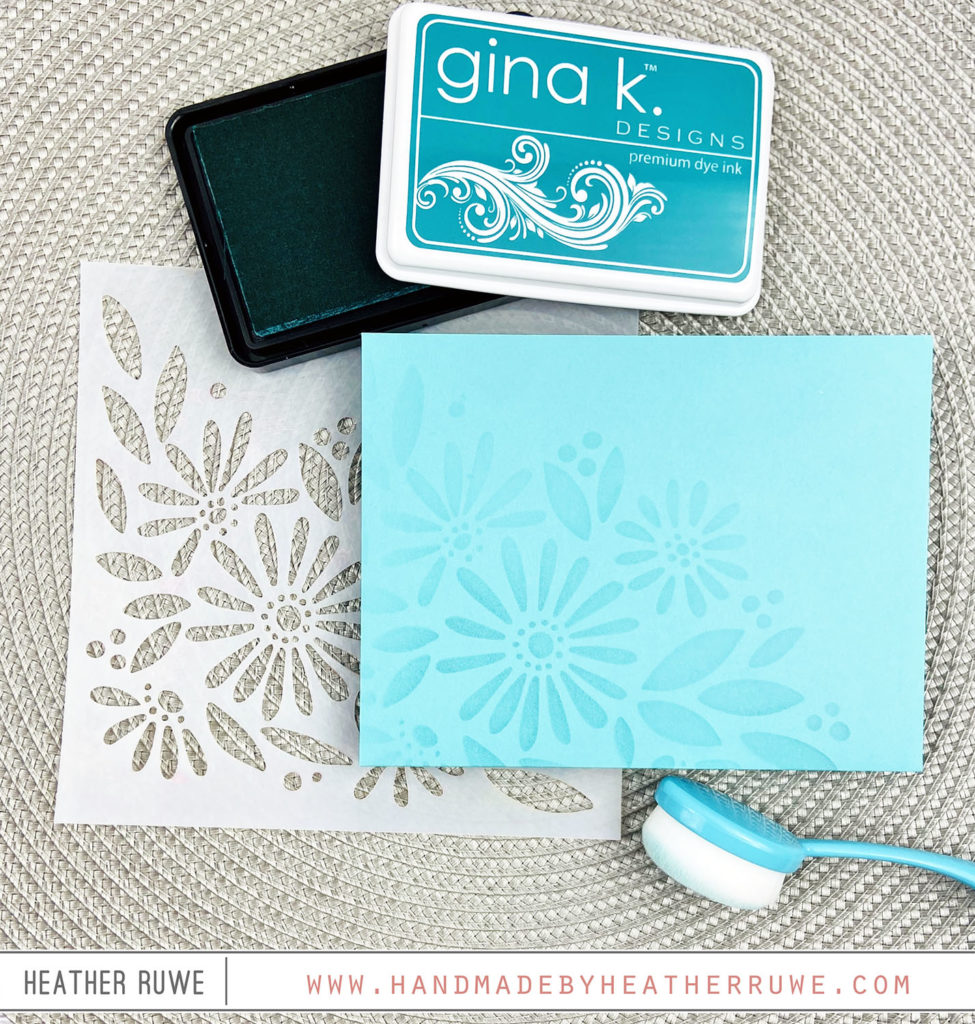
I inked up the back of THIS stencil with THIS and THIS ink. I sprayed water and flipped it over and laid it on a piece of THIS card stock, similar to when you ink up a stamp, flip it over, and apply pressure. After lifting the stencil, I dried it with THIS heat tool. I repeated the same process two more times to get more intense color. I also pressed down on the stencil around the flower images to get a defined line.
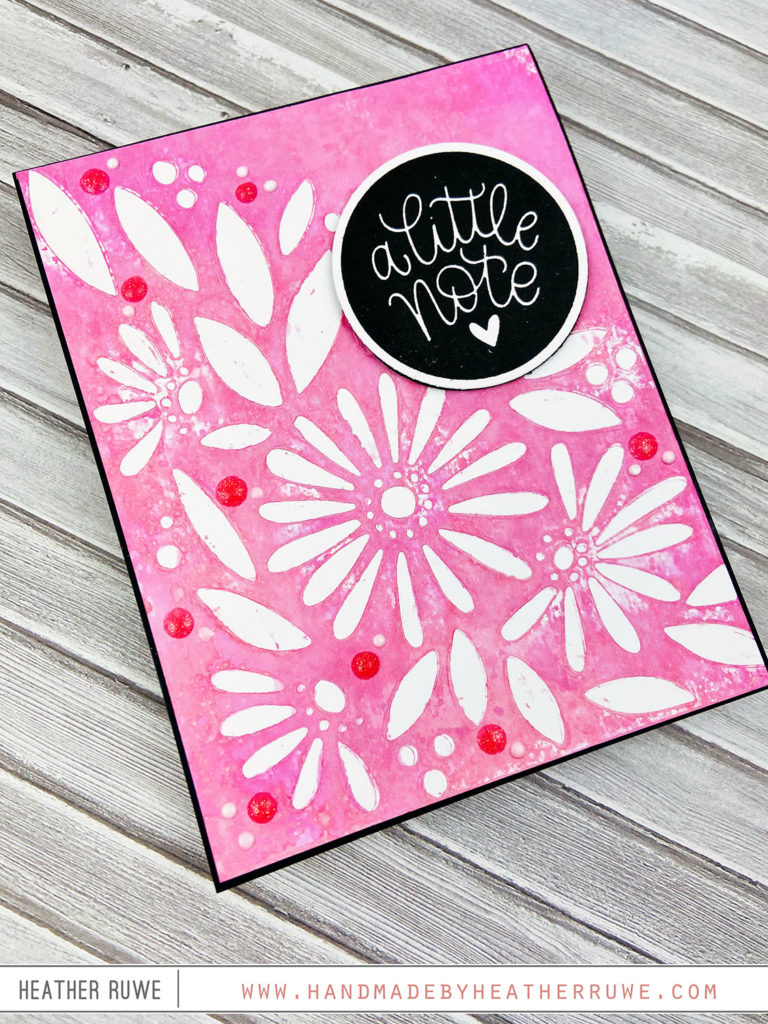
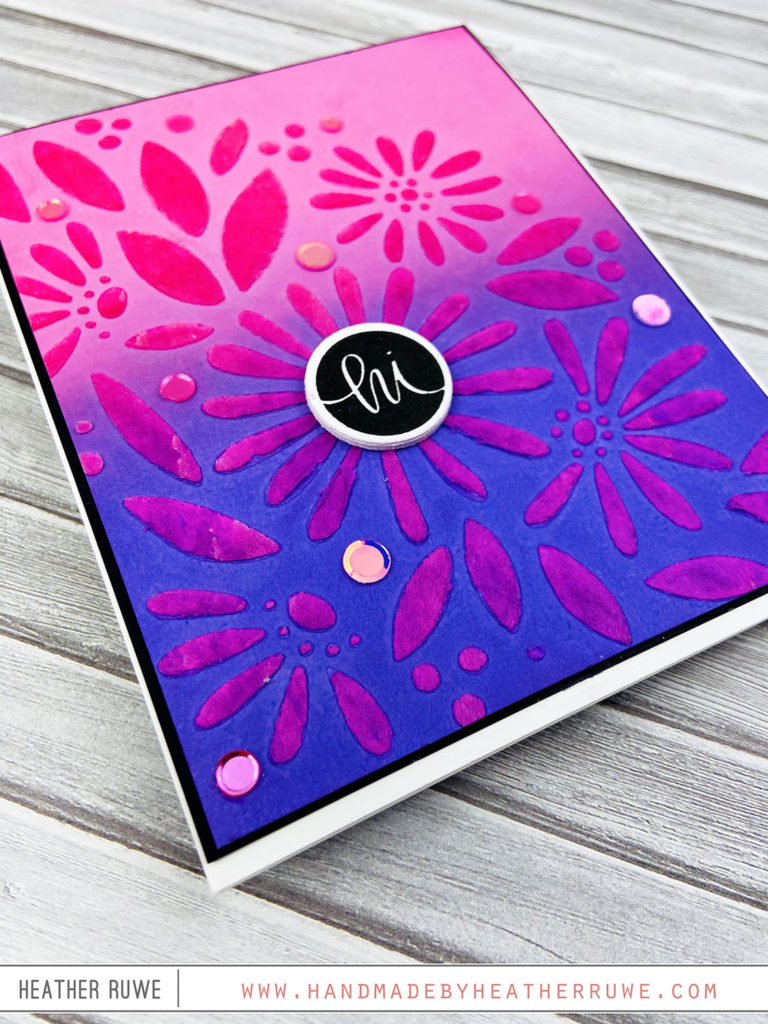
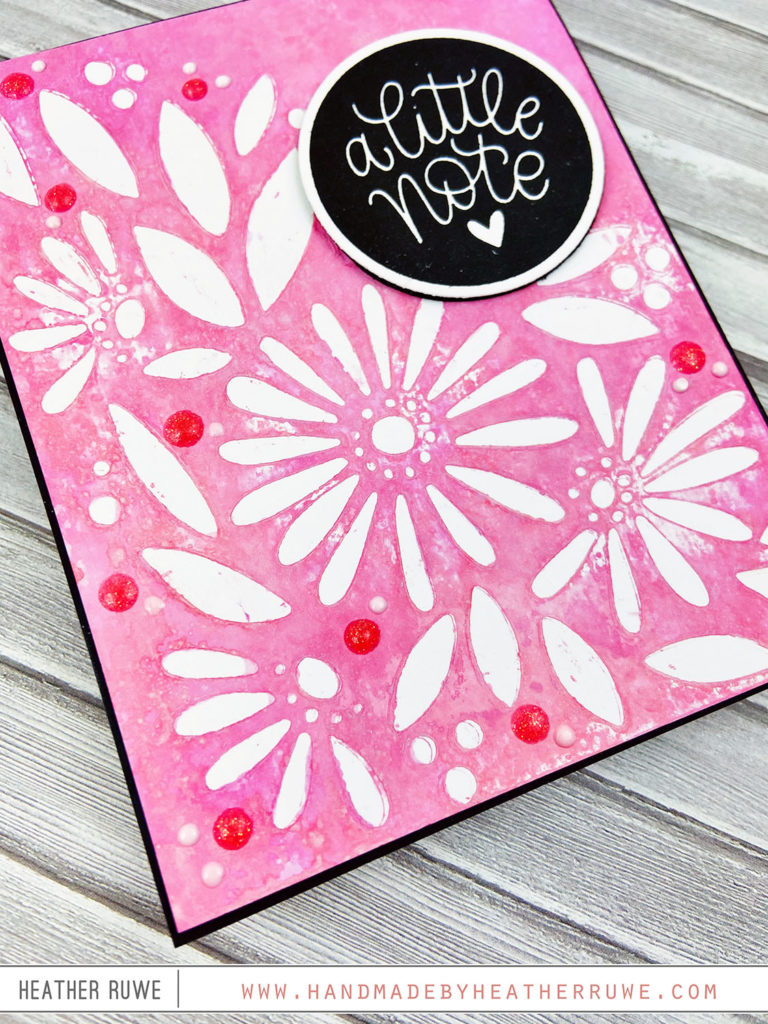
I trimmed down the panel and added a black mat behind it. I adhered the entire panel to one of THESE top folding cards. I stamped THIS sentiment in black and die-cut it with THIS coordinating die. This stamp and die set is unique as it stamps and cuts multiple greetings in one pass. So clever! I finished off the card by adding dots of THIS and THIS.
So let’s recap all five ideas for using a stencil.
1. SIMPLE INK BLENDING ON ENVELOPES

5. STENCIL STAMPING
Thanks so much for joining me this week. I hope I’ve inspired you to try one of these stencil ideas. Happy crafting!
LINKS TO SUPPLIES USED: