Howdy, crafty friends. Today’s card is a great example of a super simple interactive card…
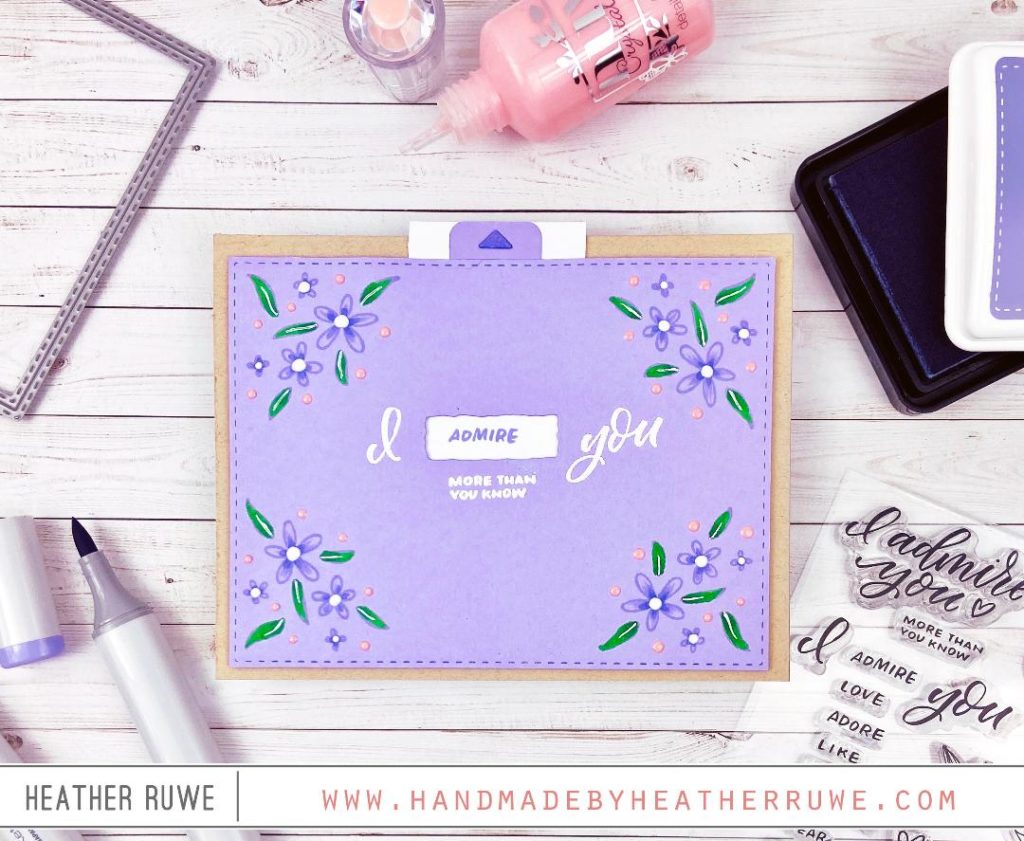
I started by die-cutting THIS card stock with THIS die. I also die-cut the smallest rectangle from THIS set in the center of the card to serve as a window for the sentiments. I stamped one of the images from THIS stamp set with THIS ink in the four corners of the panel. I colored them in with Copic Markers and added some of THIS and THIS for dimension.
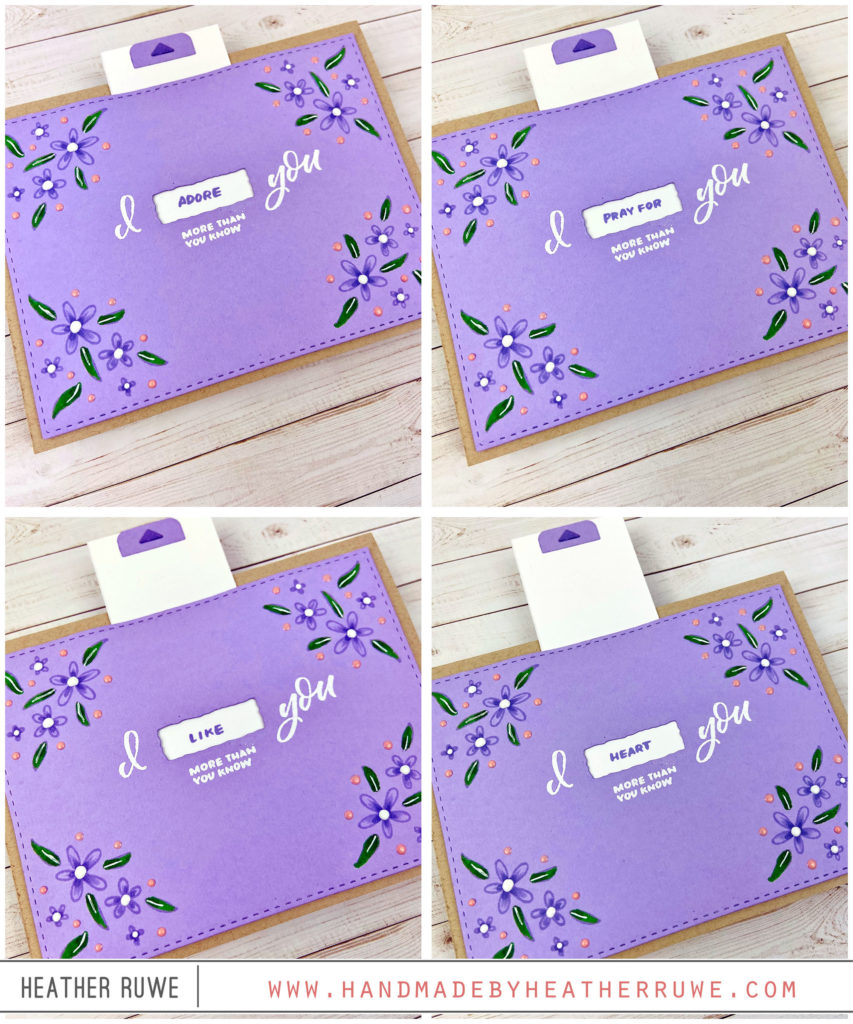
I cut a white piece of card stock a bit larger than the window opening and stamped multiple greetings from THIS stamp set as I pulled the tab higher. I held it on the back side of my card so I could add THIS along all three sides, leaving the top open. This creates an opening for the piece to slide in and out of. You don’t want the tape right against the piece, just a little wiggle room. I also applied some of THIS to the sides of the tape before removing the lining so it wouldn’t stick to the sliding piece.
I added a small arrow pull tab from THIS die set on the top so the recipient knows what to do. I applied foam tape to the rest of the back of the purple piece and adhered it to a card base created with THIS card stock. When the recipient pulls the tab, multiple sentiments are revealed. Here are a few…
I hope this has inspired you to create a simple pull tab interactive card.
Thank you so much for visiting. Happy crafting!
LINKS TO SUPPLIES USED: