
Hello, friends. I’m thrilled to be part of a fun blog hop celebrating the latest release from Simon Says Stamp…

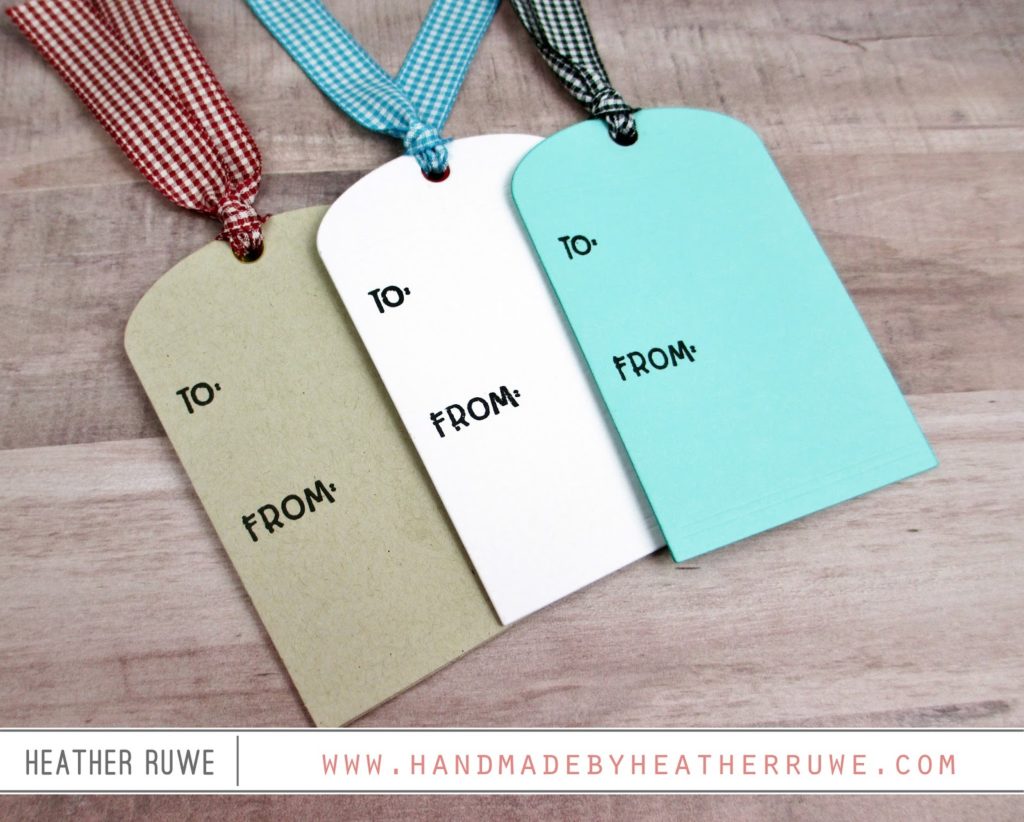
I wanted to get a jump start on the Holiday Season, so I created a few Christmas tags using the new picture book dies. I like to make a bunch of tags to keep on hand so when it comes time to wrapping gifts, I’m ready to go…
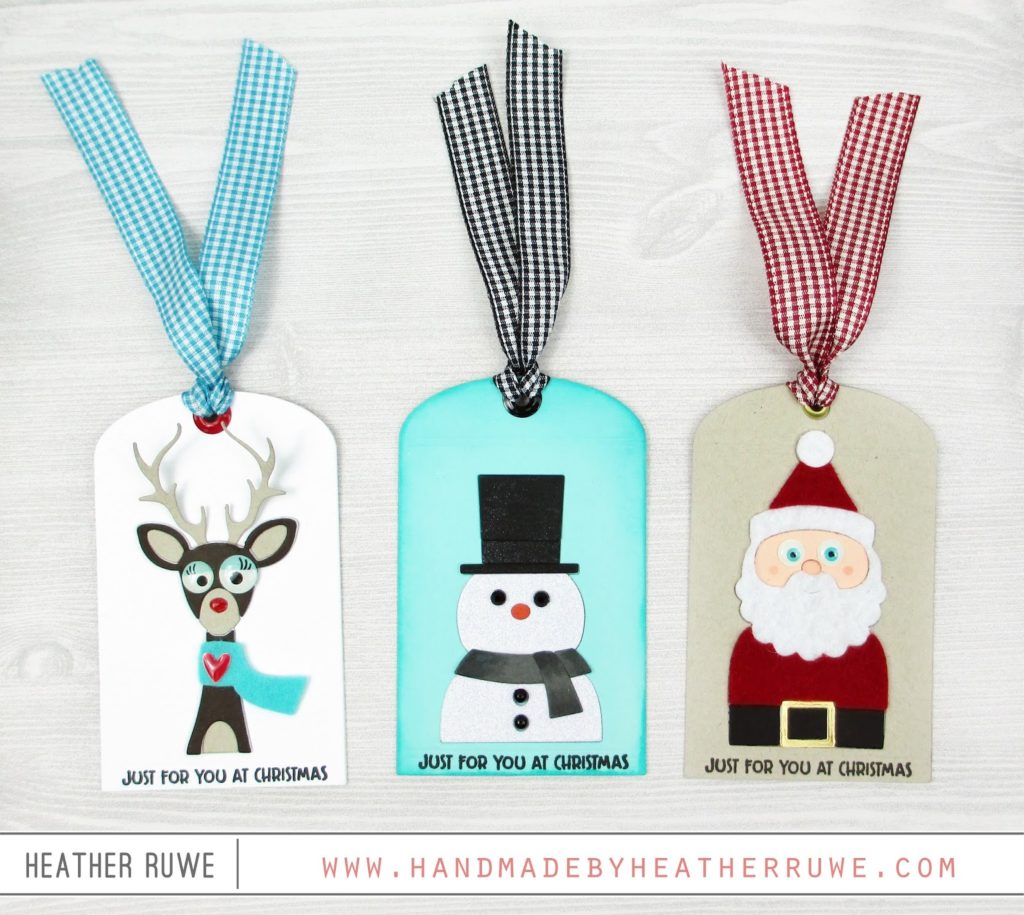
I die-cut THIS Deer, THIS Snowman, and THIS Santa image from cardstock, specialty paper, and felt. I love that these dies will easily cut through a variety of material. For all the tags, I used THIS die (one of my favorite tag dies of all time) and stamped a sentiment from THIS new set underneath each image using my MISTI and THIS ink.
Let’s start with the Deer tag…
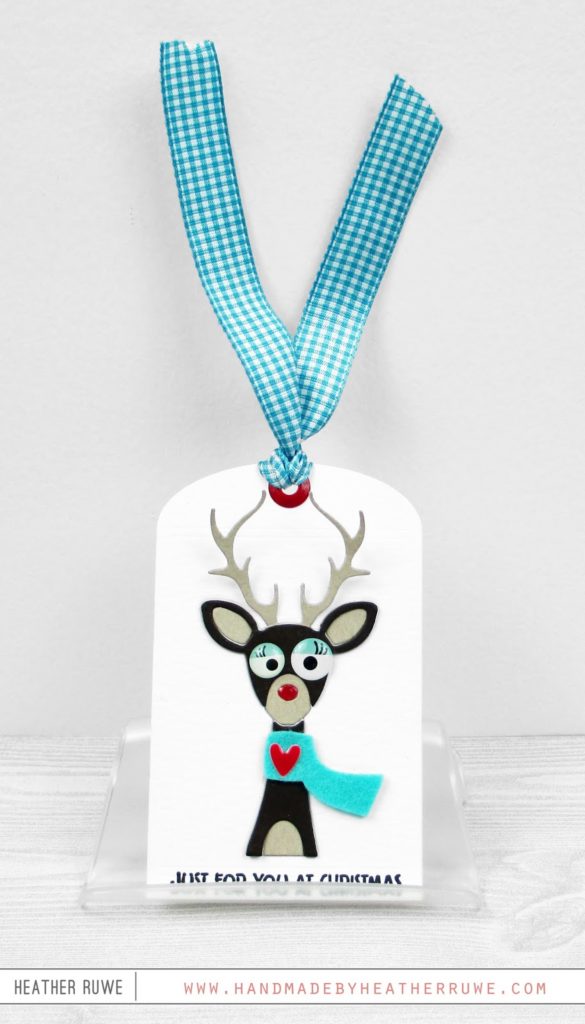
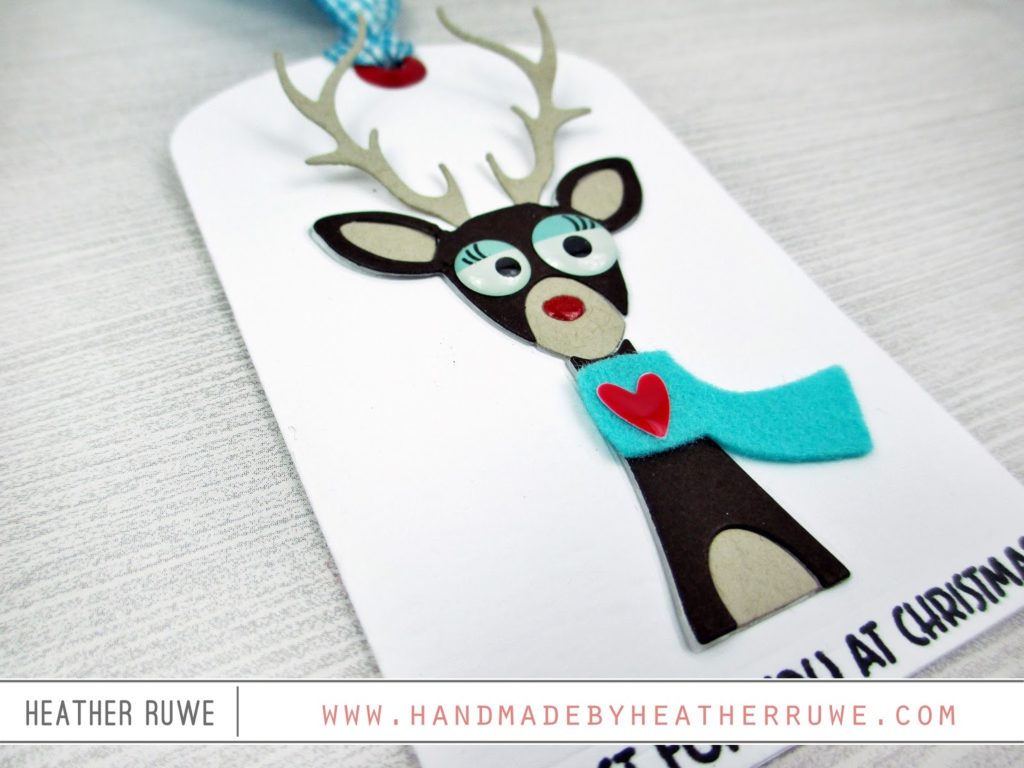
I used THIS cardstock for the tag and cut the deer pieces from THIS and THIS cardstock. I cut his scarf from THIS felt and added an emamel heart to it for decoration. I also added THESE for the eyes, just to add some playfulness.
For the Snowman tag…

I used THIS cardstock for the tag and applied THIS ink around the edges to add a bit of interest. I die-cut THIS glitter paper for the body and THIS and THIS cardstock for the hat and scarf. I used THIS cardstock for the nose and used black gems for the eyes and buttons. I used THIS on top of the hat for some shine.
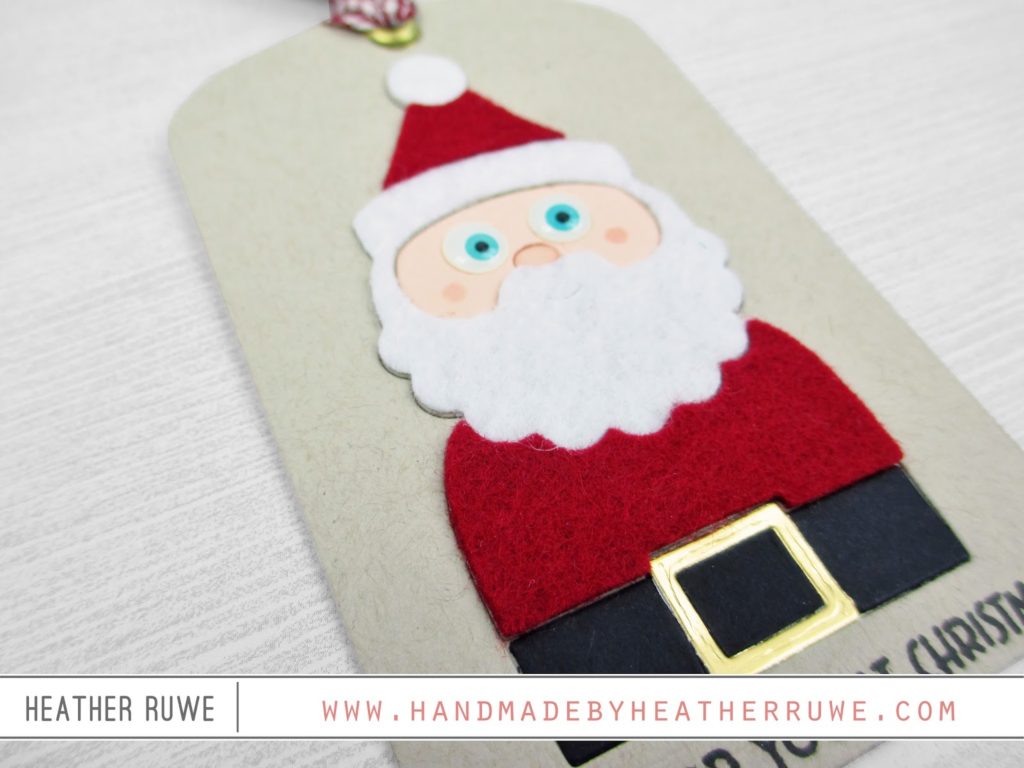
For the Santa tag…

I used THIS cardstock for the tag and cut THIS felt for the suit and hat. I also used THIS felt for the beard and hat topper. I used THIS foil cardstock for the belt buckle and THIS cardstock for the belt. I added more of THESE for the eyes and added some color to his cheeks.
Here are a few tips…
*Since the die cuts out pieces and not the solid shape. I stamped two tags for each tag, one for the front and one for the back. I cut the image out of the front tag and adhered it to the second tag that was completely covered with adhesive on the front. This way the opening was covered with adhesive and I could inlay the pieces inside. It made the process much easier.
*Try adding some dimension to the image by layering certain pieces. As you can see with the deer, I added a few layers to the dark body part while only using one layer for the lighter parts. It adds so much dimension and makes the image pop…
*Try using other materials besides cardstock. I used felt, specialty papers, and foil paper on these tags…

*Adding embellishments to the image can really change the look. Just by adding the enamel/gem eyes, it gives a whole new look and can stretch the use of your dies…
I also stamped the back of all the tags with THIS stamp set so they are ready to go…
There’s so much more inspiration to see. Click HERE for the next stop on the hop and visit my talented friend, Kelly Latevola. You can start at the beginning of the hop HERE.
Here’s the complete Blog Hop List…
Simon Says Stamp Blog
Jennifer McGuire
Laura Bassen
Shari Carroll
Nichol Spohr
Heather Ruwe (YOU ARE HERE)
Kelly Latevola
Anna-Karin Evaldsson
Kathy Racoosin
Lisa Addesa
Thanks so much for stopping by. I hope this inspires you to create some Christmas Tags.
GIVEAWAY
Simon Says Stamp is so generous and giving away a $25 gift coupon to one person at each stop on the hop…so be sure to leave a comment on every blog. The winners will be announced on the Simon Blog on Tuesday.
P.S. Looking for more inspiration using this release? Click HERE and HERE to see more projects I’ve shared using the new release products.
P.S.S. I’ve linked to all the new release products in THIS post.
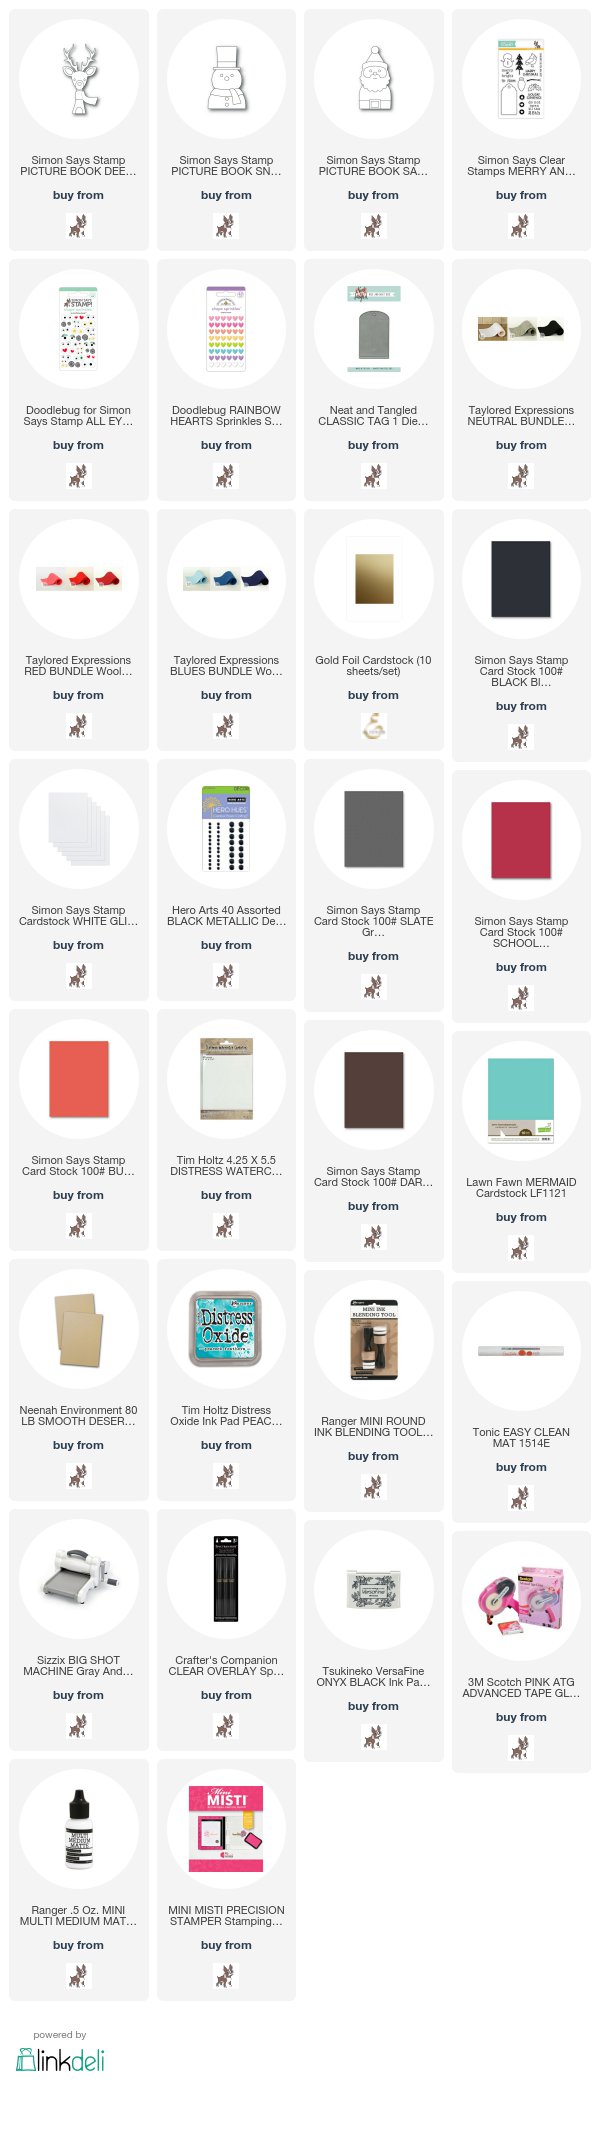
LINKS TO SUPPLIES USED:
<

October 15, 2017
What joyous tags, perfect to adorn the holiday gifties! This is a pop of whimsy and color and JOY with these holiday tags! TFS!
October 15, 2017
Great tags! Love these dies!
October 15, 2017
Santa looks like he came down the chimney and walked in on something he was not supposed to see! LOL. Love it!
October 15, 2017
Oh my goodness, such cute tags!
October 15, 2017
These tags are so fun esp. with those eyes.
October 15, 2017
Your tags are so cute!
October 14, 2017
Love how these turned out. I've never made tags myself, so I really appreciate your tips.
October 14, 2017
Holy cuteness. These are a gift itself. Nicely done…..
October 14, 2017
So cute! love the added eyelashes on your little deer!
October 14, 2017
The tags are SO cute!!!
October 14, 2017
I love your cute little tags! I can't decide which is my favorite because they are all great! Thanks for the wonderful inspiration 🙂
October 14, 2017
Gorgeous Tags and the deer is so cute!
October 14, 2017
Checking out all the tags very seriously this year! It's my new project to tackle and I love these! Using mixed materials really adds texture and interest to even a small tag project. Thanks for inspiring!
October 14, 2017
Everyone needs tags! So many uses over the holidays.
October 14, 2017
Love, love, LOVE your tags!