

I’m so excited and honored to be a part of the Cold Hands, Warm Heart Blog Hop today. I decided to create three projects using the new Build a Snowman Stamp Set, the Snowman Parts Dies, and the Ring Frame Die.
To create the background on my first card, I die-cut some vellum with the new Ring Frame die twice. I adhered both pieces on a piece of patterned paper from THIS paper pad. Tilting them before adhering them down creates the illusion of movement, like snow blowing in the wind… or at least that’s what I tell myself. 😉 I heat embossed the sentiment in white along with some of the snowflakes and nestled them in the circle openings. I finished it off with some bling and a scalloped strip along the bottom covered in stickles…
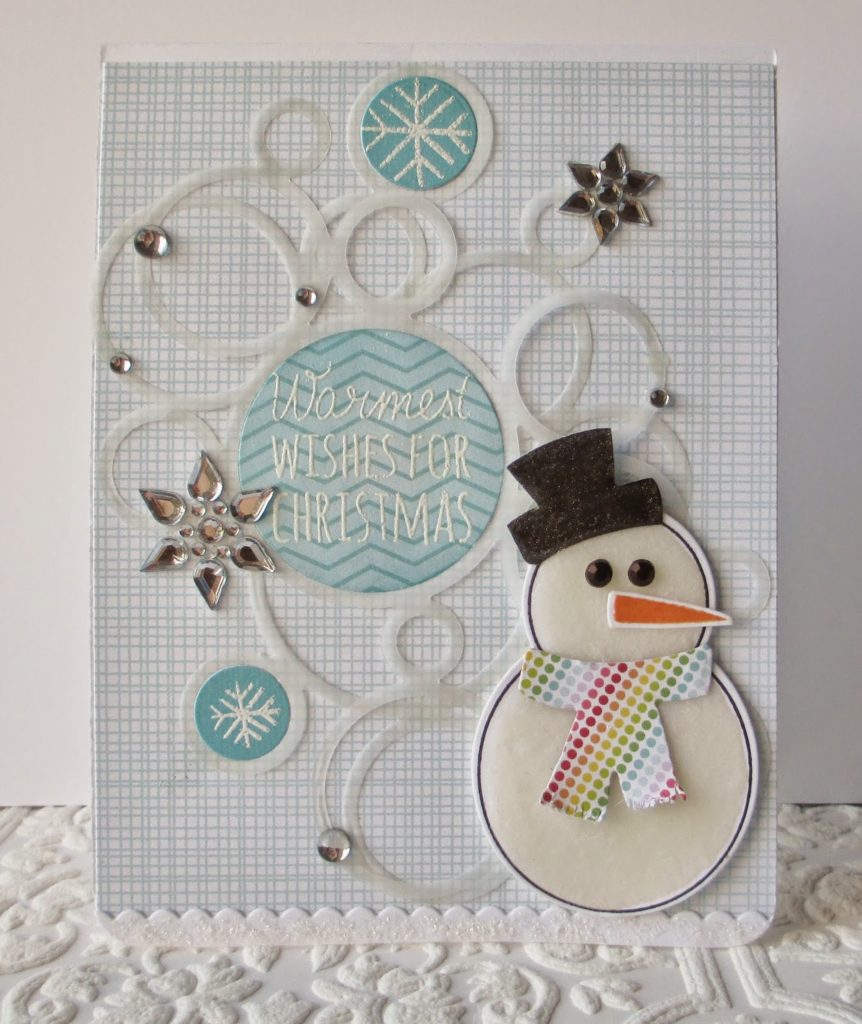
For the snowman…
I stamped the snowman image from the Build A Snowman Set in black ink on white neenah cardstock and used the coordinating die to cut him out. I applied glossy accents to the inside of the black line and added white flocking powder on top. It gives him a fuzzy feel. 🙂 I die-cut the scarf image from the coordinating die set (Snowman Parts) from some patterned paper in THIS paper pad and cut tiny slits in the bottom of the scarf to give the look of fabric. I love the look of a classic snowman with a top hat so I created my own hat by using the scarf die, turning it upside down, and trimming it down. I added some Wink of Stella shine to it before coating it with glossy accents for some shine. His eyes were created by coloring some clear gemstones with a black Sharpie marker. I stamped his nose with some orange ink and used the coordinating die to cut it out.
A closer look…

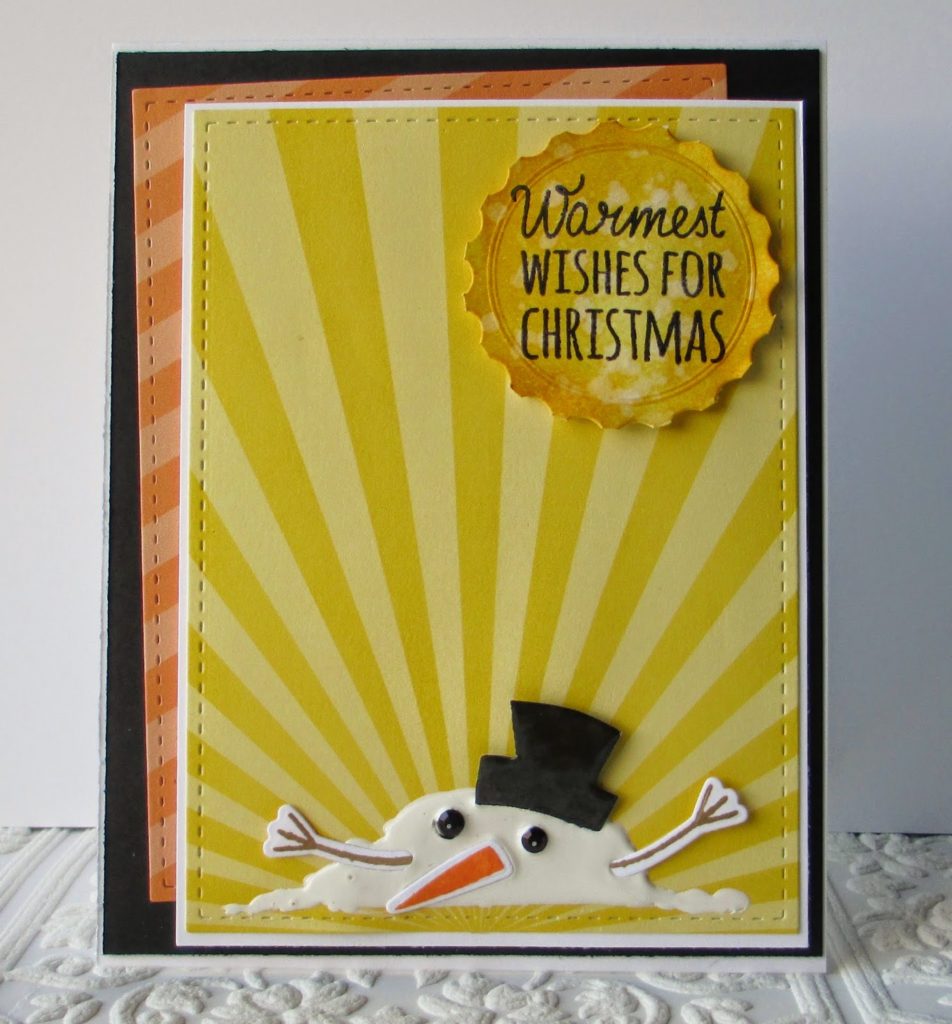
The next card goes the non-traditonal route for a fun, whimsical card…


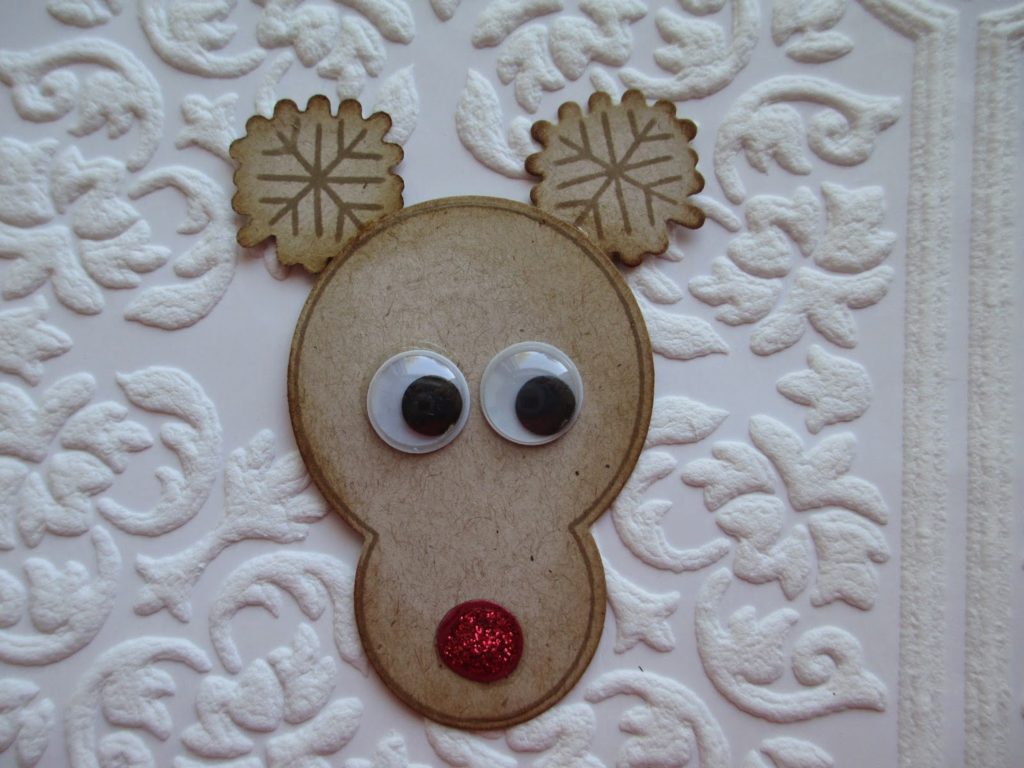
I decided to use the Build a Snowman set in a completely different way for this project and turned the images into a reindeer! I attached him to a tag that I cut out using THIS die. I found a cute poem on Pinterest and printed it out on some white cardstock and die-cut the same tag shape out of it.
To create the magic reindeer food, I filled a small, plastic bag with oats and sugar. I punced a hole at the top of the bag and tied some silk, red ribbon through it. I attached the tags to it using some natural twine.

I have a photo tutorial to show you how I created the reindeer…
1. I stamped the snowman image in Hero Arts Latte Chalk Ink on some Neenah Desert Storm Cardstock. I used the coordinating die to cut out the image. I repeated the same process for the snowflake images…
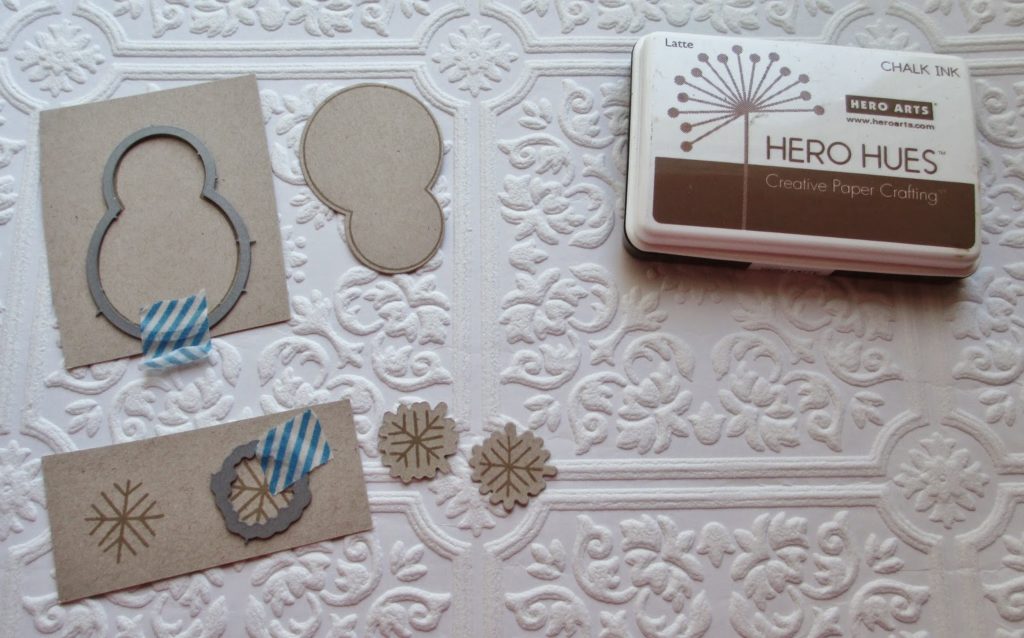
2. I added some Vintage Photo Distress Ink to the edges with a foam blending tool to give the pieces some dimension…

3. I die-cut the circle image from THIS coordinating die set and placed it on a piece of washi tape that was taped to a piece of cardstock. This was my holder for the small piece so I could apply Glossy Accents on top of it. Then I dipped it into some red glitter to create Rudolph’s nose…
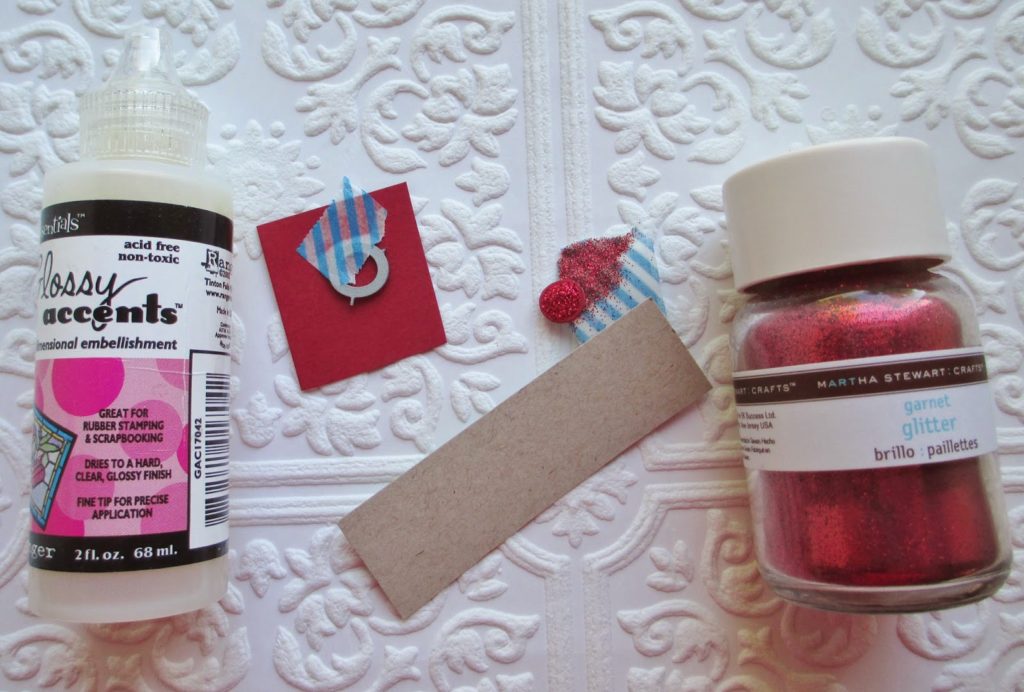
4. I adhered the snowflakes to the top of the “reindeer” to become his antlers. I also added googly eyes and the sparkly nose. I applied Glossy Accents on top of the glitter so that it didn’t rub off…
Here is a video of the projects I created. (I apologize for the shakiness of the video. My camera wasn’t working right so I shot it with my phone.)
There you have it! Three completely different projects using just one stamp set!
Now don’t forget to leave a comment for the giveaway….
GIVEAWay
NEXT STOPClick HERE for your next stop on the hop…which is the super talented Kim O’Connell! If by chance you encounter a broken link while hopping, you can go back to the beginning of the hop at the Simon Blog HERE.
Here is a list of the complete BLOG HOP…
October 7, 2014
Super fun cards! Gotta love the melted snowman and the reindeer for is super cute.
October 7, 2014
love love love them all!
October 7, 2014
These cards are so cute. I love it when I receive more creative ways to use my dies and punches, the reindeer is a great idea. Thanks.
October 6, 2014
Such funny cards! Love your works!
October 6, 2014
🙂 Melted snowman was my favorite card! So much inspiration!
October 6, 2014
Very clever use of the dies and the melting snow man is so cute! I just loved all of the cards!!!!
October 6, 2014
So chic! Love these, I'm gonna have to get my cards started. Pronto!
October 6, 2014
I just love the versatility you found with this one stamp set! This helps me in deciding which sets I need to have NOW! ha!
October 6, 2014
I love your creativity. I laughed when I saw your melted snowman. Very!!!! creative.
October 6, 2014
I really love your snowman
October 6, 2014
I love your use of the White Enamel Accents on the cards! Especially the bubbles in the milk!
October 6, 2014
Awesome cards that melting snowman really made me laugh. TFS.
October 6, 2014
Love the idea witt the melting snowman! 😀
October 6, 2014
Really adorable cards. The melting snowman and the way you made the top had are great!
October 6, 2014
You are so creative! The melting snowman is such a fun idea and I love your tag.