Hi there, crafty friends. Today I’m sharing a few four bar sized cards that feature products from the new Clearly Besotted release. I also want to share a few time saving tips.
First, let me share how I created each card…
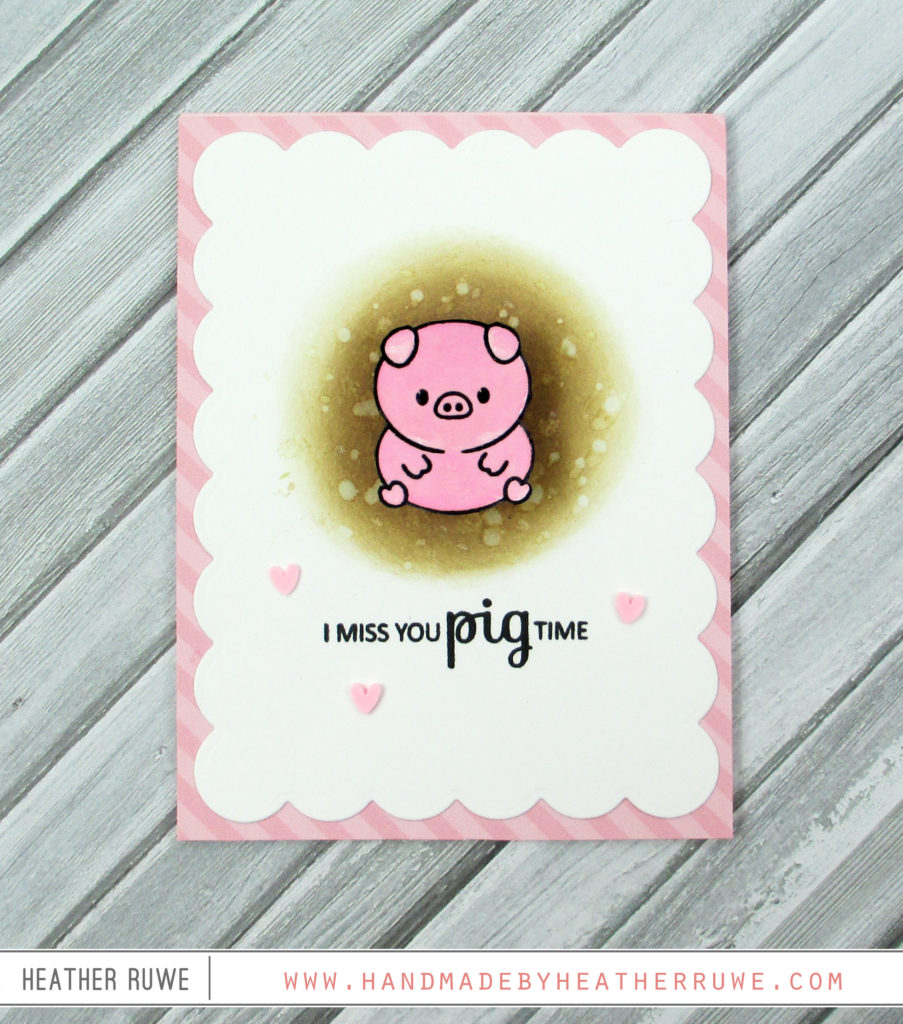
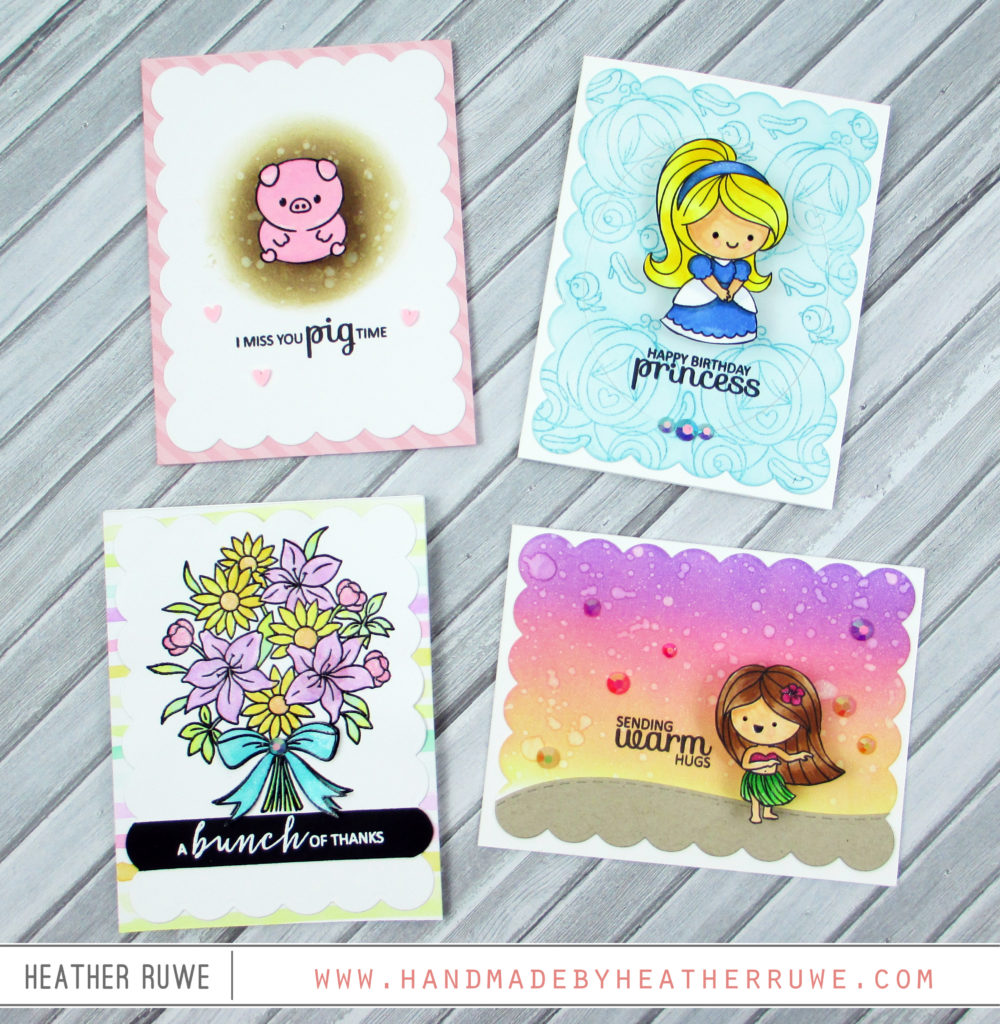
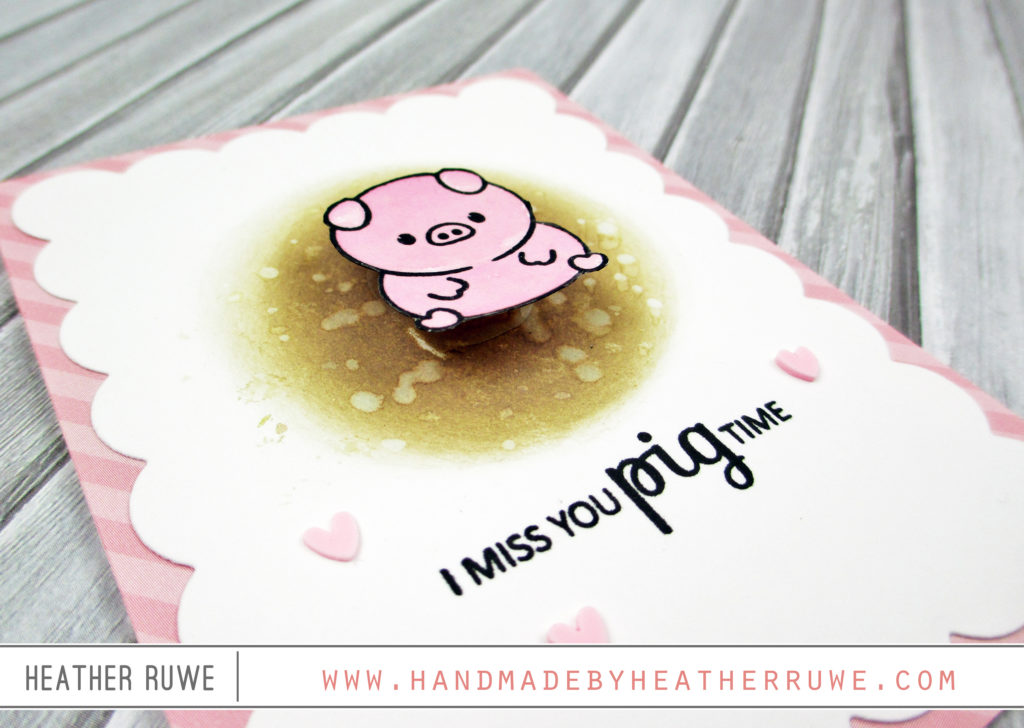
I stamped one of the pig images using THIS ink and added clear embossing powder on top. I painted the image using THIS ink with water. I applied some of THIS ink in the middle of a panel cut with THIS die to resemble mud. I added some drops of water for added interest and stamped a coordinating sentiment underneath. I adhered the pig with one of THESE action wobblers for some fun. I finished off the card by adding some of THESE hearts and some of THIS patterned paper.
For the second card…
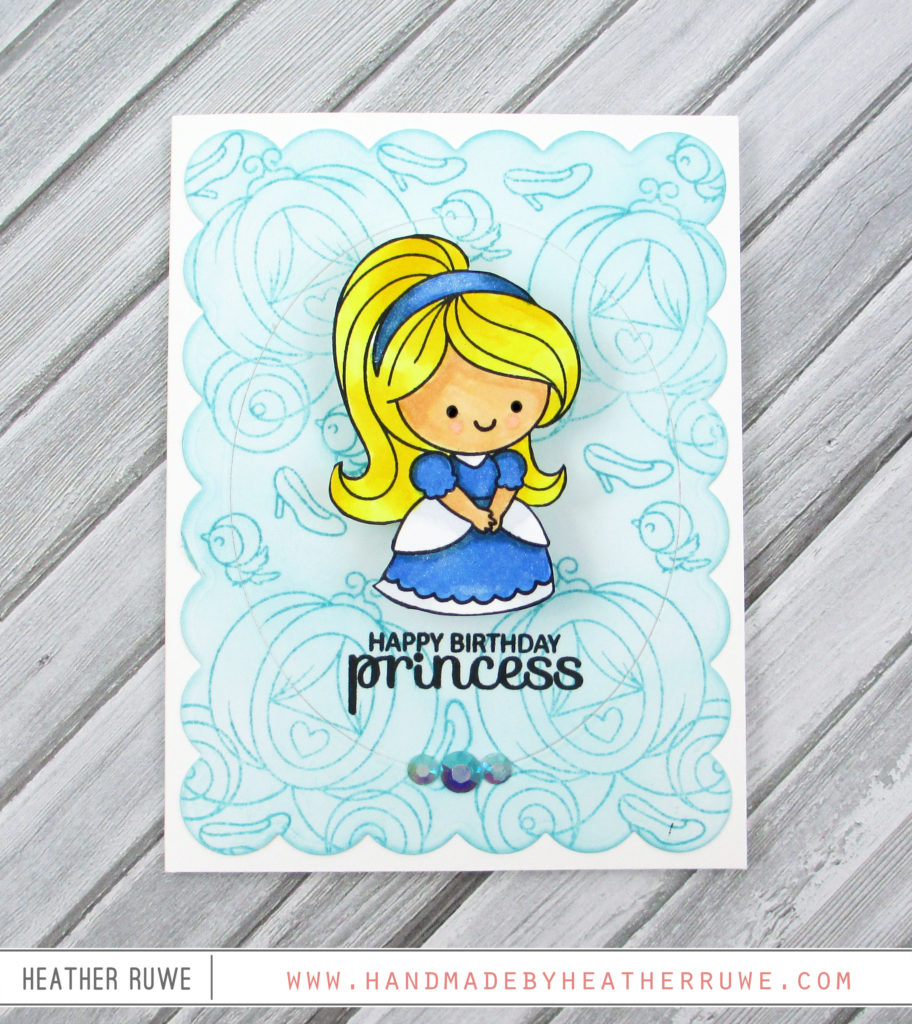
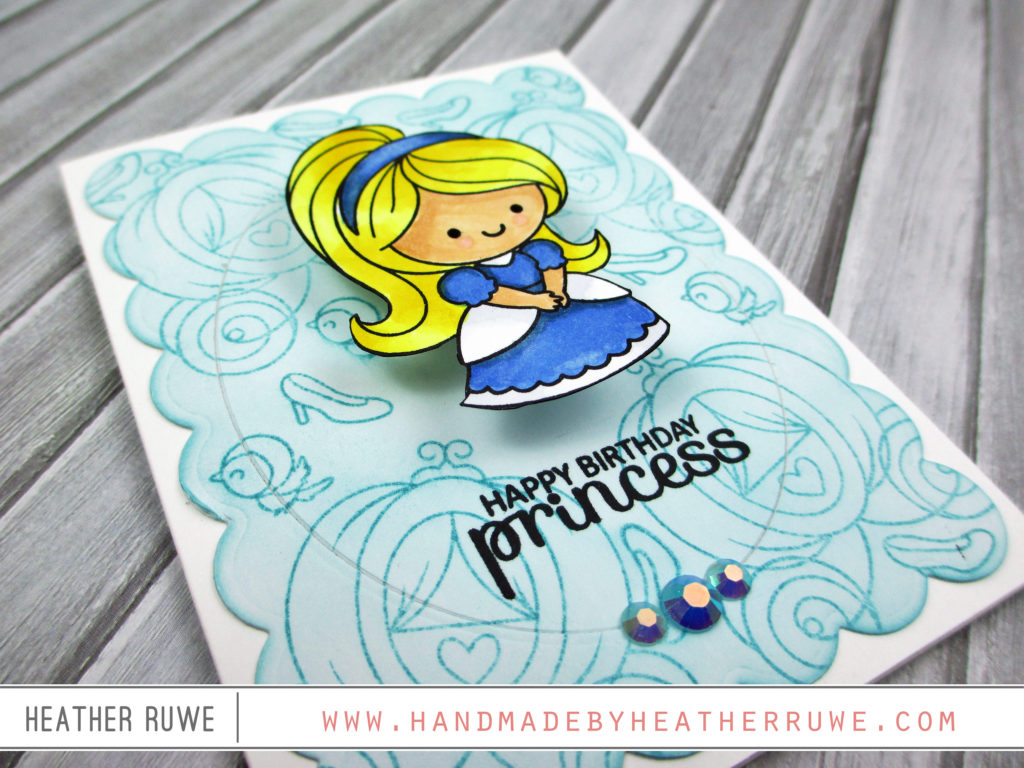
I stamped the princess image using THIS ink and colored it in using Copic markers. For the background, I stamped the other images in the set using THIS ink. After stamping, I used THIS tool to smear the ink. Since the ink is a mix of dye and pigment ink, the image stays in tact but allows the color to transfer to the background, giving a tone-on-tone look. I die-cut one of THESE ovals from the center and stamped a coordinating sentiment. After cutting out the image, I adhered it using one of THESE action wobblers. I finished off the card with a few of THESE embellishments.
For the next card…
![]()
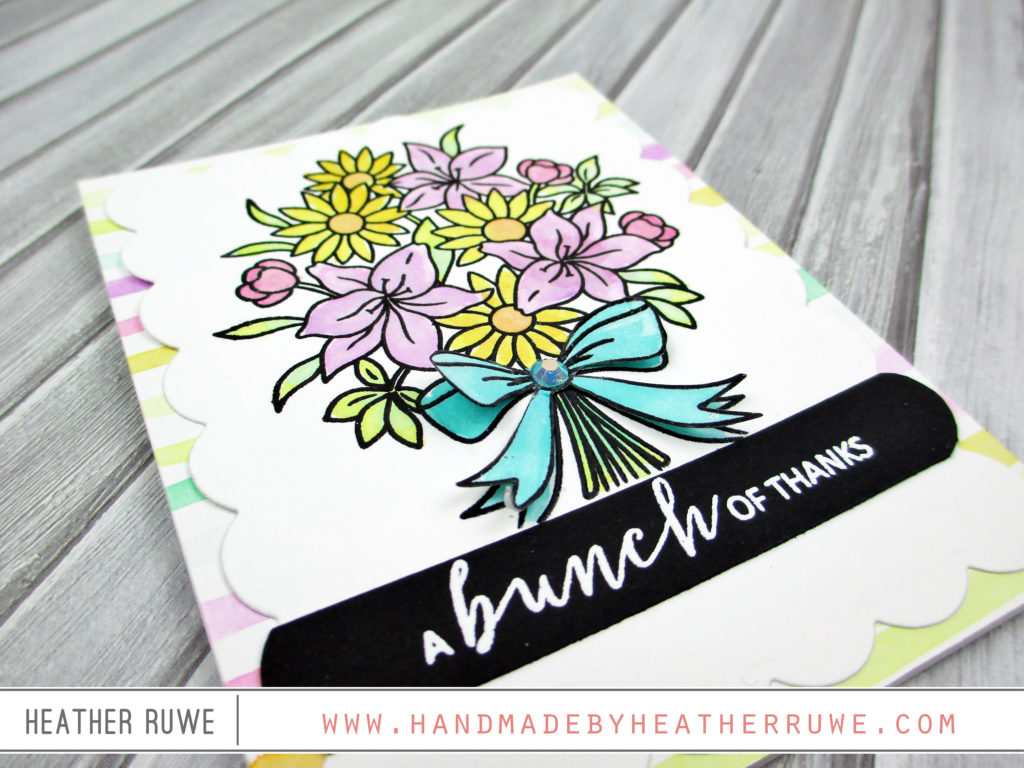
I stamped THIS flower bouquet using THIS ink and clear heat embossed it. I did this so I could watercolor without the colors bleeding into each other. The heat embossing creates a barrier between the colors. I used a variety of Distress Oxide inks with water to add color to the image. I stamped another image and painted in just the bow to add on top of the image for added dimension. I white heat embossed a coordinating sentiment on a piece of black card stock. I painted stripes for the background with the leftover ink and added THIS to the flowers for some shine.
For the final card…
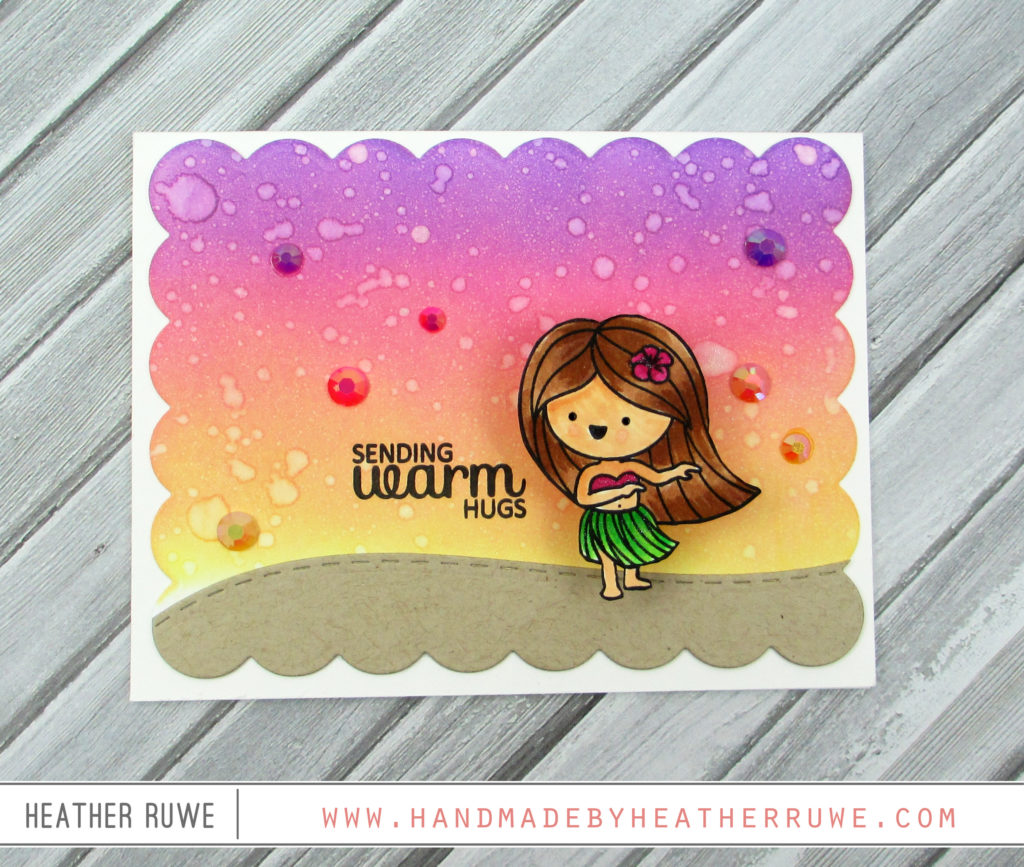
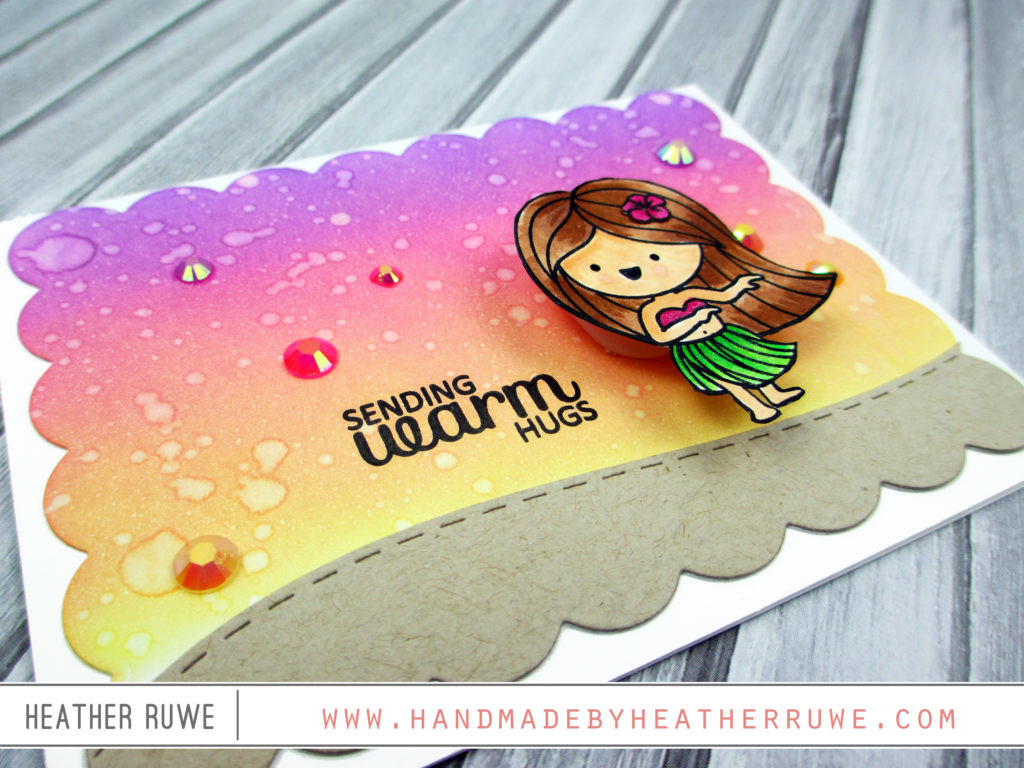
I stamped the hula girl image from THIS set and colored her in with Copic Markers. I ink blended a background and spritzed on some water. I cut a sand hill using THIS border die and stamped a coordinating sentiment. I finished off the card with a sprinkling of THESE embellishments.
Before I go, I want to share some time saving tips…
- SHRINK IT DOWN: All of the cards today are smaller in size (4 Bar Size). I find that when I shrink down the canvas, I have an easier time creating. Also, all of the stamp sets I used today are mini stamp sets. Sometimes, I find that all the images in a regular sized stamp set can be overwhelming so shrinking down the stamp set size is another way to save time creating. Less options saves me time.
- PRE MADE CARDS: I used THESE pre made cards for all the card bases. I find using cards that are ready to go saves me time from cutting and scoring. I also use THESE cards when making standard see cards.
- STAMP MULTIPLE IMAGES: This may sound like more time but it actually saves time in the long run. When coloring, I tend to mess up a lot. So if you’re anything like me, stamping multiple images is a good idea so you don’t have to get out all of the supplies to stamp again. It’s also a great way to test out color combos before coloring.
- MEDIUM CHOICE: When I’m crunched for time, I like to pick mediums that will give me multiple uses. For example, I used Distress Oxide inks for this background. I was able to not only ink blend with them for the backgrounds, but add water to them to watercolor some of the images.
That’s all for today. I hope this time saving tips has inspired you to make multiple cards at once.
Thanks for stopping by. Have a great day.
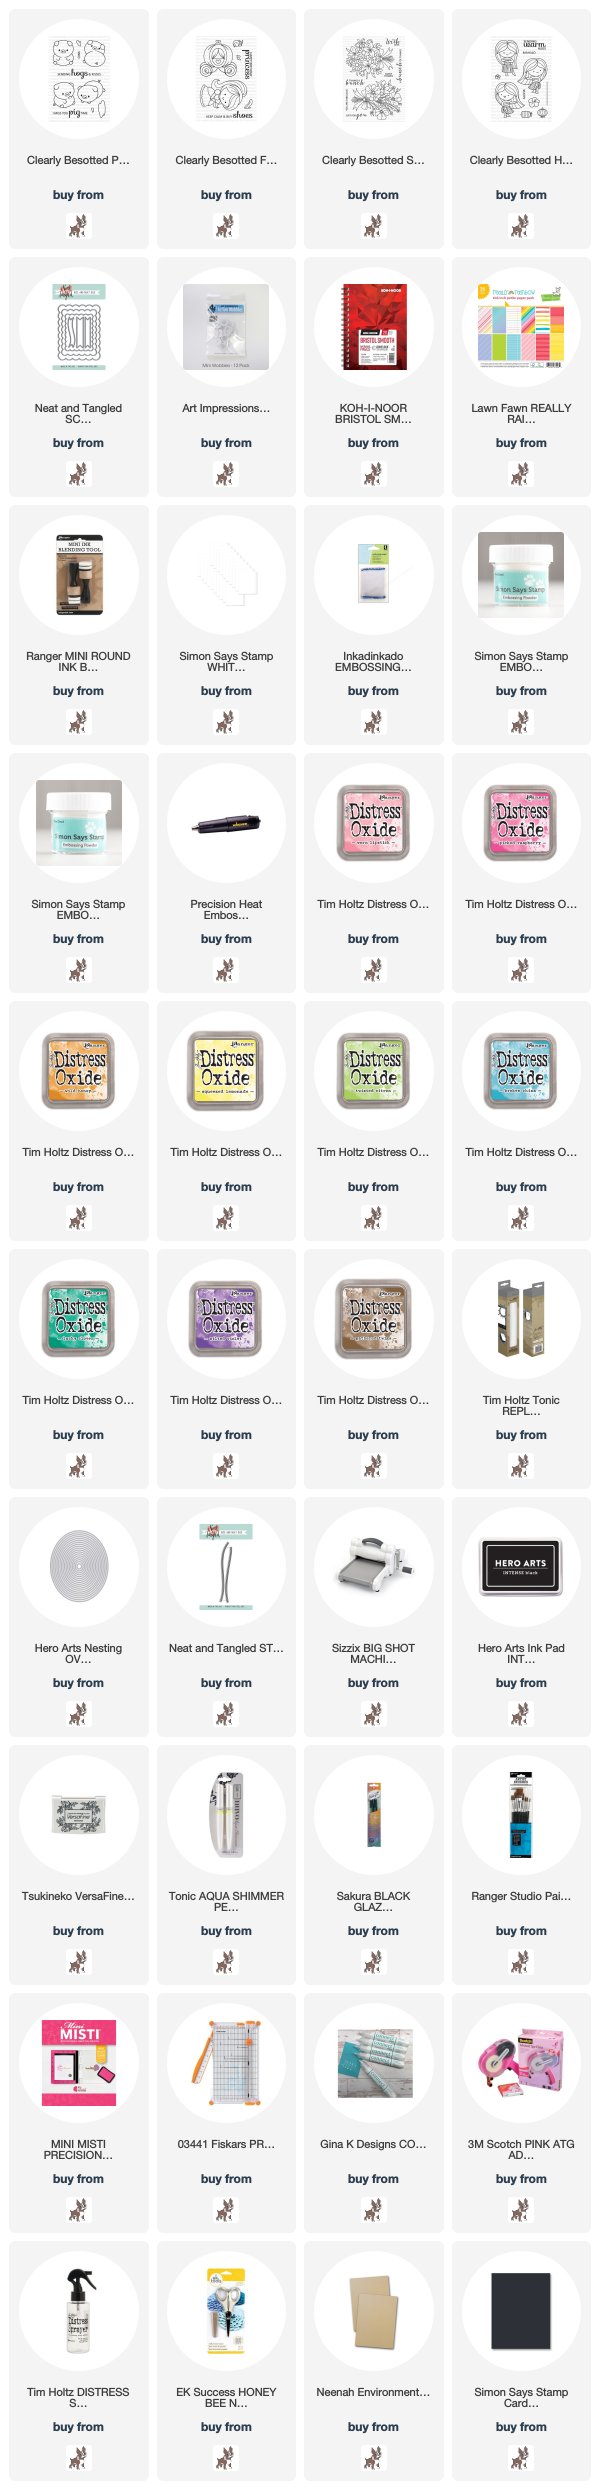
LINKS TO SUPPLIES USED: